Pages

Showing posts with label Simplicity. Show all posts

Thursday, May 15, 2025

A New Jacket, Just in Time for Summer? Simplicity 2508

At the beginning of March, we got dumped with a huge pile of snow (like nearly a foot!). I'd been complaining about my black wool coat being too big. I'd ordered a couple different coats online and none of them fit well, plus, the fabrics were subpar. 

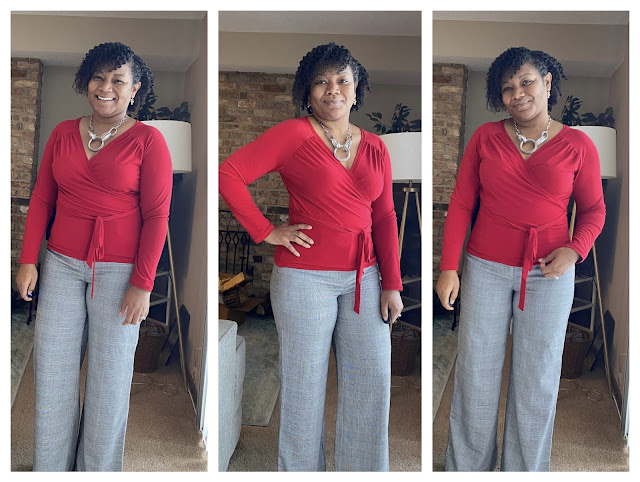
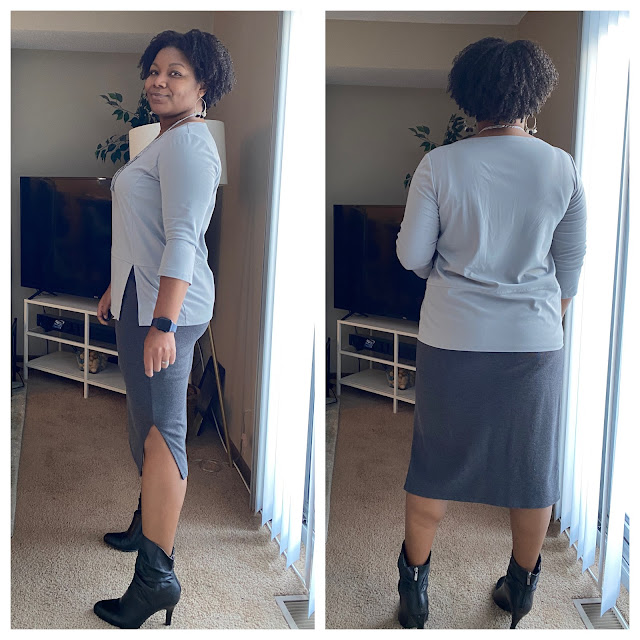
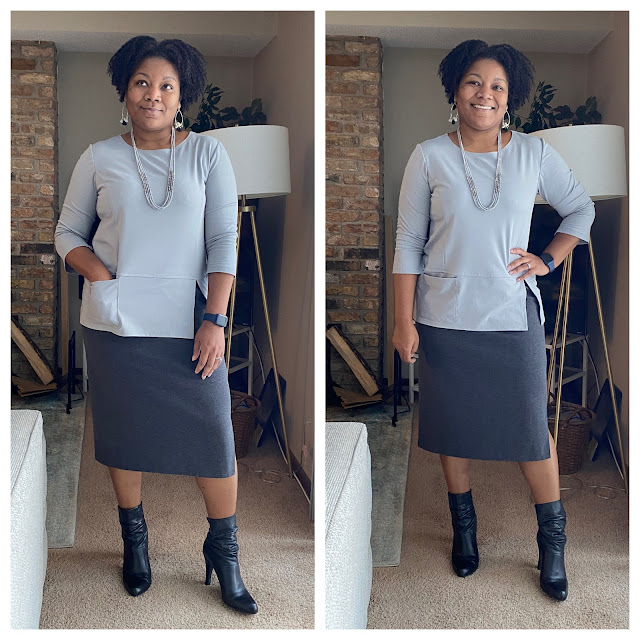
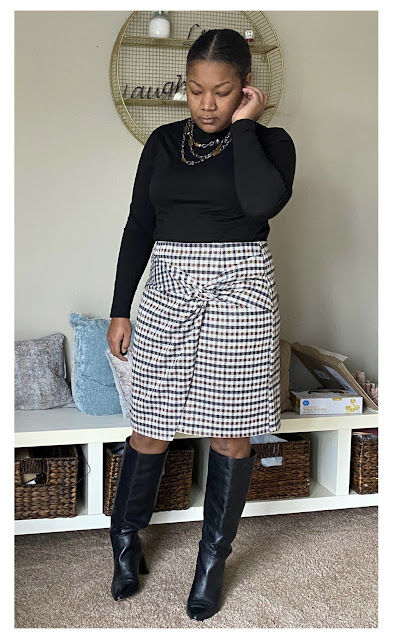
On its maiden voyage to my office

I decided to use a pattern that I've made before (coincidentally, in March, but in 2015!) to make it easier on myself and to make it quickly (I did not make it quickly). As these things go, I started the coat on March 5 and finished it on April 20th. 

2015 version in pink wool blend from Hancock Fabrics ( :tears: )

I decided to use a camel-colored wool from stash (that came from a woman in my machine knitting group), brown buttons from stash, and champagne-colored rayon lining from stash (a Ralph Lauren Fabric Mart find for $1.99/yd in 2019!). I LOVE THESE KINDS OF PROJECTS!

From my previous version:
  • Size 16 (44.5" finished bust; I am around 39.5")
  • Adjustments; sewed 1/2" seams on front princess and side seams
  • 100% wool coating in magenta from Hancock Fabrics
  • 100% polyester pongee lining fabric in baby pink from FabricMart
  • Bound buttonholes tutorials by Iconic Patterns and Julia Bobbin.
  • Bagging the lining tutorial by Grainline Studios
  • (Need: small FBA, shift bust point down 1", lengthen sleeve 1/2", raise pockets 3/4-1", back facing)

This time;

  • size 16
  • I initially used smaller seam allowance and had to resew them all to 5/8"
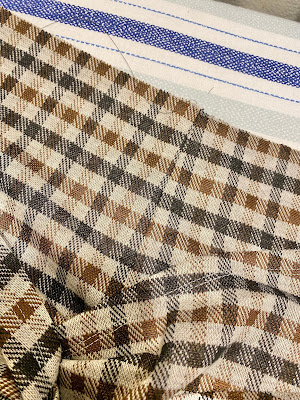
  • 100% wool coating from stash
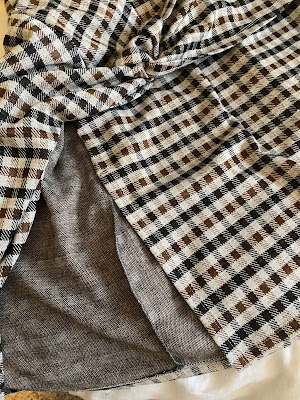
  • 100% rayon lining in champagne tan from Fabric Mart
  • Regular buttonholes with buttons from Fabric Mart
  • Bagged the lining using Cecelia Podolak's 'Easy Guide to Sewing Jackets' book
  • I did not need an FBA, I did shift the bust point down 1", I did not lengthen the sleeve and should have, I did not raise the pockets and should have!, I did add a back facing. And, I lowered the back tab on this version.

In preparing to sew this jacket, I read my own review and a bunch of other reviews. SO many people complained about pattern errors and I was all, "I don't remember having any issues last time..."

Ha! Well, inexperienced sewer me probably didn't have any issues. This pattern has A LOT of errors. Notches that didn't line up, an error in drafting the straight collar (which I didn't catch until it was assembled), the lack of a back facing is insane, I think there were more. Grr. 


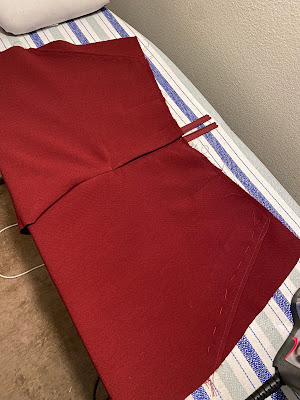
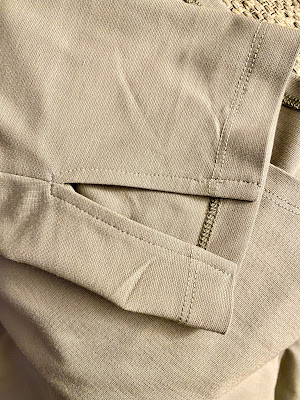
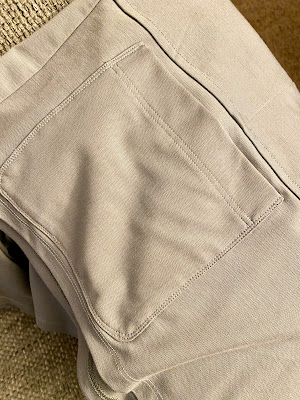
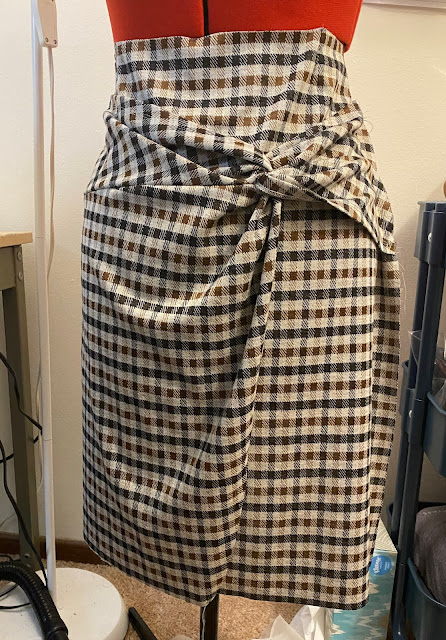
By March 7th, I had the pockets inserted and princess seams sewn, realizing I should have moved the pockets up. I only had 7 of these buttons and there were supposed to be 5 on the front and 2 on the collar, so I decided I didn't have enough for the sleeve bands. With the collar error, I could have done the button bands. I think the sleeves look better with them!!!


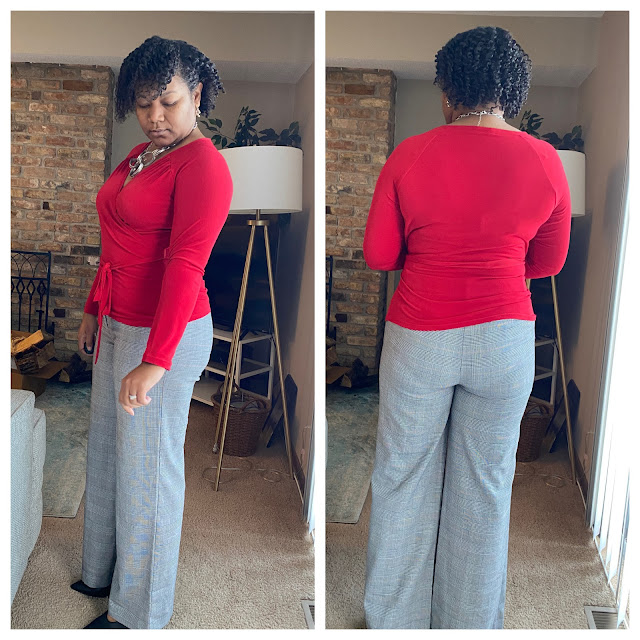
By March 12th, I had the shell constructed and ruh-roh, this is too big. I took all the seams from 1/2" to 5/8". And, WHY is the back band so high?! I think it's a notch error. 


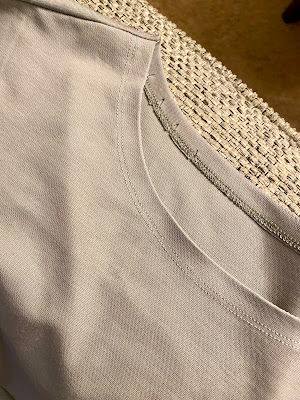
March 22nd, I realize the collar is wrong. I'm super annoyed but not enough to recut the thing (do I even have enough fabric to do so?!).


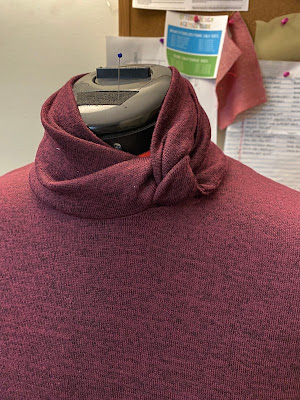
I lazily drafted a facing and topstitched it down instead of doing it the "right way" because it's a raglan. It would have crossed part of the front sleeve, part of the back sleeve, and the back. 

It must have bothered me more than I realized because it was April 17th before I returned to working on the jacket. But, it's ready for buttonholes!


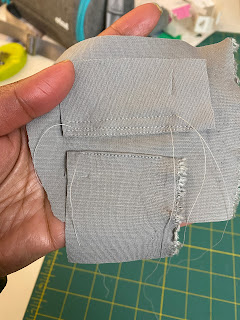
The buttonholes needed are too big. Sigh. I can do it. I can do manual buttonholes. I watched a Threads video, mimicked the settings used, and, success! 


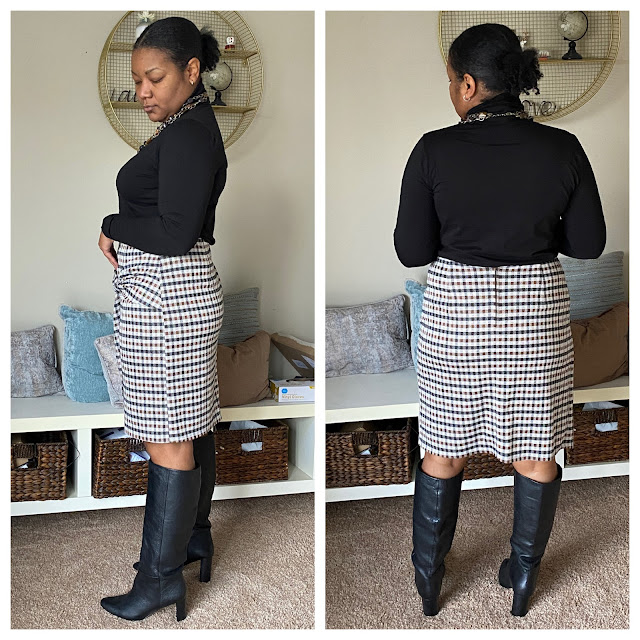
April 20th, my finished coat, ready for wear (I am contemplating topstitching the collar). And oops, I moved that back band down a little bit TOO far :)


I think I wore it 3 times before the weather changed. Ah well, there's always next year! 


Wednesday, January 26, 2022

A Dozen Drafts: Pattern Fitting Challenge - January

I named my challenge!!! 

In my last blog post, I mentioned my January project will be Simplicity 1325 because I've always wanted to make it and it seemed simple enough to complete before the month was out.

Well, I rough cut the pattern pieces and was trying to fit them onto the form like that, but it was too confusing. So I figured the bodice should be cut according to the shoulder and neckline size, and the other parts should be adjusted to fit. 

The first thing I noticed was that there are no waistline markings on the bodice. STRIKE 1

The next thing I noticed was that there was no indication of where the back neckline was supposed to hit. STRIKE 2!!! 

NOW, I understand what my more experienced sew-sisters are talking about when they criticize patterns! It was a rough start to even begin to gauge fit when I didn't know where to line up the waist and if the back neckline was in the "right" spot or not. 

When I did my first draping exercise, I learned I have this hollow at the front of the armhole and under the bust. The only way it smooths all the way out is when I have a bust + waist dart, and a tiny armhole dart. My belly does start pretty high on my body, so that is the dead space beneath my bust and above my belly protrusion :-D It's fine.

I cut the right half (front and back bodice) from muslin and the bust dart was in the wrong spot, the bodice was too long, and the CB seam was not aligning. I have been trying to figure out shoulder adjustments for the last year or so and I think the problem is actually a rounded upper back (probably some forward shoulder action too!). Also, I am adding just a little bit of additional ease than what's seen here because it IS a pinafore -aka- meant to layer.

I'm going to leave that back armhole ease because of layering. If you look closely on the front, you'll see where the original dart was (pink + stitching lines) and how I had to redo the dart. You can also see the original cutting line (pink vertical line). On the back, there's a faint pink line below the blue line, which was the original back cutting line. 

At first, I was going to add to the CB. But I think I'm supposed to slash and align the muslin with where CB should be, and then fill in the slashed area. I have to double check my books on that! :)

Next, I was really unsure of what fabric to use for this. I knew I wanted it to be versatile enough to work with several knit tees and tops, turtlenecks, tie neck tops and button fronts that I have in my wardrobe. I had so much of this suiting on hand - it's a cotton base with cording/thicker threads woven throughout. It's been in my stash for years! 

I did a quick half scale circle skirt front, and used my draped bodice to rough cut & pin a similar style bodice front. I think the fabric being cut on the bias helps the skirt drape quite a bit...and I like the horizontal "stripe" in the bodice paired with the bias cut on the skirt. And I think the colors will work with quite a few garments I own. Probably not as versatile as a black or charcoal, but definitely more fun!

I really like it!

Today I'll be making some adjustments and getting it cut out. I can finish this by Monday, right? :-p

Friday, December 24, 2021

Burda 2/2020 #117 (and failed S9373)

Can we talk about how awesome this issue was? I was on the fence about resubscribing for 2022 because 2021 was SO lackluster. Looking at some of the 2020 issues only reaffirms that (Feb, Mar, May(!!))

While this is only my second garment from this issue, I do have fabric and plans to sew the Balmain-esque blazer #102, there's a casual jacket on my radar #120, and I ADORE that shirt with a tail #110. 

I planned to sew this right away but had some reservations as finished objects started to post. When I decided to add a red top to my wardrobe and found this cut of ITY (Fabric Mart) in the stash, I knew I would use this pattern. Upon a closer look at other's garments, I think that some may have been concerned with the neckline or just didn't want it too low and raised it. For me, it works as-is.

I sewed the sleeve and body in one pass and used a 1/4" seam allowance instead of the 3/8" I'd added because I was worried about it fitting. I think I need to go in at the underarm and take it in *just* a bit.

I used a size 42 (should have used my normal size 40 neckline, it's a little loose around the neck), and a 44 back from the armhole down. I did a slash and spread on the back below the waist to add about an inch. I also added 1" to the bicep (this pattern had a 13" finished sleeve width. EESH!). 

Changes from the pattern only involves leaving off the sleeve ruffle. I like it, it's just not practical for wearing under a coat, especially at the shorter length. There's nothing more aggravating than having your sleeve stuck, rumpled up in your coat sleeve!! Also, it's the TUNDRA so I may need to wear this under a jacket or cardigan sometimes. 

I really love the tie belt too! I am often not a fan of self-fabric belts but this just seemed right for this pattern. I did thread chains for loops but placed them at the waist/where the surplice hit and that's technically too high, but I just loosened the belt a bit and it seems fine. I'm certainly not cutting them out and redoing them. 

I am really thrilled with the outcome of this top - simple but effective and especially in this bright red! I remember, years ago making a red top and thinking, OMG NO! I cannot wear that! :) It felt way too bold. Now? Tuh! I love it!!! 

This is fantasy because there's no possible chance of bare legs in the tundra :-p

I am SO HAPPY to have my mojo back y'all!!!! 

It's not about feeling like I have to sew, it's about genuinely enjoying the process, making things that fit my body (today! right now!) and spending my free time in a way that makes me feel good. 

Plus, I've finally made the decision to apply to grad school next year and I think the fear kicked me into "making overdrive". hahahahaha! In reality, I am getting to a much better place mentally than I've been for about the past 3 years and it feels great. 

Already completed and ready to photograph is a turtleneck maxi from Burda 10/2018, and I am in-progress on a pair of pants from Burda 2/2013.

Oh. The disaster that is Simplicity 9373. Meh. It's enormous and boxy in a bad way. The sleeve cuffs are RIDICULOUS!!!!!! They are enormous. I removed 2" in width and still, they just...ugh. I was sad I wasted my chartreuse sweater knit (SR Harris) but once I pulled it out of my sewing room trash (really, LOL! But I *only* put fabric and thread and stuff in those trash cans and never empty them until a project is complete done!) and took these pics and realized it's SO enormous that I can very likely get a cute little top from the deal. I'm thinking NL6314 because I've made it before, wear those 2 tops all the time, and this fabric doesn't have great recovery so that pattern will pair well.

THIS COLOR THO! 

If you celebrate, I hope you have the merriest of Christmases! If this holiday is tough for you, for whatever reason, take good care of yourself because you deserve it <3


Thursday, December 16, 2021

Simplicity 9275

I have to take some quick pics of my failed S9373 cardigan...I used a BEAUTIFUL charmeuse sweater knit on that darned pattern! grr!

But, my mojo was redeemed with this project! 

I cut a size 14 with the back graded to a 16 through the hip. I shortened the top above the band 1", and did a 1" full bicep adjustment. 

Warning if you have hips/butt, the band is just a rectangle. I would alter the back band to be more of a trapezoid shape or very light peplum to ensure there was enough room. See crude drawing below :-p


While there is a little extra back length, most of those wrinkles is because the lower band can't relax. And you can see on the side view that it's pulling to the back. Again, some of that is how I'm standing/twisting, but yeah...I need more room in the back band. 

I refused(!) to do a facing on this pattern and ended up stitching a line at 5/8", clipping, turning and topstitching. As SOON as I finished the top, I thought, DOH! why didn't I do a strip of binding as a facing?! (stitch, turn to the inside and topstitch). SO I think the neckline might be too flimsy and I am debating if I should remove the coverstitching and add a faced binding.


I added 1" to the sleeve length and left a 3" opening for the slit. Just a little fun detail, no real reason otherwise :)


I cut a few samples to test the topstitching options because I wasn't certain I'd add the pocket. I had to cut the pocket on the cross grain (top) because the fabric was behaving weird and stretching out of shape with it cut on-grain. The pocket is a fun addition. Speaking of fabric, it's a "ponte" by Telio...their leggero which is quite interesting. It's opaque and drapey (65% rayon/31% nylon/4% spandex) and is just under 7oz/yd) and washes, presses, and sews well. It does wrinkle really easily though. 


I think it works with a lot of items, as long as the waistband is flat. I have never been much of a tunic fan (because they don't tend to work well narrow shoulders and a bum!) but I am trying to get on board. I tried it with jeans, slim pants, cropped pants, trousers, and a straight skirt so here's a couple of looks!


Not sewing related, I stalked this DKNY top for so long at Macy's! It was $59 and I was just unable to for a poly top. It went on sale Black Friday/Cyber Monday and I scored it for $29, that's in my budget! It's a pleated fabric with a ruffled color and neck tie, and it's in black & white print which makes it a perfect fit into my wardrobe.


Thursday, December 2, 2021

Simplicity 9375

I actually finished this in a timely manner! Yay me! You know the routine...it's winter in the tundra and I have to get pics when I can. In this case, I work from home on Thursdays and that's an opportunity!

As mentioned in my last post, I got this fabric from Fabric Mart during a recent sale and it is really nice! It was listed as a double knit but I don't think that's true. DKs have knit stitches on both sides, right? At any rate, its a poly/rayon/lycra, washed and dried well, and has nice drape. I saw it on the site and immediately new I'd use it for this skirt pattern. 

I am still carrying my COVID +15 and went up a size bigger. The last skirt I was working on is a UFO because I cut my normal size and it DOES NOT FIT. LOL! I cut an 18 front and 20 back. I was lazy and didn't do a butt adjustment and the skirt tilts just enough to annoy me when I'm looking at it/pics. Grr. 

Otherwise, I really love everything about it. The fabric looks like it could be a wool woven and the plaid makes me happy!! The pattern is very intuitive to assemble. The overlay is reinforced, a small pass-through is hemmed, the exposed edge gets hemmed and the whole thing basted to the front. The smaller piece is treated the same and then looped through the overlap and basted to the upper front. Interestingly, the front is left loose under the overlay -- on the left side the front and back are sewn together but on the right side, the front+overlay+back are sewn together until the break and then just the overlay and back with the front loose. I imagine this is in place of a walking slit? Especially if you're a) using the longer length or b) using a woven fabric. 

I looked at the length for this view (22") and the longer one (28") and was going to add 3". I wish I had! It comes to my knee which is my favorite skirt length, but I think this could have been very impactful just a hair longer (but not midi length). I'm too thick for midi length skirts. I have little waist definition and very shapely legs but they can turn squat with the wrong length. I can pull off midi dresses but have never really liked that length on a skirt. Mini, knee, and just past the knee, or maxi length. 

I inserted a center zip instead of invisible since this tape color was a perfect match. Also, because I was using a knit but treating it like a woven, I used a firmer (not tricot) interfacing on the facing pieces, and added a 1.25" band of interfacing to the upper skirt edge (front and back). I don't want this skirt growing on me throughout the day when worn. And I did an okay job on the plaid matching too! Woohoo!

I did all of the hemming on the coverstitch machine

The fabric is so versatile! It has a pale grey background with black and rust/brown plaid lines. I can really play off both the grey and the rust with pairing it with other wardrobe items. My fave!


I do like this length, but I can also see how 2 more inches would've been better. It sort of turns me into a square. The skirt is about 22" and I have a 45.5" hip so about 22" across the front of my body.
Not a complaint...just an observation. I love my body, the most! LOL!

I adore these boots! 

I'm so close to finishing up the baby sweater! I am going to sew the side seams today and then I'll seam the ribbing by hand, weave in the ends (grr), and by then my new yarn for the matching baby sweaters should be here! 


since taking this pic, the sleeves have been seamed to the sweater


Friday, November 26, 2021

In Progress

Life has been life'ing. I am overwhelmed, over tired, and over stressed. There's just been too much stuff

But, the bright side is, I've gotten back in the sewing room. I'm currently working on this newer Simplicity pattern, S9375, in a plaid double knit I got from FM last month (those shipping discounts will get me every time).

I got a lot done the past 2 days. Yesterday I cut out my pattern pieces, today I cut the fabric, fully assembled the front, the back darts are sewn and it's awaiting a zipper. I will likely finish it this weekend, yay! I still need to sew the zipper, baste the side seams for fit, sew the side seams, and hem. So it may be done tomorrow...maybe Sunday.

Really love this fabric as it looks like it could be a wool/woven but it's a knit! The double knit has some drape but is stable, so I cut my normal size, I'll make any necessary adjustments at the side seams, but I don't want this to fit too snugly either. 

I finished up my knit hat. It's slouchy but I wish I'd added more increases earlier on. All the "slouch" is near the top/tip of the hat. The yarn is really nice though!


I also started a sweater for Bert. It's an old pattern, likely from the 80s and a bit generous in sizing I think. I'm going to finish it but I'm also going to try the pattern one size smaller. I have all 4 pieces knit and blocked. Next up is the neckband, then assembly. Since it's a sweater for a little one, I'll seam it on the serger with a 3-thread stitch. Here's a pic of the back with 1 sleeve (I think I may knit the neckband in yellow just in case there are any errors with picking up stitches. They'll be easily hidden!):


I saw a cute colorblocked sweater and wanted to do something similar, but had no "fun" colors in stash. I visited Cindy in Princeton, MN (if you're a machine knitter, you have to visit her shop!) and we found lots of cones of yarn appropriate for my standard gauge machine. I picked up a purple but didn't care for the shade and she said, oh that one's wool. I figured I'd keep that one...there was another wool cone in gray. I got home and that yarn (Brown Sheep Nature Spun sport weight) retails for $50/lb! SCORE! I paid $1/lb!! My son in law's favorite color is purple so I'll use that one to make him a hat :)

If you're in the US, hopefully you had a great Thanksgiving.


Wednesday, July 14, 2021

Simplicity 8337

 I sewed! :-D I did not sew a birthday outfit (first year since I started sewing that I didn't!) I wore RTW:

I had dinner out with my husband, brother and sister in law, I got lots of fantastic gifts, and I went to the White Sox v. Twins game on the day of...it was a great birthday all around.

Last Saturday, the Twin Cities Sewists group got together for the first time in a long time - it was awesome! We got together at a local lake (the weather was thankfully very mild that day). Talking sewing is always inspiring and I came home and cut out this pattern! 

I'm a very average height, just a bit under 5'6", and removed an inch in length


It's all sizes in one envelope - XXS to XXL - and I cut a size medium. I shortened it an inch at the waist and made no other adjustments. I fully intended to add a bit across the upper back (I've put on some weight there) but I forgot. I was cutting this from scraps and had to play pattern tetris. I laid it out and just forgot to adjust the pattern piece. Womp. Womp.


It's a little tight across the upper back as a result. The puddling is partial due to posture, and a reality of making something without a CB seam.

I also departed from the pattern instructions on finishing - do not use pre-purchased woven bias tape to finish the neckline of this jersey knit top. That is just silliness. I cut a strip of the knit against the grain, at 7/8". The neckline seam allowance is 3/8", so I'm allowing for 1/8" turn of cloth, and 3/8" to finish. I didn't worry about folding the fabric back on itself.


I then turned, pressed, and used a narrow zigzag to secure.  The armholes were supposed to be finished with a double fold binding method and I just folded my binding in half and serged in place.


Wrong side will show, so keep that in mind if you choose something other than a single jersey. I am one that doesn't mind raw edges if the application is right (in this case, be sure to cut the ruffle with a rotary cutter for a neat edge), you can also do a rolled hem if a raw edge bothers you.

I really love the color (I hate that I can't wear the dress made from the fabric here), it's just super baggy in the chest / neckline. I'm so happy I was able to get a wearable (and versatile!) garment from the scraps. Yay, scraps! LOL!


Oooh - I (finally!) ordered a Beatrice dress form! (NAYY) I am SO excited! It'll be awhile before I actually have it in hand, but I plan to document the process throughout. 

They are currently releasing a limited number of forms each month, so that they can keep up with production, and I missed out in May and June. July - scored! 

Step 1: Complete an intake form. There are some basic questions and measurements so that they can send a scanning kit out.

Hopefully we will have a nice, bright day that will allow me to get a good scan (my husband will do it). From there, they verify the scan is good and then the form goes into production. I'm thinking I'm going to spend the extra $250 to get the half scale form - we'll see!

************************

My grandson is 10 months old! he's such a big boy, it's mind-blowing! He just moves around like a big kid now. He's reached the point where he scoots down off of the couch or bed and I'm about ready to send a consultant over to give baby proofing advice! 

He is very active, very determined, AND he's a big kid at 25lbs and he's tall. They're going to have to be quick on their feet! :-D