
I named my challenge!!!
In my last blog post, I mentioned my January project will be Simplicity 1325 because I've always wanted to make it and it seemed simple enough to complete before the month was out.
Well, I rough cut the pattern pieces and was trying to fit them onto the form like that, but it was too confusing. So I figured the bodice should be cut according to the shoulder and neckline size, and the other parts should be adjusted to fit.
The first thing I noticed was that there are no waistline markings on the bodice. STRIKE 1!
The next thing I noticed was that there was no indication of where the back neckline was supposed to hit. STRIKE 2!!!
NOW, I understand what my more experienced sew-sisters are talking about when they criticize patterns! It was a rough start to even begin to gauge fit when I didn't know where to line up the waist and if the back neckline was in the "right" spot or not.
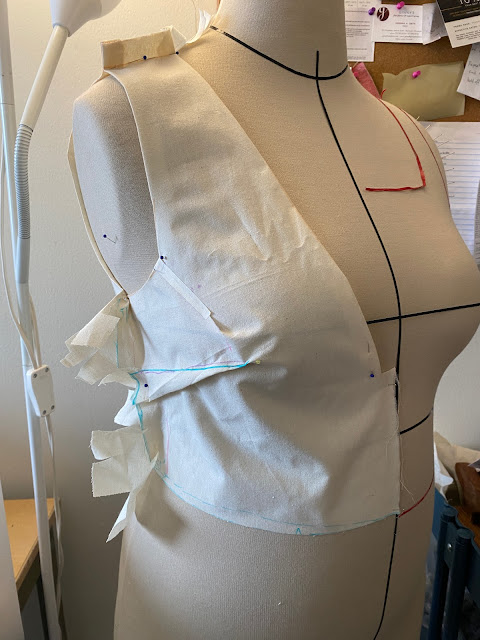 |
| When I did my first draping exercise, I learned I have this hollow at the front of the armhole and under the bust. The only way it smooths all the way out is when I have a bust + waist dart, and a tiny armhole dart. My belly does start pretty high on my body, so that is the dead space beneath my bust and above my belly protrusion :-D It's fine. |
I cut the right half (front and back bodice) from muslin and the bust dart was in the wrong spot, the bodice was too long, and the CB seam was not aligning. I have been trying to figure out shoulder adjustments for the last year or so and I think the problem is actually a rounded upper back (probably some forward shoulder action too!). Also, I am adding just a little bit of additional ease than what's seen here because it IS a pinafore -aka- meant to layer.
 |
I'm going to leave that back armhole ease because of layering. If you look closely on the front, you'll see where the original dart was (pink + stitching lines) and how I had to redo the dart. You can also see the original cutting line (pink vertical line). On the back, there's a faint pink line below the blue line, which was the original back cutting line. |
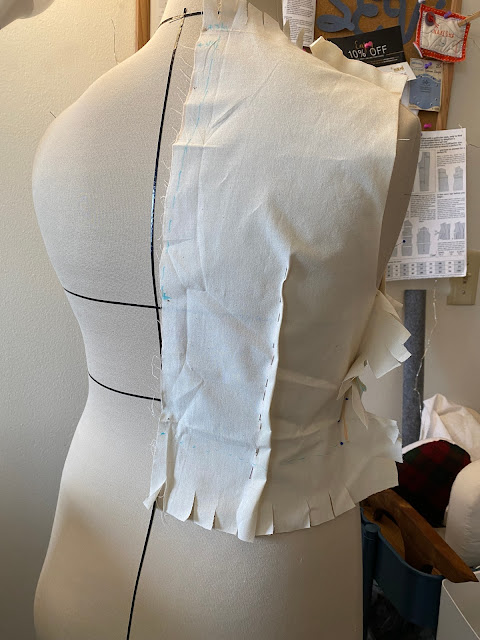 |
At first, I was going to add to the CB. But I think I'm supposed to slash and align the muslin with where CB should be, and then fill in the slashed area. I have to double check my books on that! :) |
Next, I was really unsure of what fabric to use for this. I knew I wanted it to be versatile enough to work with several knit tees and tops, turtlenecks, tie neck tops and button fronts that I have in my wardrobe. I had so much of this suiting on hand - it's a cotton base with cording/thicker threads woven throughout. It's been in my stash for years!
I did a quick half scale circle skirt front, and used my draped bodice to rough cut & pin a similar style bodice front. I think the fabric being cut on the bias helps the skirt drape quite a bit...and I like the horizontal "stripe" in the bodice paired with the bias cut on the skirt. And I think the colors will work with quite a few garments I own. Probably not as versatile as a black or charcoal, but definitely more fun!
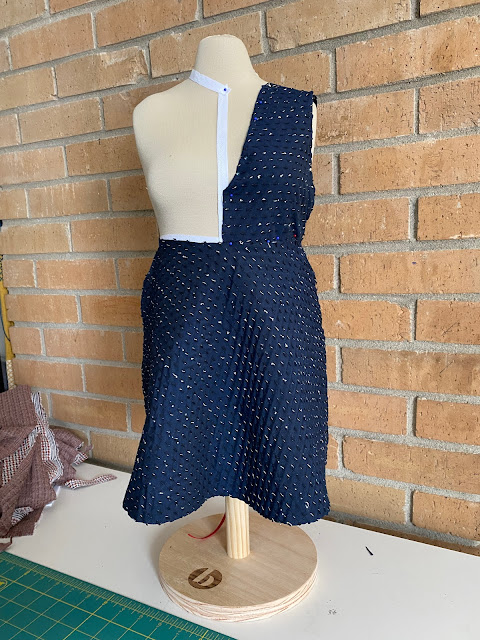 |
| I really like it! |
1 comment:
wow!!! good for you! can't wait to see the end product!
Post a Comment