Pages

Showing posts with label Loungewear. Show all posts

Sunday, January 19, 2020

All in a Day's Work


Our local group was supposed to get together on Saturday for a sew day and then a blizzard struck Friday afternoon into Saturday afternoon so it was canceled.

I'd been so excited for it (I am always excited for our meetups) so I decided I'd still have a sew day. It was cold, it was snowing, the winds were out of control and I wouldn't be going outside anyway. Plus, I'd prepped everything so it was ready to go.

I'd decided that I'd take my serger instead of sewing machine and work on loungewear, and that I'd work around areas that needed a sewing machine or my cover stitch until I was back home. When the storm hit I figured, why change the plan?! So I went for it! :)

I've been meaning to sew M7061 for FORever. It has so many positive reviews and I just kept putting it off. In 2018, I ordered this precut from Fabric Mart (those are seriously some of THE best pieces of fabric I've owned!!). It is Ann Kelle for Kaufman cotton spandex (95%/5%) knit. Can you believe I paid $6.40 for 4 yards?!?! I washed it up awhile ago and just hadn't gotten around to it. Oh, rookie mistake: I didn't notice til I had cut like 60% of my stuff out that I'd forgotten to remove the label. Luckily, I was able to cut around it.

DOH!

LOVEEEEE.

This is one of *those* patterns. 1) It has XS-M in one envelope and L-XXL in another. I needed a medium top and large bottoms and luckily, I'd purchased both sizes. 2) All the views for the top? ALL overlaid. I HATE when they do that! The short, straight seam for A, the longer, curved view C, the dress length view D and curved dress length view B. GRRRR! I end up cutting off at C, saving the longer bits from the dress length views and then folding up for view A.

Adjustments:
I've been thinking about fitting more and one (simplistic!) rule I keep reminding myself of is to put the fabric where I need it. My chambray Vogue blouse is done and on that one, I'd added at the side seam for the hip, as I've often done. It's still snug across the butt and sticks out at the hip. My "hip" measurement is larger due to my butt so I added the most fabric where I need it most!

I did a slash and spread in back and added 1" (2 inches total). I also added a wedge at the side seam on front and back of 1" (another 2"). The hip on the medium is 41.5 on that longer view and my hip is 44", so that wasn't going to work.


The sleeve was SOOOO slim!! Eek! I've been using the Singer Sewing book bicep adjustment because it adds less width throughout and doesn't lower the sleeve cap but I needed the extra through the sleeve so I went traditional adjustment and added 1.5".

I cut the front  and took the inseam out to the XXL, tapering to nothing at the notch. This was a bit too much at the inner thigh. I figured I'd take the chance because its loungewear. Also, I ended up removing 5/8" from the CF tapering to nothing at the side seam after sewing the grey shorts.


On the back, my back crotch curve most closely matched the XXL. I added 1" to the inseam to get the back to match. I also smoothed out this inseam line below much more when cutting out the fabric.


I will adjust the CF to remove 5/8" via a wedge. I will remove some of the crotch extension and inseam width. On the back, I will remove some of the inseam width and do a small wedge (I can see the heart pattern on the back pants dipping just a bit).
For this set, I used a cotton knit from JoAnn, one of their Doodle prints. I fell for the unicorn print and didn't research. OY!!! Well, I measured my 2 yard cut because I don't trust JoAnn's cutting (I bought via order pickup). It was 2 yards. Great! I washed and dried it and when I pulled it out, I could tell it was shorter. As I started to lay everything out, I was *just* barely going to squeak out the pieces and remeasured - 1 yard 25 inches. It shrank 9 INCHES! I went to research after the fact and several people complained about shrinkage of 4-5 inches per yard. I hope this doesn't mean I've lost 1/3+ yds off of my 3 yard cut. Grrrr.


I intended to add the hood but didn't have enough fabric for it! I'd already decided I wasn't going to add the hem bands to the bottom and sleeves. 

I finished the neckline with a facing. I cut a band that was 1 1/4" wide, stitched it in place, graded the seams, turned to the inside and topstitched with my coverstitch. I inserted this flat but once I sewed the band on, I sewed the other shoulder seam and then coverstitched it in the round.


The waistband doesn't include any elastic - DO NOT do this unless your fabric has great stretch and recovery!! You can insert as a casing or stitch the elastic in. I first saw this on someone's blog many moons ago and then Kwik Sew 3115 (I think?) included these instructions.

After cutting out the waistband, I traced the fold line in place and zig-zagged the elastic in place on the interior of the waistband. It's the width of my natural waist and light tension was needed to fit it into the waistband length. The hem was finished with the coverstitch. 

The heart shorts were sewn the same way (they were sewn first actually!) and I did include the side slits. waiiiiiittttt!!! The marking for the slits is technically above the crotch level of the shorts! LOL!!!! Yeah, no. 

Anyway, the work to make the slits is extra and unnecessary so I probably won't do it again. It's not anything difficult but the side seams were serged first, hem corners made, side seams stitched, then hemmed. Eh. Not worth it!

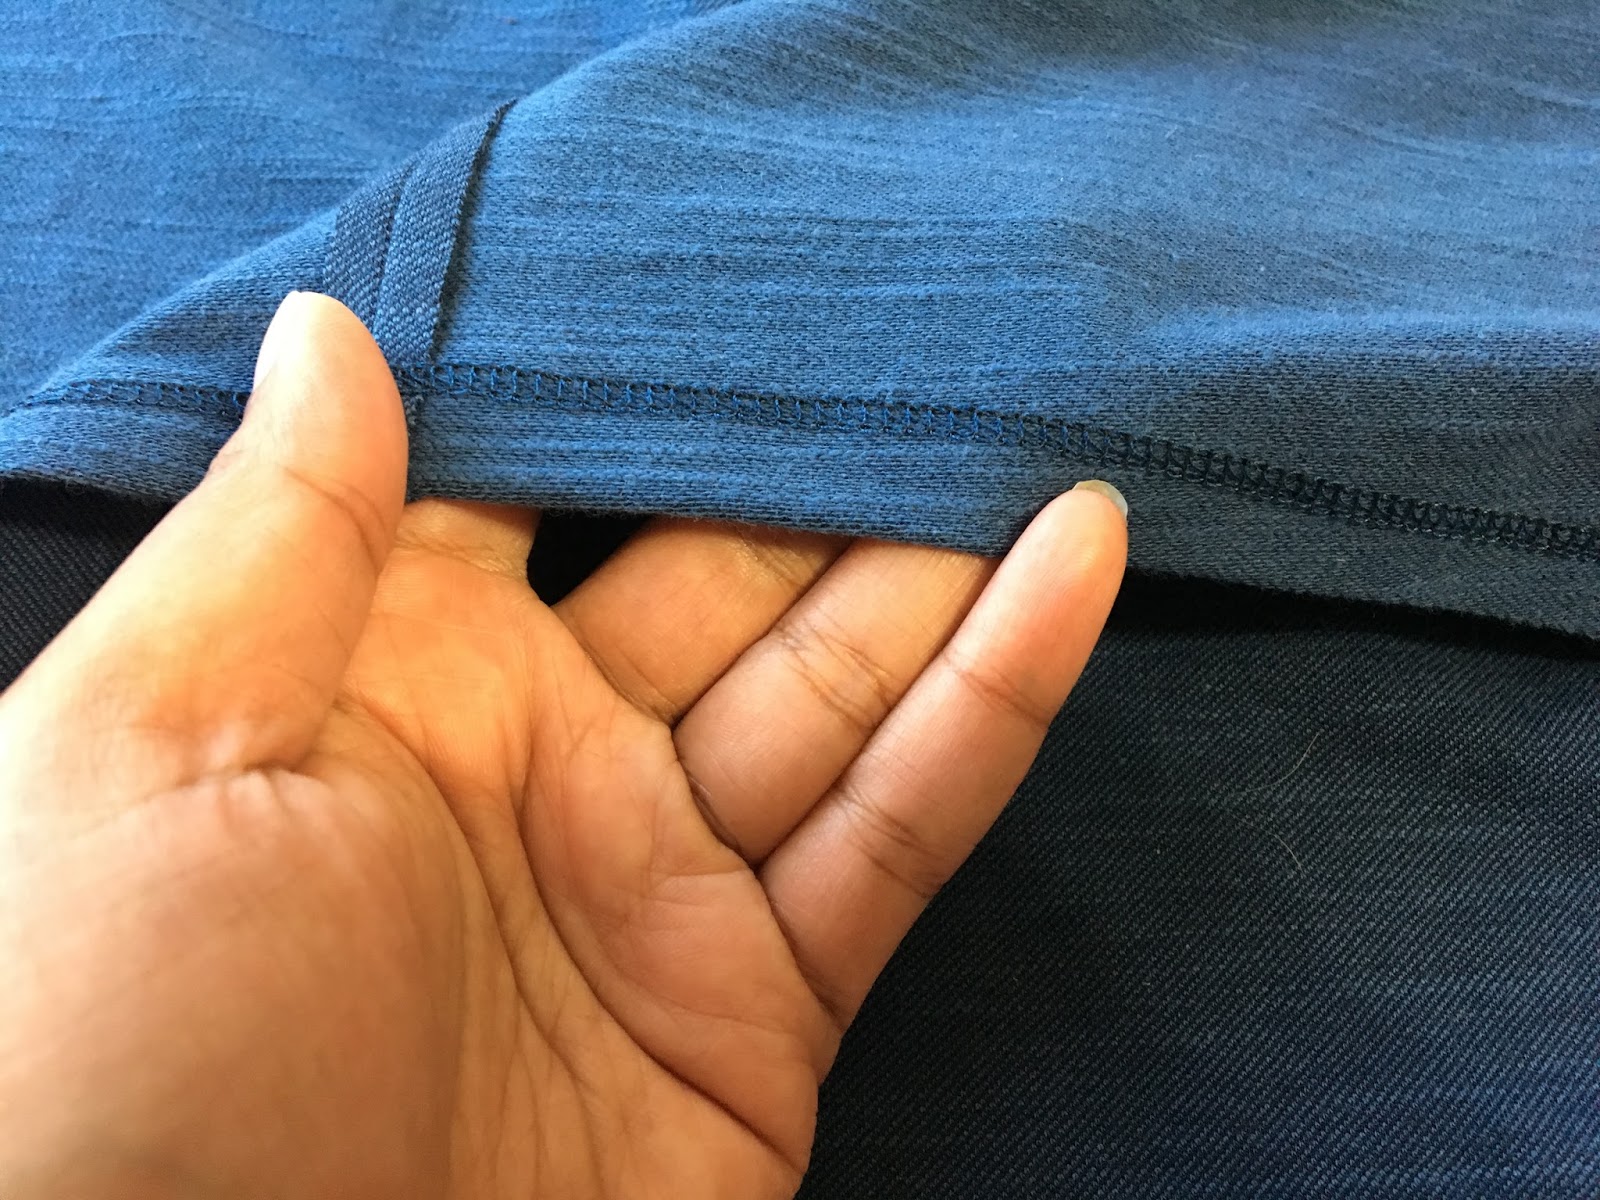
I did use 3-thread coverstitching for the first time making the looper threads visible. 

I love it and feel confident using this stitch more often on casual wear!

(messy zigzagging on the side slits)

The pants went together so ridiculously fast. I sewed on the first hem band upside down after looking at it, pinning it, flipping it, pinning it, looking at it again. Oy! LOL! Also, based on the fit of the shorts, I ended up sewing the side seams at 3/4".


I love the fit!!! 

For the top, I was confused on the collar for a minute for some reason! But I just followed the directions and it was fine. 

Before I ever started this, I was drawn to red for the thread selection and the only options that worked as a drawstring in stash were white or red. The red really POPS and I love it.


My machine wasn't loving straight stitching on this fabric but the zigzag turned out well!

After topstitching this in place I hated the puny stitching and went back and did the two horizontal lines of coverstitching. 

For the top, I had enough hip room but still ended sewing a slightly smaller seam allowance through the sleeve until around the elbow and through the bust and waist on the top. I removed the 3rd thread and used a traditional coverstitch to hem the top.
I feel so ridiculously warm and fuzzy over the heart set! It really is a joyful print! And it's warm and soft and snuggly!
I think I sewed a total of 7.5-8 hours making these 5 pieces. Everything had been cut out prior to Saturday.

I purchased a second cut of Doodle fabric to make the onesie from S8502 but I'm hesitant until I see how the grey set wears. And, I still need another hoodie. I have a black and white polka dot sweatshirt knit that I hope to get to sooner rather than later.

What's next? I did not even think about going in the sewing room today! LOL! I think I'll pull out my McCall's 7982 muslin so I can get those sewn, and I need to get back to S8948.


Saturday, February 17, 2018

Patterns On Repeat

I'm getting behind again on reviews and wanted to get these posted.

After making the B6427 tee from the black cotton lycra, I decided I didn't like it enough for garments but it would be fine for loungewear. And I was already wearing my other B6031 nighties as often as possible...so I made two more!


The first was made with the same lace as the grey one. I had enough for the bust lace but nothing else. I added 1/2" to account for not using the lace and just sewed that seam. I cut the bottom straight and skipped the lower lace. With the grey fabric, it was SO easy to make straps from self-fabric!! For this fabric?! Oh my gosh. It drove me mad. I think I tried 3 or 4 times before quitting. I had some old straps from a long-gone strapless bra that I used.


For the all black version I had 2" black lace (the pattern calls for 1 1/2") so it's a little bit more exposed.


I used a pretty elastic lace on back and made straps using rayon challis an packaged bra slides/rings. It worked out great.


I ADORE the lace on the hem!!! I admit, the two with lace hems are my favorites <3


These have been in heavy rotation and I cannot say I won't revisit this pattern again sometime in the future. Someone mentioned a navy one and now I'm pretty sure I'll make another one if I find a nice navy knit. I have yards and yards of white lace. Some people expressed interest in a sew along so if I remake the pattern, I'll revisit the idea.

The other repeat was a black pair of S8424 leggings from the same fabric. I'd decided to do something using HTV and the Cricut. When making transfers, you have to remember to mirror the design. So I cut both leg designs mirrored. Well...pants legs are ALREADY mirrored! I only needed to mirror one. DOH!! And then, when doing the waistband, I had the unit ready to go, and installed it "backward". The stitching for the elastic is on the outside. DOH!!

I went back into Design Space and created this "Oops!" iron-on. LOL!!!! :)


No other changes were made. I REALLY like this leggings pattern!

Last, but certainly not least; on repeat is Burda mag 1/2018 sweatshirt but for my daughter, not me. 

When I made my M7688 sweatshirt, she wanted a mustard one and I ordered this fabric from Cali Fabrics. Well, this stuff is THICK. There was no way it would be made into that top. As mentioned in my review post, I had been hiding my Burda hoodie from her and one day she saw it, freaked out, and begged for one.

I got it started and my mojo went on hiatus. Plus, I didn't care for the zipper when it came (Wawak). The fabric was difficult to handle; it did not press well at all and cutting was tough on my hands so I spread it out over quite a period of time. And then I forgot she didn't want the bias binding on the hem. But I forgot to add hem allowance. And as mentioned, shortening metal zippers is a no for me. I stewed for DAYS over what to do with that hem. And then I had an ER-visit as I had a bout of vertigo (I've experienced dizziness but never THAT! It was scary!!) so more days passed. At the same time, my pants for wearing to the premier of Black Panther were sitting as well. I knew I had to finish those by Friday and decided to knock the sweatshirt first. Luckily, I found my mojo!

Lightbulb moment...self binding! The fabric wouldn't have liked being quadrupled so I basically cut a strip, serged it to the edge, turned it inside and topstitched. IT WORKED PERFECTLY! 


I also remembered to widen the pocket. I slashed and spread and added an inch. If you make this, MAKE THIS ADJUSTMENT!!!! Her pockets are so much more usable than mine.

Daughter is slim and has a short torso and LONG limbs. I knew the straight size would work but we'd have to lengthen those sleeves. And since I wished I had another inch, I added 2" to hers; 1.5" about mid-sleeve (she's long shoulder to elbow and elbow to wrist). I also added 1/2" at the hem and made the cuffs about 1/2" longer than called for in Burda's instructions.

Sleeve on me :) It is *perfect* on her!

For my version, I used a size 40. For hers I used a size 36 and graded the neck/shoulder to a 38. This worked out so well.  I bought natural twill tape which really played well with the zipper color. YAY!!

I didn't bother trying to do the hood seam the 'right way' this time either...it's fine.

And, as thick as the fabric is, the doubled fabric for the hem was fine. Go figure. 


After all the fussiness, I finished and was really impressed by it! And she LOVES it. She wore it to school Friday and said she got lots of compliments.

Hopefully, since my mojo has returned, and I don't have to work Monday, I can get going on a Clare coat muslin. I'm running out of time to get that sewn *in* February.

Sunday, January 28, 2018

Burda 1/2018 #119

I love this pattern. I was uncertain for a moment because of the hi-low hem and pleated sleeves. Now, I'm not a hi-low hem hater (sorry y'all!)...I think they're fine at times...But I was worried about the bulk of the sleeve especially with this heavyweight knit.

It *is* bulky in this fabric but I don't mind it.

One thing I like about Burda is that, in terms of fit, often what you see is what you get. A baggy, slouchy garment fits as such and when Burda shows you tight-fitting or low-cut, get ready! :)

I went with a straight size 40 (vs grading to a 42) and added 3/8" seam allowances. If you make this and plan to bind the lower edge, you do not need to add any allowances to the hem. Now, one thing I did not realize is that the zipper length given is for the largest size. I had a pale grey zipper but it was 24" and therefore too long. As mentioned on Instagram when I was working on this - *I* cannot shorten metal zippers. I do not possess the hand strength to do so. Luckily, I had this 22" zipper in stash also.

I briefly toyed with the idea of not binding the pockets but I'm glad I did! I think it looks really good! Another suggestion for you -- extend that pocket about an inch or so out. I feel like I can just barely fit my hands in there. I used Wonder Tape to hold the pockets in place while topstitching with the coverstitch. Worked perfectly. I do need to go back and bartack the ends. Also, I'd lengthen the sleeve an inch if I made this again.


I know(!) I had a grey athletic knit in the stash but couldn't find it. I used a white mesh knit for the hood lining and used eyelets for the drawstring opening. I'd already topstitched the channel for the drawstring (used cotton twill tape from SR Harris) not realizing I was supposed to do that last, resulting in a clean finish on the neckline. Oops!


This fabric washed, cut, sewed and pressed like a dream! (This was another Fashion Fabrics Club find.) I did most of the construction on the sewing machine. I serged pattern pieces prior to sewing them together because of the thickness of the fabric.

I know the length of the sleeve looks fine but while wearing it it feels like it needs to be longer!
You can also see a little bust pulling but, casual garment, will probably rarely be zipped, not worth going up a size and having an overall baggy fit.

I was honest-to-goodness sneaking and wearing this because I knewwwwwww! My daughter came home one night and gasped and asked me to make her one PLEASE :) It's easy...I'll do it. She didn't even want the binding, saying that was "too fancy" so she'll have a mustard-colored hoodie coming up soon.

Oh, another important note...this big headed-lady fits the hood just fine! :-)

Monday, January 22, 2018

Burda 6659 and Butterick 6427; Loungewear post 2 of 2

I had B6427 in the stash and planned to compare it to the Dixie DIY Summer Concert Tee. I was unsure about this type of tee on my frame and never proceeded.

Well, I love it!

I used a size medium with a small for the neckline (it's SO low and wide!) and this black cotton-lycra jersey knit from Fabric Mart. It was a Sue's Pick I believe, by Maggy London, and I bought 6 yards! After sewing this top I realized I wouldn't like it as much for actual garments. It's thick and attracts lint like some crazy, deranged lint magnet! But for loungewear, it's fine. I plant to make another S8424 legging from this fabric.

I decided to make this my first Cricut HTV (heat transfer vinyl) project!!! I have a couple of official Cricut posts coming soon (early February and early March). I plan to do a tutorial on making heat transfers for tees so watch for that in a few weeks!

One of my favorite phrases is being 'unable to adult' :) If you're familiar with the show 'black-ish', the oldest kid from the show is now off to college and has a spin off called 'grown-ish'; my tee is an ode!

This, not surprisingly, was constructed entirely on the serger and coverstitch. Easy. Peasy.


I like the hi-low hem and the side slits. The sleeve bands are a bit snug for my forearms; I'd increase them a bit (probably to the equivalent of a large).

The neck binding on S8424 was perfect, this one was a little too long and I have a wavy neckline in front (and yes, I used the right size!!). Luckily, it's loungewear. My next iteration will be out of fabric that's more lightweight so I will likely need to size that down a bit.

The joggers! I had these in stash for DD and the 3/2014 issue of the magazine has a very similar pattern. I decided cutting this out as the lazier option over tracing from the mag :)


I used a size 44 on the blue pair and cut down to a 42 for the star pair. I shortened the front rise 3/4" and lengthened the back 1". While I love when there are multiple rows of elastic in patterns like this, I hate doing the work!

I decided on eyelets (because I am the eyelet queen now!) instead of buttonholes. I interfaced the area but must've cut it open too much. I've since found that with knits I just need to take the awl firmly through it and immediately place the eyelet; I don't need to cut them open. When they were finished and I went to try them on, I pulled the twill tape and ripped the eyelet right out on one side! I did a hack job replacing it AND they aren't even. DOH!


On the star pair, I felt the thicker french terry would be REALLY be a joy (/sarcasm) to thread two rows of elastic through and decided on a ponte waistband in black. I also narrowed the ankle just a tad, cut the leg band down to a size 40, and attached it with a 3/8" seam instead of 5/8". I love them!!!!


I don't need more joggers right now but once I wear these out I'd definitely use this pattern again.

Fabric for both pair of joggers came from Fashion Fabrics club. The blue is a lightweight french terry (beautiful! drape) and the star fabric is heavier. This kind of fabric was my first experience with french terry and made me say I hate this fabric. I'd made M6884 and absolutely hated that loopy wrong side. I don't mind it as much in joggers but probably wouldn't look for this heavier terry again. The lightweight version? LOVELY!!!

I've ordered from Fashion Fabrics Club off and on. The biggest deterrent, aside from their outdated website, is I hate that I can't use PayPal. It isn't even a security concern just that I hate having to actually pull out my card. LOL!!! So sad.

In this order I'd gotten both of these French terry fabrics, double knit for my hoodie (coming soon!), the denim knit used in the s8424 top, 3 T-shirt knits (white, ivory and cream), a black t-shirt knit and an apricot colored lightweight French terry. I did not receive the last two items.

I received a notice with my order that the apricot fabric had sold out. I asked about notification of sold out items and was told I have to ask to be notified at checkout. Sigh. Whatever. Okay, give me a refund. I did not receive the black t-shirt knit. I notified them on 12/20, had to ask again on 12/22, and it was 1/2 before I realized I never received the refund on the black knit. I was NOT HAPPY and they were going to be off the list. (I went 3+ years without ordering from Fabric.com because of screw ups). HOWEVER, all of the fabrics I received were pretty much amazing. And their pricing was so good, that I will give them another shot.

I have worn these items NON STOP! :)


I've said a million times before that "my colors" are blue, black and grey. Uhmm...yep! LOL!

Simplicity 8424 leggings and tee reviewed here

Sunday, January 21, 2018

Simplicity 8424; Loungewear post 1 of 2

When this pattern came out I wanted every single piece. EVERY PIECE! I wanted to make this for a fall loungewear wardrobe but then I sprained my hand (which, 6 months later, isn't fully healed but is better).

I started with the leggings with the ties, in this grey cotton knit from Fashion Fabrics Club. This is the only pic with the ties because I promptly removed them. Actually, I pulled them really tight and snipped them right off on the outside. Can't even tell!


They were ridiculous to put on each time and they are too wide which makes them too thick. Plus, I have thick calves and they were too short to wrap as instructed but too long to skip a go-round. Meh. I wouldn't add them again. The tie waist felt too bulky as well. I left that one and may use it again, but under normal length tees it's too bulky.


Review on the top to come! :)


 The leggings pattern itself is decent. Like most Big4, it seems to not get the fact that they should taper from thigh to knee and back out at the calf! LOL! But a little fitting solved that. After fitting the first pair on the serger, I shaped the legs of the pattern pieces.

I used a size Large (18-20) with is typical sizing for me with Big4. I usually cut my woven pants in a size 18, so I found that consistent.

The waistband is finished by zig-zagging elastic on the inside waistband, and then attaching the waistband as a unit. This is my favorite way to finish casual/athletic wear pull-on pants.

The tank is really short and I got lazy about lengthening the pattern pieces and just skipped it. Plus it's hard to consider sewing a tank in the dead of MN winter. The wrap top was reviewed by a blogger and she gave the top an "okay".  That prompted a closer look at the pattern and I decided to pass on the wrap top.

The hi-low top is really cute and made better by this SUPER COZY heavy jersey knit fabric. It has a "denim look" and I honestly was convinced that the light side was the right side...and then when I went to put a pattern piece on my dress form, I wasn't so sure anymore. So I decided it didn't matter! #asewersperogative. I added interest by using the other side for the neck binding, a visible CF seam (so the dark side shows)  and displaying the looper thread on the hems.


I really love this top! I used a size medium neckline, shoulder (which is also the upper sleeve) and a L for the rest.


Review on the joggers to come!


I've been taking photos randomly since they were finished but hey...it's everything! LOL!

Tomorrow I will post my review of Burda 6659 and Butterick 6427!

He's such a baby :-p

Burda 6659 and Butterick 6427 reviewed here