Pages

Showing posts with label WIP. Show all posts

Friday, September 27, 2024

Finished Object: Butterick 5526 and Updates

I posted HERE when I planned out this project and HERE with info on adjustments and construction. I  have to admit, I did not like it when I first finished it. I called it a "Post Office" shirt! LOL!!! I finally wore it after washing it a couple of times (I dislike when it's super crisp).

Wearing it has shown that removing all of the cap ease DOES impact the fit a little - I think it limits my mobility a bit when I bring my arms forward. But it isn't straining or pulling, so there's that. Luckily, I had a tracing and adjusted that; the original sleeve is intact.

I wore it with my aqua? mint? jeans...it also pairs well with camel, red, navy, and black. I didn't like it as much with a pair of mid-toned blue pants (post office!!). 

And after looking at the pics in the black skirt I was like, geez, I look so blocky! And yep...this skirt is too big. I can pinch like 3" out of the waist. 

I really like the sleeve more and more! I added a center seam and topstitched that seam. It looks really good. This pattern has no dart control at all...if I made it again I'd either make it a bit looser overall or do a cheater FBA. The side view shows it's flattening my chest a bit. 

Good thing this turned out well because EVERYTHING ELSE I've been working on is MEHHHHHHHHH!

I put the yellow dress  in timeout and while the Burda shorts turned out well (I'm tempted to make another pair but feel like full-on fall will immediately arrive if I do)... 


...the double gauze wasn't fun to sew and I realized I messed up the collar on the shirt. I feel mildly over it.

I understitched the facings but they are still super floppy and I have no confidence in sewing buttonholes in this fabric. You can see in this pic where I messed up attaching the collar.


I was so close to recutting the shorts but luckily, I posted about the fabric growing and someone told me it would be fine once washed. WHEW!! Apparently it grows while sewing but once I washed them, they were perfect. 


I went to insert a sleeve on the yellow dress and sewed the entire thing only to realize there was NEVER any thread in the bobbin. OY VEY! The next night, I tried again and sewed the sleeve inside out. Totally in the naughty bin now. Hmmph!

Monday, August 5, 2024

Fitting and Construction: Butterick 5526 (B5526)

So, score for me not having to cut the pattern out! For me and my myriad hand issues, this is a major win! Sometimes, cutting the paper pattern is a one-day activity because I "use up my hand" doing that task and have to wait before moving on to cutting fabric.

I'm almost 5 years post-reduction (OMG WHERE DOES THE TIME GO!?) and I'm slightly larger than I was. I could probably use a tiny FBA on things...like less than 1/2" for an additional 1" total, so I don't bother. I often just shape the side seams a little bit. 

In the case of this casual top, there is no dart control (no darts or gathers), and I intended to add a bit (3/8") to the side seam at the bust, and forgot. Ah well. It'll be fiiiine! 

(this is one of the benefits of being more experienced, I'm able to decide what to fuss on and what not to)

I did a rounded back adjustment of 5/8". This is standard for me with Big4 patterns. I open it at the neckline -- this dart is usually about half the width of the opening at the center back. You can sew the dart shut, in my case I leave it and just ease it into the collar. For some garments or fabrics, I alter the collar to fit this additional width. 

I also wanted to remove some of the sleeve cap ease and consulted two sources. 

Threads used a method by Sarah Veblen where you walk the seam and note the excess, add back an appropriate amount of ease, slice it through, add seam allowance, and sew the seam. 

I trued that bad curve when I cut the fabric

David Coffin similarly has you walk the seam, remove the excess ease, but has you sew this dart closed. 

I decided to add the seam and topstitch it for a decorative effect. 

BUT I MADE A MISTAKE. oy! I noted the excess ease but did not add back ANY sleeve cap ease. I know there's some discussion around the necessity of sleeve cap ease and while I think most Big4 patterns do include an excessive amount, I don't know that zero ease is always appropriate. Considering this is a semi-fitted, casual fit top, the amount of ease seemed over the top. So even removing it all (accidentally! haha!), does not result in a too-tight fit. 

Lastly, I don't care much about front pockets on shirts so often opt for just one, on the left. Other times, I include them both pretty much to cover the dart ends. Ymmv. The pocket is standard construction, stitch the upper part, turn it out, and then fold in the seam allowance and topstitch in place. I did note a review by Lladybird where she mentioned how high it was and I agreed when holding the pattern piece up to Lily...I lowered the placement by 1 inch. Wonder Tape is everything but for pockets, a good old fashioned glue stick works very well too!

My preferred order of construction for shirts:

  1. darts (n/a in this case)
  2. front pockets (if applicable)
  3. serge hem
  4. front placket, including turning out hem
  5. shoulder seams (sew and serge)
  6. fit side seams
  7. side seams (sew and serge)
  8. sew hem
  9. sleeves (fully assemble including cuff if a long-sleeve pattern, sew and serge)
  10. attach sleeves to body (sew and serge)
  11. cut and prepare collar and stand (I don't even cut the fabric out until this point and always block interface a piece of fabric and cut the stand from that since there's some bias in this piece)
  12. attach collar
  13. top stitch collar stand (sometimes I topstitch the collar, sometimes I don't)
  14. sew buttonholes and buttons
When sewing the placket, I traced in the fold lines on the right side of the fabric (be mindful of your marking tool e.g., marker-like tools will make a thicker line). I use my seam rule and this line to ensure accuracy. And here is a quick nod to PRESSING. It is game-changing!


At the hem, I fold it back and stitch at 5/8". I trim it to a scant 1/4", clip the fold, and turn it out. I do not poke anything in anywhere or any of that! There shouldn't be a need for poking and prodding. 

blue annotation because I forgot to take a photo of trimming

Another tip - always mind your markings. Notches and such exist to ensure pieces match where they should. The only time I'll ignore markings is when it is literally two straight pieces coming together and I know they have to be the exact same length. Whenever there is any shaping, curves, etc., I make the appropriate markings and am sure to match up. 

Here on the sleeve, you can see where I matched the sleeve to the body, exactly. 


On the collar and collar stand, I use the pattern markings plus drawing in the seam allowance (this was done with a fixion pen for accuracy) to ensure everything is sewn properly. Fold the seam allowance up on the interior collar stand before sewing, again, to ensure you are accurately stitching at 5/8". Because this is a bulky amount of fabric, I trim this seam with pinking shears after pressing it up. Be careful with trimming - you don't want to remove too much fabric and with it, the integrity of the pieces. Lastly, Wonder Tape to the rescue! Once the collar stand is attached, I use wonder tape to hold the interior stand in place. Using my walking foot and a slower speed, I topstitch the stand. I usually start in the middle so I can navigate the curves of the collar stand more easily. 


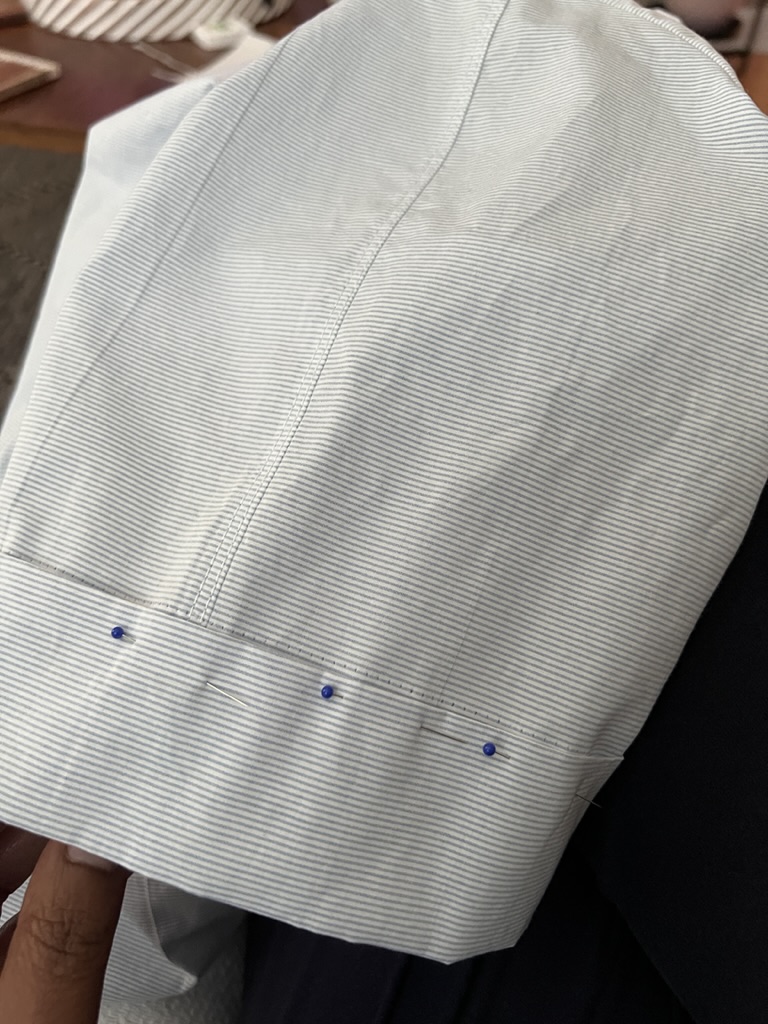
When I tried the shirt on, I hated the sleeve length! Using a scrap piece of fabric, I played around with the idea of sleeve bands and really liked the look. Deciding on a finished length of 1 3/4", I cut pieces 4 1/2" wide (adding seam allowance) and longer than the sleeve opening since it would be a little more difficult to accurately measure the sleeve in the round. I then pinned the band into the sleeve opening to ensure an accurate measurement. I used my walking foot to topstitch the band. 


I need to do the buttonholes and sew the buttons, but that's a straightforward task for my machine. If you struggle with buttonholes and your machine, be sure to read your manual and follow the directions there, run a test buttonhole or two, use tear away stabilizer if needed, and be patient! 


When choosing between two buttons, I'll stitch them on loosely like shown, and come back to it later, deciding pretty instantaneously which one I prefer. I'm going with the smaller button on bottom.

The shirting is a bit crisp, as cotton shirting tends to be. My trick to this is to add the item to my laundry EVERY time. Even if it I haven't worn it. It helps break it in a little faster :)

Watch for finished photos in a bit! 

Next up, I am making a slight detour from the plan in my head to sew up a few pair of lounge/pj shorts and maybe a nightgown or two. In 2016 and 2018, I made a bunch of loungewear and it's about time to refresh. 

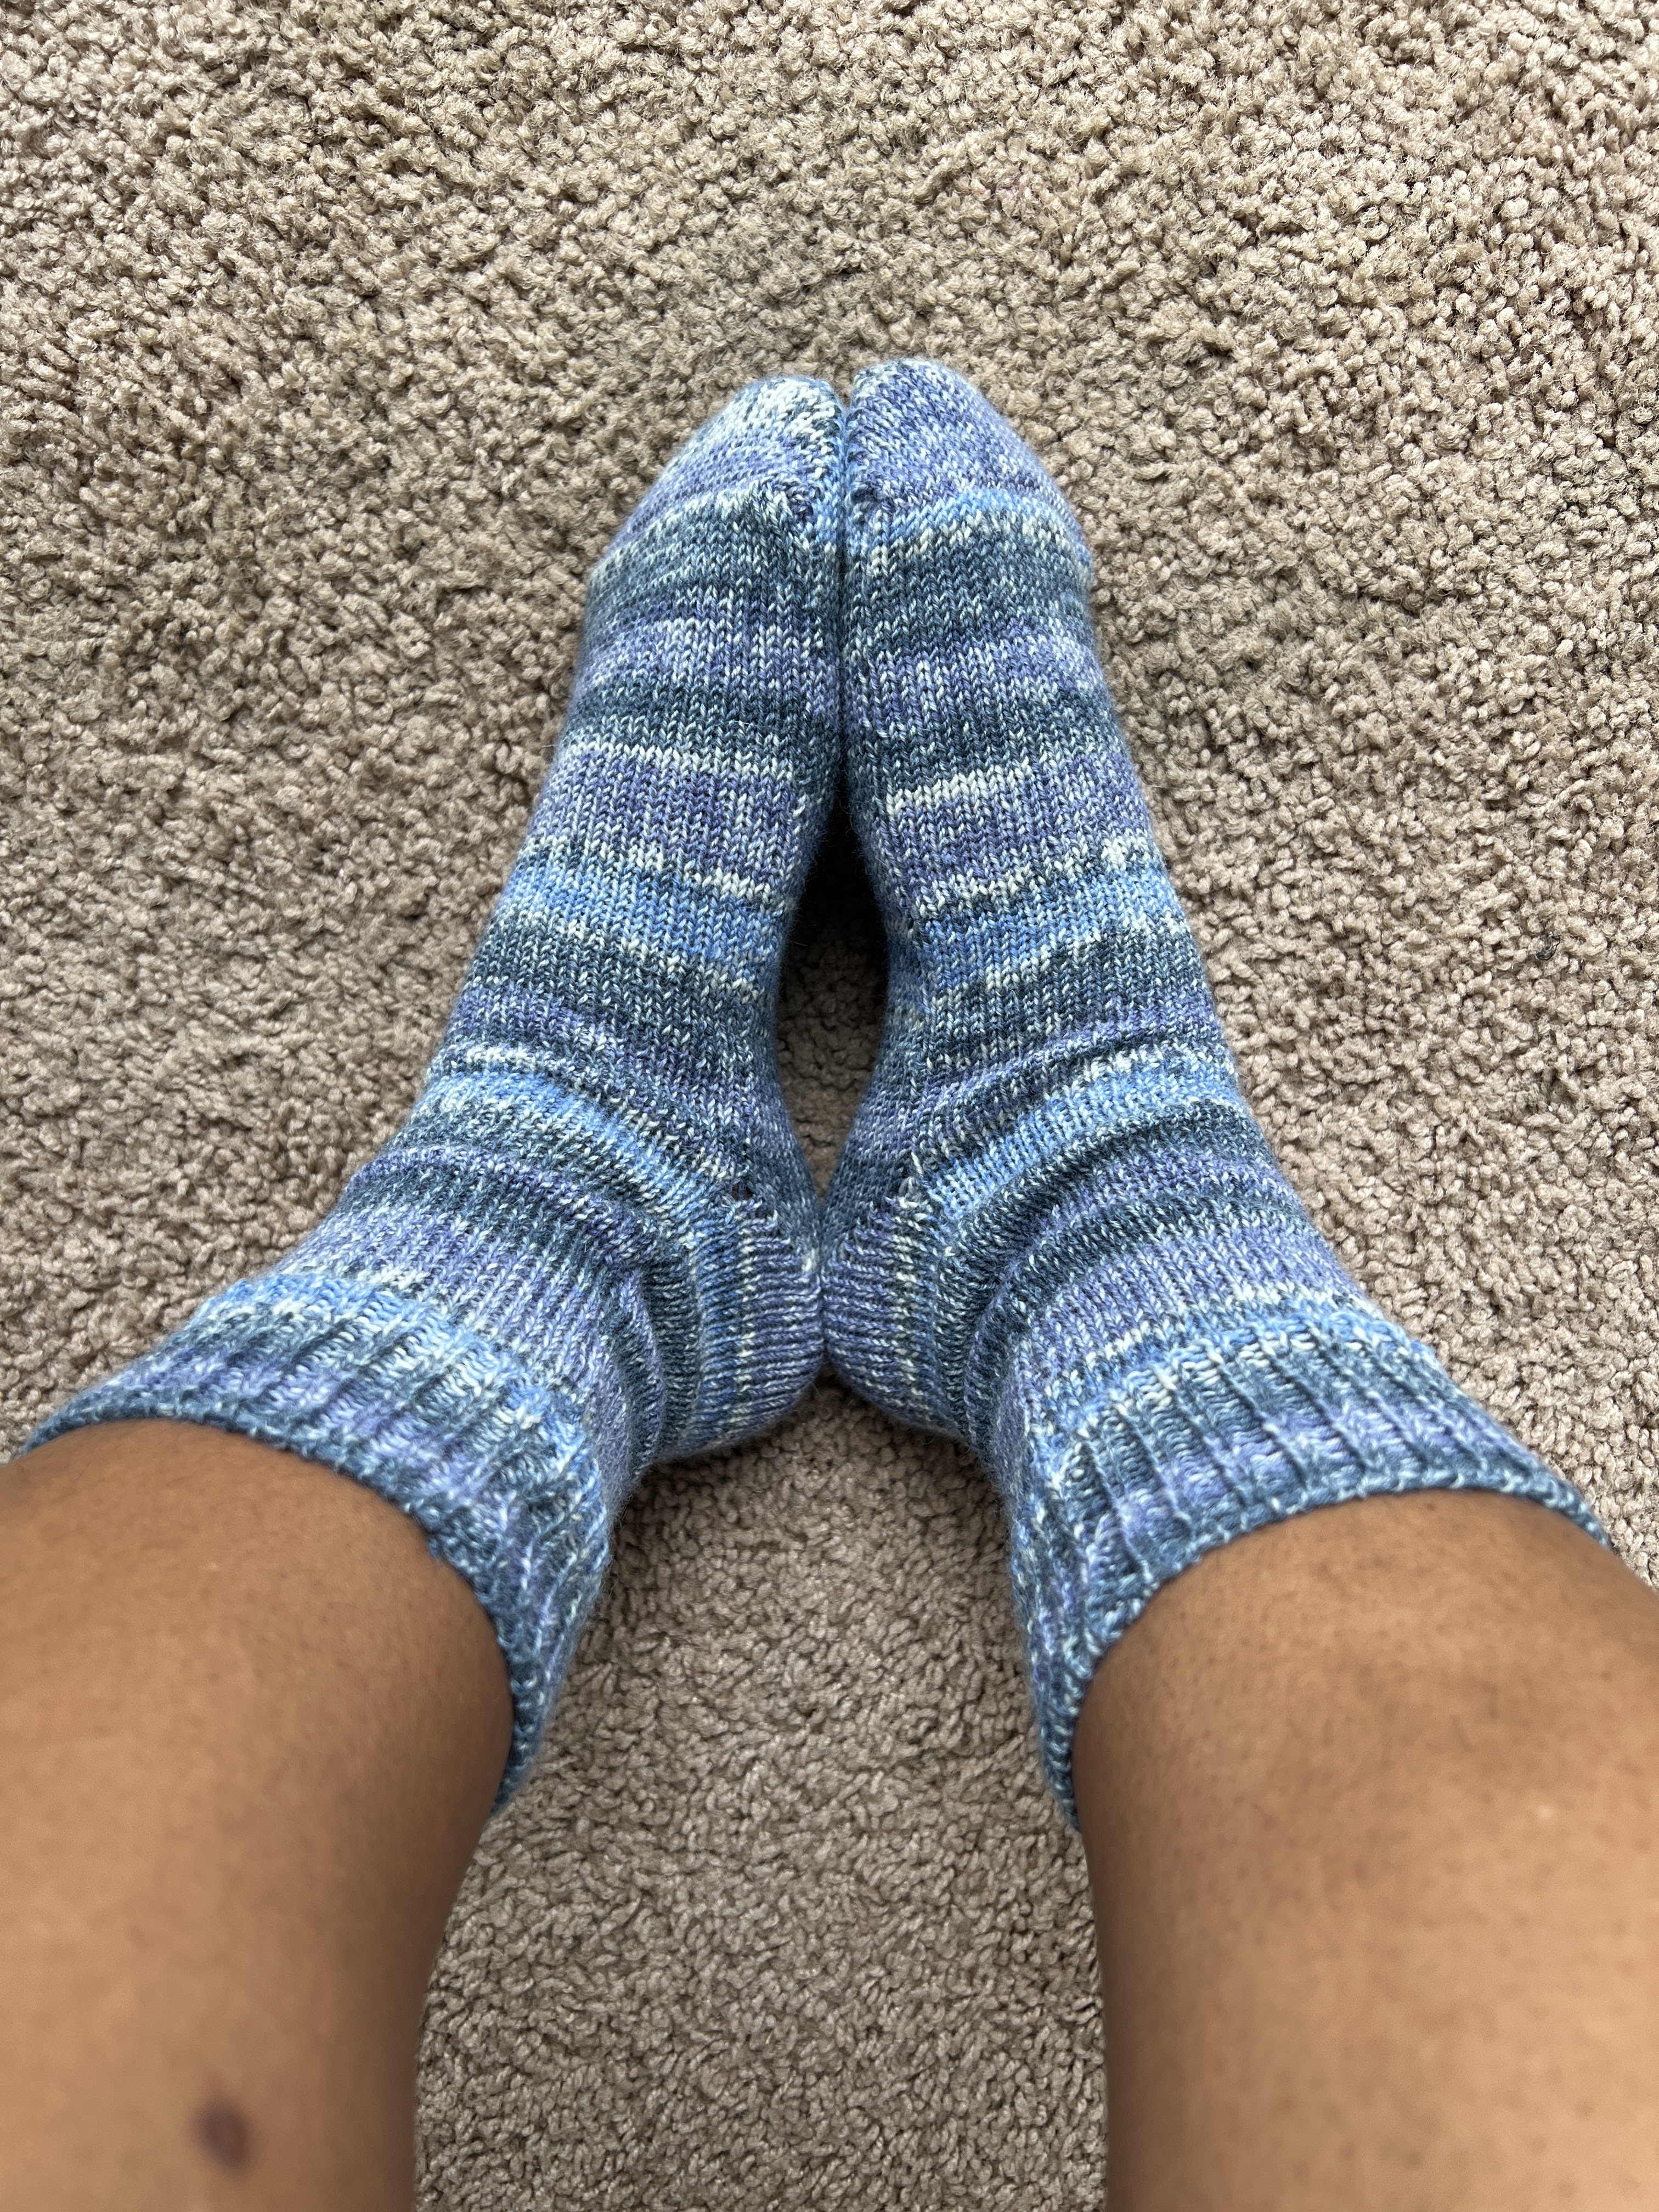
I'm also knitting up a storm, working on State Fair entries(?). 

More, later!

Tuesday, December 6, 2022

Sewing WIP - Style Arc Alexi

I wanted a fitted, zip-front turtleneck and spent a long time thinking about how to do it. I was super over-complicating it. Finally, it dawned on me that a 1/4 zip fleece is basically the same concept, and I found a pictorial which was exactly what I was thinking. Doh.

I had to search high and low for my printed copy of this pattern. I KNEW I'd printed it, but could not find it anywhere.  I'd given up and went into the spare room I'm using as an office, intending to print another copy. Ah! There's another bin in this closet! It was right on top - YAY! 

I haven't sewn a Style Arc pattern in a long time and was a little disappointed when I saw that the size 14 was printed. I've always used a size 12 on top with them and thought I'd have to reprint it (spoiler alert - the 14 is the right size!). It took FOREVER to assemble it - an entire Dateline episode! - and I was really annoyed that the front and back were full pattern pieces - aka a waste of paper. 

I traced everything off, made a 1" bicep adjustment on the sleeve, and called it a night. And then I couldn't find the traced collar piece! BLEH!

This morning, I got started on cutting everything out. I knew the collar as drafted was too tall for what I wanted. In a softer jersey, it would double fold or puddle around the neck nicely, but I was using this firm ribbed knit and inserting a zipper. I decided on a 3" height and then, for some unknown reason, changed it to 4". Sigh. You know where this is going, right? 3 inches would have been perfect. 

I have a lovely, full stash of zippers and this 11" brass zipper with cream tape was perfect. I only wish I'd double-checked the collar height once I had it cut out because I could have shifted it down an inch, easily. 

I marked the center line on the pattern front and fused a 1 1/8" wide strip of tricot interfacing to the wrong side. Cut it down the center and angled to the corners (like with welt pockets), and used Wonder tape to hold it all in place. The zipper insertion went FLAWLESSLY!

The collar scrunches down because 4" is a tad too tall :( but it's still cute!! I need to topstitch the zipper and then I'll be ready to get the rest sewn up. 

I recently finished a dress from the same fabric and I adore it. This fabric was a Fabric Mart find this spring at $3.99 a yard (I snagged 4 yards). There's easily another top worth - ha! Hopefully I can model them, soon.

Here is my recently finished knit sweater :-D


I've also been knitting some gifts and can't wait to share them. Here is a pair of fingerless mitts I snuck in for myself, using the same yarn from my State Fair socks :-D

I knew it would be a close call and yet I was determined to make foldover cuffs. I knitted the first one completely and started the second one. I got to row 72 (of 104) and ran out of yarn. So I frogged them, counted up the total number of rows knitted (because I needed thumbs, too!) and adjusted my pattern. I would have had *just* enough of the patterned yarn to do them in full, but I like the contrast ribbing too :)


Speaking of those socks...I bought a shadow box to frame the socks and my ribbons. Right now, I'm just checking the layout, but I love it! Can't wait to get this mounted. 


I want to sew my blue pants, but also pants with zippers are a real no-no right now. I'm not sure if it's worth spending my energy there, if I can't fit them properly. Maybe I'll give it a bit longer. I wore real pants today to run a few errands and my incisions were very angry with me. oy!

There are a couple of skirts I'd like to sew and a couple of tops, too. I go back to work on the 19th and those first two weeks back will be 3-day weeks (WHEW!) so, I may be able to eek out a couple more garments before the year ends.

OH MY GOSH I CANNOT BELIEVE IT IS ALMOST 2023!!!!


Wednesday, September 7, 2022

WIP: Burda 6/2022 Vest

I don't actually have much to show :-p

I have been itching to sew but not motivated enough to do it. I had SO much on my list for summer and didn't get much done. I'm ready to move on to fall sewing considering how slow going things have been. I decided to work on the vest/tabard from Burda 6/2022. I am using a wool suiting that I scored from SR Harris (2 3/4 yard for $8!). It's a medium weight and is perfect for this pattern. I may make a matching pair of shorts from the pattern I'm using for my daughter. 

I have pretty standard Burda pattern adjustments. I tissue fit the pattern to my dressform and so far, the changes I made seem to be working out. 

This weekend I traced, made pattern adjustments and cut the paper pattern out. Today, I started cutting the fabric out -- I cut the fronts, side fronts, back and tabs. I interfaced all the bits that needed interfacing. Then I got ahead of myself and sewed one of the front and side fronts together - I forgot the pocket!!! DOH!

Looking good!! I LOVE this color!

Still have tons to do...but I hope that I can finish the outfit and the jackets for the babies before the end of September. 

In other news...

I WON FIRST PLACE IN THE MINNESOTA *~STATE~* FAIR!!!!!!!

Y'all! I was too excited! And if you follow my IG, you know this already! LOL!!

I have Blue. Ribbon. Socks.!!

Here is the Rav page for them: Blue Socks

I ALSO placed for my sweater (3rd place)!
Rav page HERE


I was about to melt trying this on for pics though! LOL!!! 
The wool is toasty warm! Can't wait til December!


Joy.

Is it possible to correct my posture at this late stage in life? LOL!!!
Also, these jeans are MY FAVORITE and their from American Eagle and I laugh every time someone says a store is "too young". Pfft. Buy what fits/works for you!


The judges commented on the different stripes on the sleeves - they called it very attractive! And they noted how well the stripes were matched :pats back:
I lost points on the marled ribbing - which was not a design choice, it was a mitigation. I'm happy with it though, but was frustrated that it pooled differently on the second half. 
Also, they didn't like my band of light pink on the right sleeve...but I always add some little tweak or detail to things that are just for me. 

I also placed 3rd for the girl's ballet sweater (photo HERE, Rav project page HERE)


I am so grateful for the wins and proud of myself for entering (I almost talked myself out of entering!). I can't wait for our next MK meetup so I can hear all about other's projects and wins. <3

I finally finished up the sideways knit that I'd been blogging and it's CUTE! Woohoo!


Monday, August 1, 2022

July Wrap Up and August Plans

 My July plans were:

  • Burda 7/2022 birthday dress
  • Socks at knitting camp
  • MK summer cardigan
  • Butterick 6640
  • NL6692

I made my birthday dress and socks. Woohoo! :) I did not get to my summer cardigan, but I do have two machine knit tops as WIPs (I need more yarn for both). 

I also cut out a pair of shorts from Burda 8/2014 for my daughter and made a couple of Cricut projects.

WIP: sideways knit sweater with hand manipulated lacy sleeve

MK socks with Paton's Kroy

MK socks with Wisdom Angora Lace
So soft, warm, and snuggly!! This yarn has been discontinued. I bought 4 skeins (all solids, boo, but Yay!)

I got really excited about these pleated shorts...then she balked at the length. sighhhhh.
We'll see what she thinks once they're ready to fit.

July turned out a little different than I anticipated. I ended up taking a trip to the ER last weekend turning the entire next week into a wash. I just wasn't able to do much of anything. Bonus though was time with the babies.

B is in FULL toddler mode and it is hilarious (well, at least to grandma it is! haha!)
At one point, I asked him to come get changed and he shook his head and said, No, while walking away. Then he came to "help" while I was making dinner. He repeatedly started the dishwasher and kept pulling all these strainers and bowls out of the cabinet.

F is obsessed with B and never wants to stop going. I kept trying to put him down for a nap, but now, he just fights til he passes out. 

I broke out the Cricut this past weekend to make a birthday present for my sister. She loves Scrabble and I've been meaning to make these coasters for her for ages. I finally got it done and I love the way they turned out! 

The wood blanks are 4x4 inches and I wanted them to fill the space as much as possible. I tried to very closely match the orientation of the point value with the letter. I then did 3 coats of Modge Podge with about 10-15 minutes between coats. Did you know that it takes 3-4 weeks for it to fully cure?!? I did NOT know that! Whew! Once fully cured, no sealant is needed. However, I would like a glossy finish so I'm going to get something to spray over top.

I cut out 3.5x3.5 inch squares of felt and adhered them to the back with the Modge Podge. The felt is adhesive, but I wanted to ensure a really good seal. 

Lastly, Beyonce's 7th studio album was released on Friday. It is full of fun-upbeat dance music but Thique has  heavy baselines, and THAT is right up my alley! :) I’ve been bumping the song all weekend. 

Someone posted that merch was available for 7 days only so I go to the site. $45 for a T-shirt?!? Beyoncé or not, there's just no way I'm paying that much for a tee, so I made my own! I really wanted to use this silver holographic vinyl that I had on hand, but I could not get it to weed cleanly around the curves (Cricut vinyl in general, sucks). I pulled out this Siser glittler vinyl in gold and made quick work of finishing the tee. It's a men's medium and fits well through the body, but it was long. I chopped off 9 inches, folded up 3/4" and hemmed it on my coverstitch machine. Woohoo!


August's plans? eh.

I am going back up to St. Cloud on Saturday for monthly  machine knitting meetup. Mainly because I had stuff I forgot to buy when I was there for camp, but I am also interested in the meeting topic for the month. 

The following weekend I am in Chicago for a bridal shower. Then, in the last 5 days of August, I have grandson F's 1st Birthday, out of town friends visiting so we can go to the MN State Fair, and my husband's birthday. 

Oh, plus I'm trying to knit a sweater to enter into the fair and that has to be completed and dropped off by August 15th. 

And I have several medical appointments as I try to figure out these health issues.

So what are my August plans? TO SURVIVE THE MONTH! haha!

I plan to finish the shorts and a top for my daughter and hopefully the Butterick shirt dress. I also hope to finish the 2 WIP machine knits once I get more yarn, knit the sweater for the fair, and finish the teddy bear I knit for the babies. 

As always, more later!