My Simplicity is almost done (needs a hem) and it looks really good! For March, my challenge focused on McCall's patterns. I realize the gathered skirt takes me a tad bit away from my original mission, but not by much.
I cut out a pattern size 14, which is the largest size I had in my envelope (no clue why I didn't buy the larger size) and sewed a half muslin. When I put that first muslin on Lily, I was so confused about where to even start. I went through my Pattern Review and blog history and realized I've sewn very few fitted, woven McCall's patterns.
Now, if I'd had the larger envelope, I likely would have cut a 14 front, graded to a 16 at the waist, and 16 back. So while a smaller pattern can account for some of the issues, there was just a lot that was SO far off of my body!
Muslin #1
On the front bodice, we have a dart that's incredibly wrong for me, and the (again) obvious need for a tuck at the armhole. The second photo shows that the shoulder is a bit too long. I later realized that the neckline seamline wasn't quite reaching where it needed to.
The back bodice was a mess!
Never mind the waist, the back waistline has elastic in it, so that gets pulled in quite a bit. But I felt at a loss with how the entire upper back was fitting. There were so many cuts and slashes and marks and...whew!

Muslin #2:
Things got even crazier! LOL!
I realy didn't know how to add the neckline space that was needed. Turns out, according to my books, I should just raise the stitching line by the amount needed, so this slash across the chest was ignored. And if you look closely at the waist, it wasn't actually lining up where it needed to be.
I had also aded an underbust waist dart here (later removed), and was still working on where the dart needed to be. The shoulder was narrowed here as well.
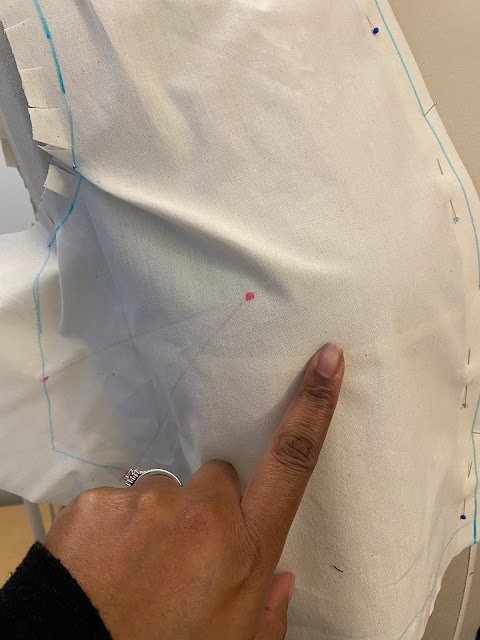
Photo 2 of the front shows a bunch of mess. I cut the side seam with a bunch of extra fabric and drew in the stitching line and where I thought the side seam needed to be. I also slashed at the belly to allow more room (remember the dart?).
Lastly, you may notice that the waistline isn't level.
The back is looking much better at this point. I shortened it 1" at the waist here. I'd also taken a 1/4" tuck out the back armhole.
I then sewed the front and back pieces together and tried it on (filling in the slashed areas as needed). When I got my Beatrice and set it up, I wasn't sure how I determine where the actual placement for neckline, armhole, shoulder, and side seams needed to be. I made some educated guesses (placing the necklace I wear daily on the form to gauge that, measuring my shoulder in a nice fitting top, etc) but it wasn't quite right. The muslin fit a lot different on me in those places than it did on the form.
I added back the fabric I removed from the back armhole, I added 1" to the waist circumference of front and back, I removed the dart from the front waist and took a tuck to allow for the shortening of the back piece and to level the front bodice (posture+bust).
I transferred the changes from muslin 2 to the tissue and cut out a sleeve. I had just taken a course at the virtual Sewing Expo about bodice and sleeve relationship and didn't really like the fit of the sleeve. I was so confused about the poor fit that I had to check the armhole against what was touted in books as a "good armhole".
Looks okay? It just had SO much sleeve cap ease
I attempted to shape the cap better while removing some of the ease, but realized I didn't know how to account for the large amount of additional width I needed to add to the bicep. The pattern has a 13.5" finished bicep and mine is 14.25" which, in this woven, semi-fitted bodice, I wanted a minimum of 1" of ease. So I added 2" to the bicep (finished width of 15.5").
The pencil lines and highlighting shows my attempts at making the sleeves fit better (I sewed 2 sleeve muslins before going back to something closer to the original cap).

Last shot! Whew! Now, we know I would normally never in a million years consider multiple muslins, but the whole point of this exercise is to know what needs to be done for the pattern companies I tend to be interested in. But things were looking good here!!
When I shortened the back I folded out 1" which meant removing 2" of length. ooops. So never mind the side seam difference :-D
After trying this on, I was confident of the armhole/side seam point and allowing a measuring tape to fall showed a closer idea of where the side seam should be (line marked with the small pins). And while it looks like there's more room needed on the front, really, it was needed in back. The front side seam is shaped and the back is rectangular (because of the elastic). When I gathered the back waist to the length it would be with the elastic, this became clear, and I added the 1" to the back waist mentioned above (graded to nothing at the underarm). This also resolved the seemingly excess fabric in the front waist.
I also realized I needed a little bit more of an adjustment for my rounded upper back. This adjustment went from 1/4" to 1/2".
Summary of pattern adjustments
Front:
Add 1/2" for neckline
Add 1/4" to front length
Remove 1/2" for narrow shoulder
Lower dart 1"
Add 1" to waist circumference
Tuck at waistline 1" at side seam to match back, tapering to 1/2" at CF
Back:
Add 1/2" for high round back
Add 1/4" to the back neckline
Remove 1/2" for narrow shoulder
Add 1" to the waist circumference
Remove 1" from bodice length
Other:
Adjusted collarstand and collar pieces to match new neckline
Added 2" to bicep and shaped the cap while removing some ease
Added 2" to back skirt by cutting 1" away from the fold
Shortened lower ruffle on view B skirt by 4"
Used smaller buttons
The bodice fits SO nicely. I am very happy with it and will post a review and pics in a follow-up post tomorrow or Tuesday.
ETA: Finished garment post
HERE


4 comments:
You are just having too much fun playing with Beatrice. She is showing you so much. Great work.
Well these are a whole bunch of unexpected adjustments 😵💫 I'm so wary of the Big 4 patterns because of trust issues like these lol
Haha! I don’t think this is a “Big4” issue. I’ve sworn off Grainline and ClosetCore because of horrible fit issues. It’s just the reality of blocks being designed with a certain body in mind…and then whether or not your body aligns with that.
I made fewer adjustments to the Simplicity and am curious on Vogue. I may get my Big4 and Burda out of the way before moving on to the handful of independent pattern companies I actually use.
Learning so much! I’m going to splurge (it’s not too bad really!) on an in-person session to create a fitting shell.
Post a Comment