This pattern was SUPER popular back in the day! There are 127 reviews on Pattern Review and many, many people made the pattern multiple times. It's a winner.
I was stuck on how to use Lily to fit a knit pattern. If sewing pants I would choose a size 18 and make crotch adjustments, with skirts I use a 16 front and 18 back. For tops I used to use a 14 neckline but that's not right anymore. Ultimately, I looked at the intended amount of ease and decided to use my normal Big4 sizing choices: 16 top and 18 for the back skirt.
If you somehow managed to own this pattern but have never sewn it, it has a very interesting construction! There are 2 main pattern pieces - a front with back skirt integrated into the pattern piece and a back bodice piece. There's also a binding for the back neckline.
I think this construction is pretty standard for cowl necks, but I am always enthralled with how neatly it finishes. There is a pleat that ends right where the cowl begins. I pinned and basted the pleat by hand. When I turned the cowl facing back on the shoulder seam, I hand basted the corner where it intersects with the back neck binding and then ran it through the serger to sew it. It ensures nothing stretches out of shape or shifts.
For the armhole, I suggest pinning front and back bodice together, stitching for reinforcement at 5/8" about an inch and then clipping. This will allow you to hem that armhole opening neatly. Where it called for "narrow hemming", I just turned up 5/8" and coverstitched.
There were lots of versions of this by the fitting mavens of the sewing blog community and after reading a bunch of posts, I decided I would be fine just cutting the CB seam of the back skirt at an 18. Many cut along the side dart (where the side seam would sit) to add width, but I don't need extra on the front skirt...just the back.
I just cut the CB seam (left) at the size 18 mark.
I added 3/8" to the waist on the back bodice piece to match up to the size 18 skirt back and shortened the bodice 1 1/4". Did a 3/8" high round back adjustment, keeping the space created at the neckline (did not sew the dart). I only had 1 5/8" of fabric and the integrated front piece is a hog, so I added a CB seam to the back bodice (no fitting here, just a seam for construction and I added the seam allowance directly to the fabric).
I added 3" to the front cowl tapering to nothing at the point (do this! it helps it sit better!).
Lastly, I decided to do a 5/8" coverstitched hem (instead of the 1 1/4" included) because I liked the length.
The horizontal seam in back sits low and I was worried about it bisecting the body in a weird way. It's fine! I think it's important to get the back length of the bodice right in order for this seam to not feel "wrong" on the body and to avoid pooling.
The wind was blowing fiercely, but you can see I achieved a nice fit through the waist and lower body. Yay!
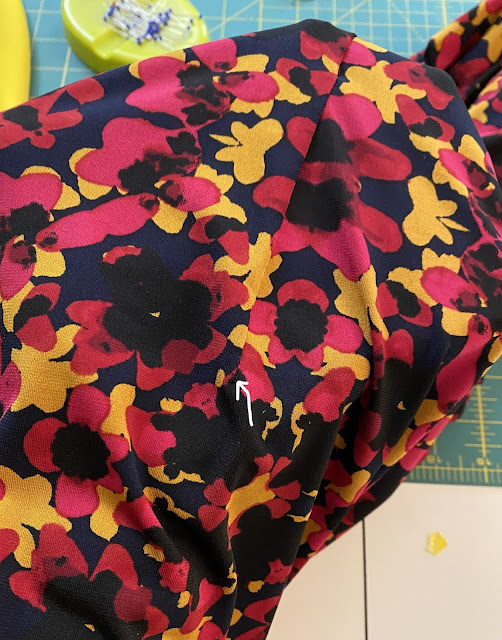
I picked this fabric up from SAS Fabrics while I was in Phoenix. I went to take a pic of the finished dress on Lily and was like, what the heck?! (WTH funny vid) I did NOT see this pattern in the fabric. I moved the phone camera and looked at the dress - nope. Put the camera up - pattern. IDK what kind of optical illusion is happening!
It is off center but I can't be bothered by that because I LOVE THIS DRESS!!! And, I just don't see the pattern when it's on my body - LOL!!!!!!
size 16 with size 18 skirt back
add 3/8" to back bodice waist
shorten bodice 1 1/4"
3/8" high round back, adding neckline width too
2.5" added to cowl at CF
hem at 5/8" instead of 1 1/4"


9 comments:
Pretty Dress( beautiful colors) and nice fit also!
Very nice!
You are an amazing seamstress!! Love your posts!
Love your modeling of this dress and the shoes are beautiful too! I'm a quilter but your post is motivating me to sew a dress for myself.
Great job. Looks like off the rack at a designer store....oh wait it is!
I loved this pattern and made it multiple times back in the day! Even making it maxi-length at one point so I was so thrilled to see you showing this pattern some love. Also, making an amazing new version. I think this pattern is timeless and should definitely have it's day in the sun again.
This was the pattern that never worked for me, but I loved seeing everyone else's versions back in the day. Your dress looks awesome and the top is going to look amazing paired with the blue fabric for pants.
You look like a million bucks in this. I didn't notice that the print was off-center until you pointed it out, and now of course I can't unsee it, but we know that the Muggles will never notice :)
Nice dress, I have the pattern but never made it. Maybe someday I'll have an occasion that requires a dress. I've been at quilt shows and taken a photo of a quilt and the camera sees something totally different. I seem to vaguely recall it's something about the camera focuses on the light (or dark?) parts, where our eyes and brain take in the whole thing.
Post a Comment