Pages

Thursday, May 28, 2020

Burda 4/2019 (again!?)

First things first, in just a few days we'll kick off our #FayesTopsThatPop sewing challenge!


Currently, In-House Patterns is offering 20% off of all patterns through the end of the month. The discount will automatically be added to your cart at checkout. 

I am a huge fan of InHouse. I own the entire catalog except for the Diana blouse! Alexandra is a professional pattern drafter and offers patterns in sizes 0-16 and cup sizes A-D. 


Click HERE to shop patterns

Also, Sew House 7 is offering a 20% discount for all tops, including dresses with top options. The discount code is FAYE.  This sale is through midnight on June 1st. Sew House 7 has an extensive size chart. The standard line is intended for a B/C cup and includes size 00 (bust size 31") to 20 (bust size 47"). The curve line has cup options for C/D, E/F and G/H depending on style. It includes sizes 18 (bust size 45.5") to 34 (bust size 61.5").


Click HERE to shop patterns


I have yet to sew a SH7 pattern but I do own a few! The Burnside Bibs WILL happen for me this summer!! :) And I am going to snag the super cute Underwood today! 

****************************

I have to say that April 2019 was probably my favorite issue for all of 2019. This dress is item number 5 for me from that issue!

I saw a dress somewhere that had a ruffle across the back only with a "normal" front with mixed prints. I could not find that image again. Often, when I'm browsing the internet I will screenshot things that interest me so I can find them again. I especially like this method because on my phone and my computer, screenshots save to a specific place so I don't need to endless scroll files/photos to find them. I must not have taken a screenshot this time. Wah. 


At any rate, I liked this top initially but not the tunic length. I'm just not a huge fan of tunics! Burda lists the finished back length as 30" so I thought adding 6" would be appropriate.  I marked 6" from the edge of the back along the (curved) hemline and then added 3/8" seam allowance because I knew I'd be doing a narrow rolled hem. 

On the front, I added 3/8" to the front hem and cut a rectangle of fabric out that was 1.5x the width of the front (I wanted a really soft gather) plus 5/8" seam allowance on each end. I added 3/8" seam allowance to the top and 3/8" seam allowance on bottom. 

I used my serger to gather the fabric after practicing on a scrap. More on this later! I actually learned this technique and used it to make a Ogden hack. I recorded a video and will share later! It is on my IG grid if you're interested and can't wait :)

I cut a size 40 neckline, 42 through the armhole and for the front, and a 44 back. I ended up taking the back side seams back down to a 42. 

I did a 5/8" foward shoulder adjustment which may have been a hair too much. I have folds which I think are ALSO due to just having more sloped shoulders than Burda drafts for. In a casual dress like this, I'm not bothered by it. The neckline and upper back feel AMAZING though! So glad I had the lightbulb moment over forward shoulders!!

Look at that upper back fit!! :-D

I was deliberate with my stripe choices but didn't worry (at all!) about trying to do anything at the side seams. The back has the prominent red stripe down the center and you can see the horizontal plane of the stripes match. I chose a piece for the yoke with no narrow stripes and cut the collar to feature the narrow stripes.  I used a solid navy poplin on the inner yoke and collarband facing.
the back crossover makes a giant pleat on the inside!

The fabric is a cotton voile so it is as light as feather! <3  I bought this in October 2017 from Fabric Mart and knew I was saving it for something bold. Well, this dress fits!! 

Everyone is entitled to dress in a way that makes them comfortable. But please, don't put your requirements on me! I got a lot(!) of inbox comments on IG about this being (dirtyword) flattering. I just don't dress to de-emphasize my body. I always say...I am 5'5" and weigh 190lbs. I ain't gonna "look skinny" so I ain't gonna try to "look skinny"! It's loose and voluminous and comfortable and cute and I adore it. So that's that!


I briefly considered a ruffle to the armhole but then decided to stick with my original plan and keep it sleeveless. I think this will keep it more versatile and allow me to wear it through early fall with a jacket. I fit the armhole pretty closely but I'll have to see if I can layer a close-fitting tee underneath. 

It was cute and I thought it balanced the lower ruffle well.


Making bias binding from lightweight cotton is such a joyous experience! It came out beautifully!! Also worth nothing that I only added 3/8" seam allowance to the armhole in expectation of using binding. So much easier to apply with a smaller seam allowance. 

Lastly, I used these large-ish buttons I had in stash. I wanted everything about it to be standout!


EVERY moment of sewing this dress was just SO fun. And I can't wait to wear it! 


Thursday, May 21, 2020

Style Arc Clare Pant Muslin

This wasn't intentionally a muslin...at some point I decided maybe it'd be a wearable muslin...but nah. And I'm not 100% sure I'd remake the pattern. Mayyyyyybe.

I like Style Arc's design and drafting. They are on my $hit-list for their crap instructions now. I'm not sure I'll be in a hurry to buy more patterns from them and certainly nothing too complex. 

1. - The illustration shows a pleat that's just folded out and basted but the instructions say to stitch the pleat.


2. - The way the front is constructed is really bulky and this fabric was *just* barely opaque and had a lot of drape. If I decide to sew this pattern again, I may eliminate the pockets. I could reduce the height so they are caught in the foldover band but not also folded over. However, they are VERY narrow - deep but narrow so I'm not sure how useful they'd be. 

3. - Why would you stitch through the elastic?? If I decided to sew it again, I'd just make a casing and keep the gathering to the side front and back.  Oh, and my pattern says to use elastic that is 1 1/5" :sideeye: I don't know if they intended 1 1/4" or 1 1/2" but the fold-down waistband is just under 2" so I went with 1.5" elastic. 

I've been going back on forth on sloper drafting. I am lazy and not super interested in drafting, but I NEED a sloper for my upper body and of course it would be super helpful for the lower. 

Oh, this fabric? atrocious. That's what moved it from garment to wearable muslin. It's a poly suiting from Fabric Mart. I'm not anti-polyester entirely but this stuff just SHRED the moment I cut it. 

Anyway, I then decided to go for it by matching the crotch curve of the pattern to my "fishbowl" exactly. (I talked about that here).  So I matched the curve of my body to the stitch line of the back pant piece.


(poorly) annotated below so you can see the changes


I lined up my crotch point with the patterns and I would have needed to go SO deep into the pattern and knowing I need more crotch extension and room through the inner thigh, I split the difference and extended the crotch point 1" and scooped/reshaped the crotch curve. As you can see, this takes away a lot of width so I've added back at the side seam. 

BUT otherwise... IT WORKED!!!!!! Woohoo! 

My addition at the side seam isn't quite right. It's too curvy too soon -- which is obvious now! On my body, the side seam pulls just a bit at the fullest part of my butt (look at the wavy butt lines!). and there's excess fabric up top. 
I hadn't pressed my seams because - full muslin at this point

The difference between left and right here is that I have the front rolled over the full width of the elastic. I need to shorten the front rise considerably if I make them again! :-p This is totally my natural stance, unfortunately! LOL!! But the good thing is...no weird fabric collapsing at the back thigh.


I cut out the back pattern piece even though it looked "weird". Remember all that L vs J crotch curve stuff from back in the day?

Well...all that and I went right and cut the front out! Without adjusting it to my fishbowl. DOH!. So the front is way, way too long. 
Red - my body vs. black - the pattern crotch curve

What I hadn't noticed is how similar this pattern was to Burda 2/2017. I swear pretty much everything exists as a Burda!!! 


Oh well...I got the pattern during a sale and paid about $6 so...maybe I should give them another go since I know what to do. And maybe this time I'll use linen ;-)


Don't forget we're going to be starting our Tops That Pop! challenge as of June 1. See this post for more information! Also, I realized after the fact that I labeled it a summer challenge - really, it's a challenge to make new tops so friends down under, please feel free to sew along and make some new tops for the upcoming winter months!

Currently, there is a Style Arc sale of 20% off (yes, I know, I don't take back my ragging on their instructions but the patterns tend to work out!). Mimi G has pdf patterns on sale for $3. Style Sew Me has select patterns available for $5. I am also in contact with some other Indie pattern brands to see if they're willing to sponsor the challenge and offer discounts on top patterns. More soon! 


Thursday, May 14, 2020

2020 Summer Sew Along

If you were an active sewing blogger over the past few years, you just HAD to be acquainted with Linda of Faye's Sewing Adventure.

‘Faye’ was one of the sweetest, most supportive sewing bloggers around and unfortunately, she passed away last spring.

A few years ago, Faye started a spring sew-a-long to make new tops for your wardrobe! She called the challenge "Tops that Pop" and it was always fun to sew along and see everyone's new tops.

A few months ago, I had the brief thought of resurrecting the challenge in honor of Faye. And then, I would have random old posts pop up on Facebook or Instagram and bam! a comment from Faye! Or I'd be considering a remake of something and hit my blog archives and bam! a comment from Faye!

The other day, I shared a few new tops that I cranked out and someone messaged me and said, "This reminds me of Faye's sew along." And well...that was the final sign that I should go for it!

Inspo!


  • From June 1 until June 15, we're going to sew new tops for summer! Sure, we'll likely still be quarantined but it'll give us something fun to focus on.
  • As Faye always stressed, it can be any top! Tank top, cami, shirt, blouse, sleeveless, with sleeves, tunics, ANY type of top!
  • There are NO Quotas! Sew one top or sew 10 tops!!
  • We will use the hashtag #FayesTopsThatPop

You can:
Hash tag your new tops and I'll grab them on IG for the roundup posts

-or-

You can send me a photo of your top as you complete them to sewcraftychemist ==at== gmail (you know the rest! I want to avoid bots picking up the address)

  • Sign up in comments and include your blog name and/or IG handle.
  • Spread the word and grab the button on the upper right of my blog!


Friday, May 8, 2020

Creating with Cricut Joy!

This is a sponsored post written by me on behalf of Cricut for Cricut. All opinions are 100% mine.
About two years ago, I jumped on the Cricut train. I'd seen sewers using their cutting machines to add heat transfer vinyl designs to clothing for themselves or their little ones and kept reminding myself to look into it. Then, Cricut contacted me about their affiliate program when the Maker was being released and I jumped on the opportunity.

Cricut recently released a new cutting machine. The Cricut Joy is the perfect companion to quickly and easily personalize anything with one cut and one color, in 15 minutes or less. It is fun, functional, and simple to use! Practical, everyday projects have never been more accessible or easier. If you already have a Maker or Explore Air 2, Cricut Joy opens up additional creative possibilities with unique features and is the perfect companion for quick, mat-free projects and long cuts.


The biggest selling point for me is how compact and portable the machine is. The Maker has unparalleled capabilities - it's amazing. A few months ago I picked my niece up from a friend's house and brought her back home with me until my brother and sister in law could pick her up. It was her birthday and I wanted to put together a quick card. But I just didn't feel I had time to pull out the Maker and my varying supplies (ahem, there may be quite a lot! LOL!) to make one in the time I had. If I'd had my Joy, I could have knocked that out in literally a few minutes! 

The Joy is Cricut's smallest cutting machine ever! It packs away easily, sets up instantly, making it super easy to move from room to room. Not having to transport a mat, combined with the smaller material size, makes the whole system compact and portable; no craft room required! It fits in a cubby or looks great sitting out on a counter or shelf. 

When I received my Joy, I already knew what I needed to use it for!

2020 is the year of babies in our family! I needed a quick gift and decided on a onesie and a card. 


I got all my tools ready!


First up:
I used Cricut Smart Iron-On to create a cute little bowtie.

With the new Cricut Joy Smart materials, mats are optional! The Joy has a full suite of brand-new materials that do not require a mat, meaning less to buy, fewer steps, and faster results. New Smart vinyl comes in extended sizes, with up to 20 feet repeated cut capability, and no need to switch out multiple mats. 

There are lots of options for colors and prints!

The process is SO slick. 

Create your project in Design Space like normal and click Make It.  Unless you're cutting something that is specific in how it can be cut, you'll be given the options shown below.


Because I am using Smart Materials, I chose Without Mat. I am using Iron-On so I have mirrored my design. 

Then clicked Continue in the lower right. 


Choose the appropriate material. 
I have also highlighted the Unload option. I had to use this just the other day because my material loaded slightly crooked. 


Click Go and seconds later, my bowtie was cut and ready to apply to my onesie! 


I pulled out my Easy Press (which I immediately purchased during a Black Friday sale at JoAnn when I got my Cricut Maker!) and input the settings appropriate for the Smart Iron-On and cotton onesie (Cricut provides all of this info for you - don't worry!). 

Next:
I decided to add my FAVORITE thing to baby tees - a 'Hi, I'm New Here' "nametag"! 

So for this project, we need the Cricut Joy mat. I used a piece of Cricut Iron-On that I had in my stash.  The process is exactly the same except for choosing On Mat at the first screen.


Once cut, I weeded the design and used my Easy Press to add the design. Since I purchased mine, Cricut has made some updates and it is now offered as Easy Press 2. There are 4 size options! I have the 9"x9" version and it is also offered in a jumbo 12"x10" size, 6"x7" (great if you're making a lot of kid/baby projects!), and a mini version which people love for adding Iron-On to small areas like on hats, shoes, keychains, etc. 

I love it!!!

Lastly:
I needed a card to go with my gift. This time, I brought my tiny, adorable, Cricut Joy down to the dining room table to work. Score!

Cricut Joy exclusive blank insert card sets allow you to create unique and impressive results in a moment's notice!


There are SO many options of colors and finishes to create unique cards for any occasion.

I chose the cream/silver brush set which comes with cream cards, silver inserts and white envelopes.


For this project, we are using the Cricut card mat. It's pure genius! It has a sleeve that allows you to insert the pre-scored and folded card so that you can cut a design out on the front while keeping the back in tact.

By setting my machine to Joy, I will filter out projects that aren't compatible. Then, I chose cards from the categories list, and baby as a search term. It was tough to choose but I decided to go with the Onesie card to match my gift. 


This is where it gets good! ALL you need to do is click Make it! 


Design Space knows that since you are using a Cricut Joy insert card that you're using the card mat, and there's no need to make any adjustments! 


Insert the card into the mat, press down to secure the card to the mat, and insert the card mat into the Joy. When the materials (mats or Smart materials) come into contact with the rollers on the machine, it automatically loads into the machine. 

The Joy makes quick work of cutting out the design and Design Space lets you know when to unload the mat. 

Gently remove the card from the mat (the cut out cardstock will remain on the mat!) and add the insert card into the slots and you're done! 


Yes, I later decorated my Joy with this cute smily face and Smart Vinyl!

I've chose to write my own message in this card but the Joy also writes! Cricut Joy compatible pens are available in a wide variety of pen types and line widths and can write in a variety of styles. 

I had so much fun with the Joy that I cranked out graduation cards for several graduates who'll be missing out on their Commencement - including my daughter! :(

I also made a ton of Mother's Day cards for family and friends and will be back soon to show off the writing capabilities of the Joy!


More later! 

Learn more about the Cricut Joy or any of the other Cricut cutting machines, Smart materials, Easy Press, and other tools and materials. 

This is a sponsored post and contains affiliate links. If you purchase anything through these links or via the banner on my blog, I will make a small commission. All opinions are genuine! 
You all know I love my Cricut!!


Thursday, May 7, 2020

McCall's 8028 & Burda 4/2019

First - It's Me Made May! I know plenty of people hate it (that's okay!)...I know plenty of people misunderstand it (it isn't about posting photos daily or sewing a bunch of stuff to have for May)...

This May is different of course with many around the world sheltering-in-place, but I always welcome it from the perspective of finding new sewers to follow and this year, not seeing masks over and over and over throughout my feed. I am obviously not begrudging anyone who is making masks, selling masks, donating masks - it has just completely overtaken Instagram. And just as I don't want to watch Coronavirus news nonstop, I don't want to see masks in my timeline nonstop. No shade to anyone, always DO YOU!

First week down! Most days, I work in the a.m. (in loungewear), take a break to exercise, shower, and eat, then work some more. Some days, I never make it out of my pjs :)
Not in order by day :-p
Burda 1/2018 hoodie and M7061 pants * S8424 leggings * V1401 pants * M6886 dress
M6654 skirt * Burda 12/2016 pants * M6886/M6964 hybrid tee and V1411 pants
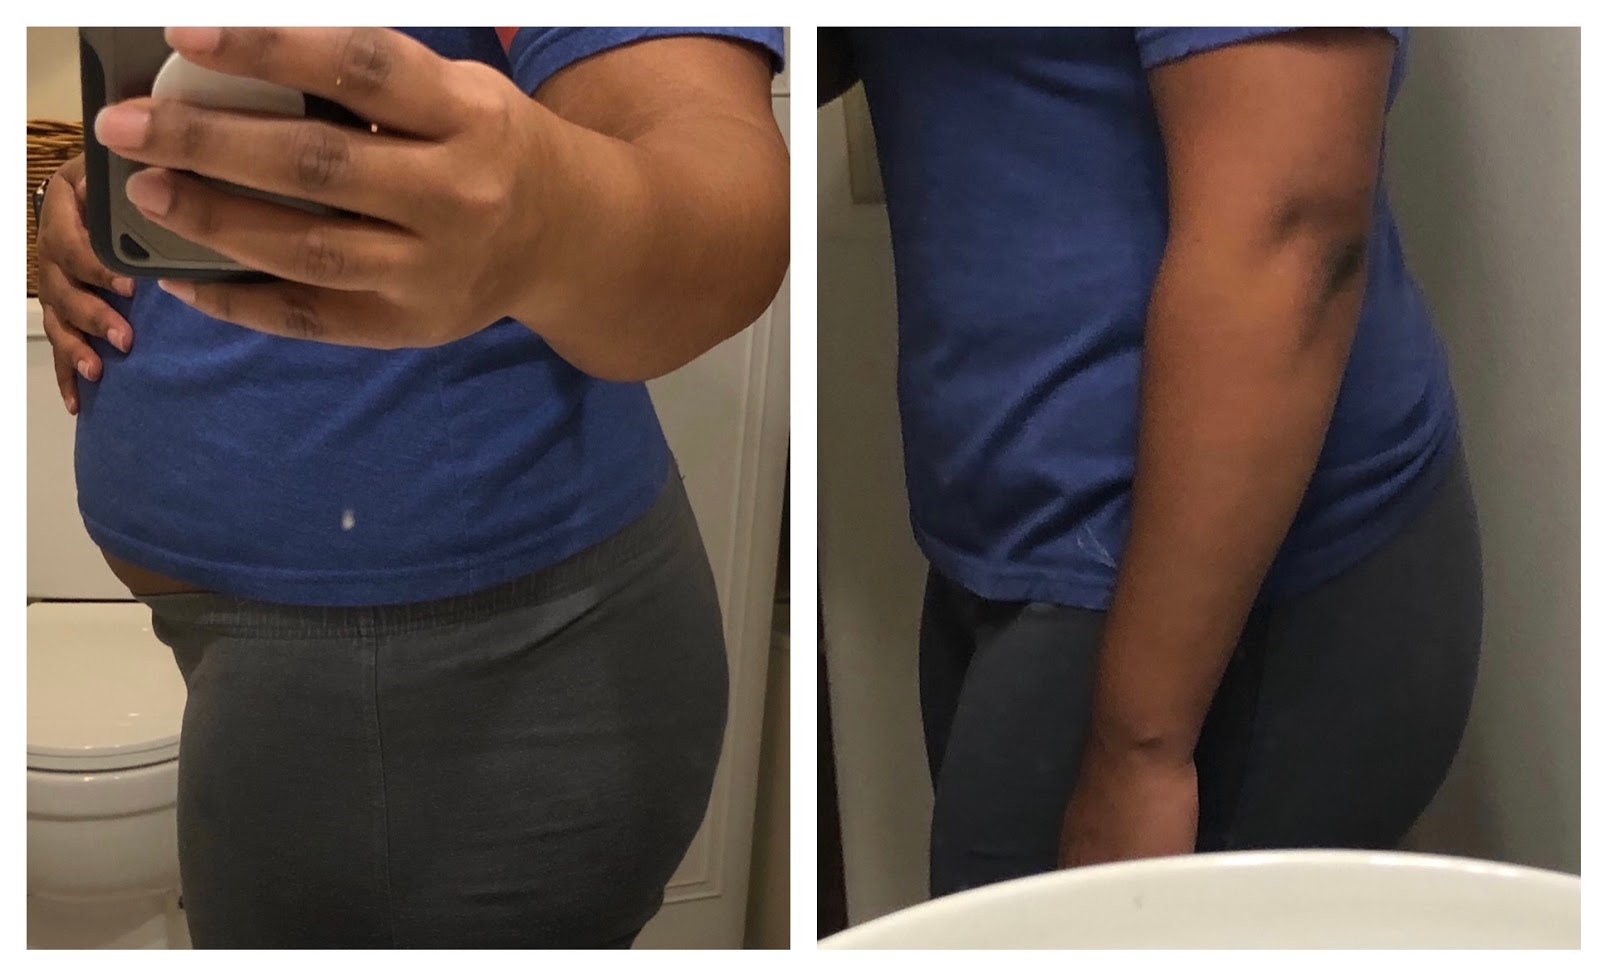
I posted to Instagram last week about my recent struggles with endometriosis. It has been so tough! and painful!! And I have this insane bloat every month.

So while I was prepared to get pics of a bunch of stuff, I just...can't right now! Blergh. Tired. Bloated. In pain. But I am so backed up on project posts that we're gonna just settle for good enough. K? Great! :-D

Now, I happen to like jumpsuits! I will say, they need to be knit or have a closure. Ain't nobody got time to be wrangling in and out of a woven jumpsuit without closure.
I missed this jumpsuit upon release and was excited by it when buying some newer patterns. I'll say, it isn't innovative. Now that I have some experience with understanding more how patterns are made, this is something I COULD HAVE made from an existing pattern. The bodice and sleeve are basically chopped off across the top, halfway down the armhole!

I knew I wanted a jumpsuit from this fabric I snagged from Fabric Mart awhile back. I wish I'd bought several yards of every color they had (I made THIS sweatshirt from the cut I had in white)! It is a really nice fabric - poly/rayon/lycra blend french terry. It washes, cuts, sews and presses well. It's 2-layered and the distressed fabric sits on top of a base fabric so nothing is exposed. Can't ask for more! I only had 2 yards of it so I couldn't afford to fussy cut and luckily, I didn't end up with the distressed holes over any parts. LOL!

In s/m/l patterns I usually take a Medium top and Large bottom. I wanted a snug fitting garment and cut a medium top, and on bottom, cut a medium front and large back. On the back bodice, I graded about halfway between the medium and large lines at the waist. This pattern had that lazy grading, each size was 1" bigger at the side seam than the previous size.

I added a 1" wedge to the back rise and shifted the upper back based on a suggestion from Alexandra of In-House patterns (her tutorials and fit lessons are ACE!). Now, these are 1) a knit and 2) snug fitting so I will be curious to apply this to a woven pant. While I still have some wrinkles (that look to me as those caused by inner thigh fullness), I don't have that drag in the back thigh area that I often have. I was curious about an adjustment like this - "changing the balance" is how I verbalized it and then she posted the adjustment after I sent her a pic of my wrinkles.

Once I had it sewn up, I didn't like how baggy the legs were. Just beyond the crotch (so left the waist and butt/hip the same), I took them in another 1/4" on inseam and side seam so I removed a total of 2".
After these pics, I took in the elastic a bit, removing about 2"

I also hated the pant cuff. It was HUGE. Wide around the ankle and too "tall". I removed some height and ended up cutting it off, taking another inch off, then reattaching to the legs with a 1/4" seam. I'll have to measure it to see how to adjust the pattern piece.

Normally, I would decrease front crotch length but jumpsuits are often not cut generously enough through the crotch. Some extra room is needed and while I'm glad I left the front as is, it could use a tiny bit of an adjustment. The back could use another inch. I'd also add a tad more length to the bodice to have some blousing.

The elastic around the bodice works well, it fits well and stays upright without being tight. My sleeve didn't "flutter" but that's probably partly due to the fabric weight and partly due to not making adjustments. While my biceps can technically fit, by not doing my bicep adjustment, I lose the "intended fit" of the sleeve.

Lastly, I *knew* better and still cut the pocket bags from the distressed fabric. I should have flipped them to the smooth side at least; I keep snagging my fingers when I put my hands in my pocket. Doh.

Fun make, nice and quick (a much needed break after several more involved projects), and is a solid contribution to one of my 2020 modified Make 9 boxes. YAY!

*****************
I have been ON A ROLL with Burda magazine patterns! This top is from the April 2019 issue - imo the best of last year. I've already sewn 4 garments from that issue (this one, a black jacket that's done and awaiting photos, this dress, this skirt) and there's more stuff I want!

This top is a simple make - front, back, sleeve, bias bound neckline, hem, done! It doesn't look like much hanging or on the dress form but it drapes *just so* and has that easy-wearing feel that I'm digging right now.


I cut a size 40 neckline and shoulder and 42 for the rest. I did not do a bicep adjustment - doh! I ALWAYS need a bicep adjustment. I have some drag lines and it is a little snug through the upper arm.

I used a white rayon challis that has been in the stash forever. At one point I swore off solid color challis. It seems so much more shifty than prints! My sleeve band must not have been fully on grain. Bleh. It made BEAUTIFUL, perfect, awesome bias binding though!


One reason I really love my Burdas is that I can add my own seam allowance. On a top like this, using 3/8" on the neckline and sleeve bands is so much more preferable than 5/8". On fitted garments I almost always use 5/8" just to have that little bit of insurance.

Since the top is white, it's pretty versatile, but the shape makes it versatile too! It's cute with slim fitting bottoms and those with more volume. I think I'll end up wearing this guy out!


Currently, I'm working on a 'hacked' TB Ogden cami and have fabrics lined up for a few new tops (all with patterns I've made before). I have to shift some stuff until I'm able to do fitting. But still plan to make the SA Clare pants and a couple dresses this month. Stay tuned!

And stay safe!