Pages

Tuesday, May 1, 2018

April Wrap-up and May Plans

Yet another month where it felt like I didn't sew very much but in reality...I did a lot!

This month I sewed 11.75 yards:
  • Butterick 6378 top - 2 yards
    • printed polyester peachskin
    • elastic
  • Burda 7136 shirt - 2 yards
    • border print cotton shirting
    • buttons
  • Ottobre 2/2015 tee - 1.25 yards
  • Burda 5/2018 # top - 1.25 yards
    • eyelets, ribbon
  • McCall's 7757 top - 1.5 yards
    • elastic
  • McCall's 7757 pants - 2.5 yards
    • elastic
  • True Bias Ogden cami - 1.25 yard (the pattern WAY overstates yardage needed)
Favorite: Burda 7136 shirt! But you knew that, right? RIGHT?! :)

FAIL:  I'd have to call the Ottobre tee a fail for now. I will try the pattern again though...one more time. But it is not at all what I envisioned. Mainly a fabric choice fail.

Accomplishments: Playing with the border print on the shirt!! And trying out a new silhouette for me in those McCall's pants. Not something I typically navigate to. I'd also give myself back pats for reworking that pattern until it worked for me. I don't have a lot of patience for that sort of thing in my sewing. I'm getting better though at discerning if it's worth it or not.

I did buy fabric this month...even with last month's bloodbath. LOL!! Those Fabric Mart precuts were too good to pass up. For several of the cuts I ended up paying $1.60/yd. For good fabric?!?! I had to!

This month I purchased :mumble, mumble 43.5 yards of fabric: I purchased 36 yds from FM (shirting and precuts) and 7.5 yards from Fabric dot com of which I sewed 6.5 yards already! WIN?? LOL!!!!

Sooooo I'm at IN: 154.5 yards and OUT: 57.75 for the year. Oops. It was the NYC/PA trip that did me in!

Before I went out of town I started tracing the coat from Burda 8/2017. And then spring definitively showed up. Now I need to get the trench coat done. The wool coat will have to wait :/

May plans:

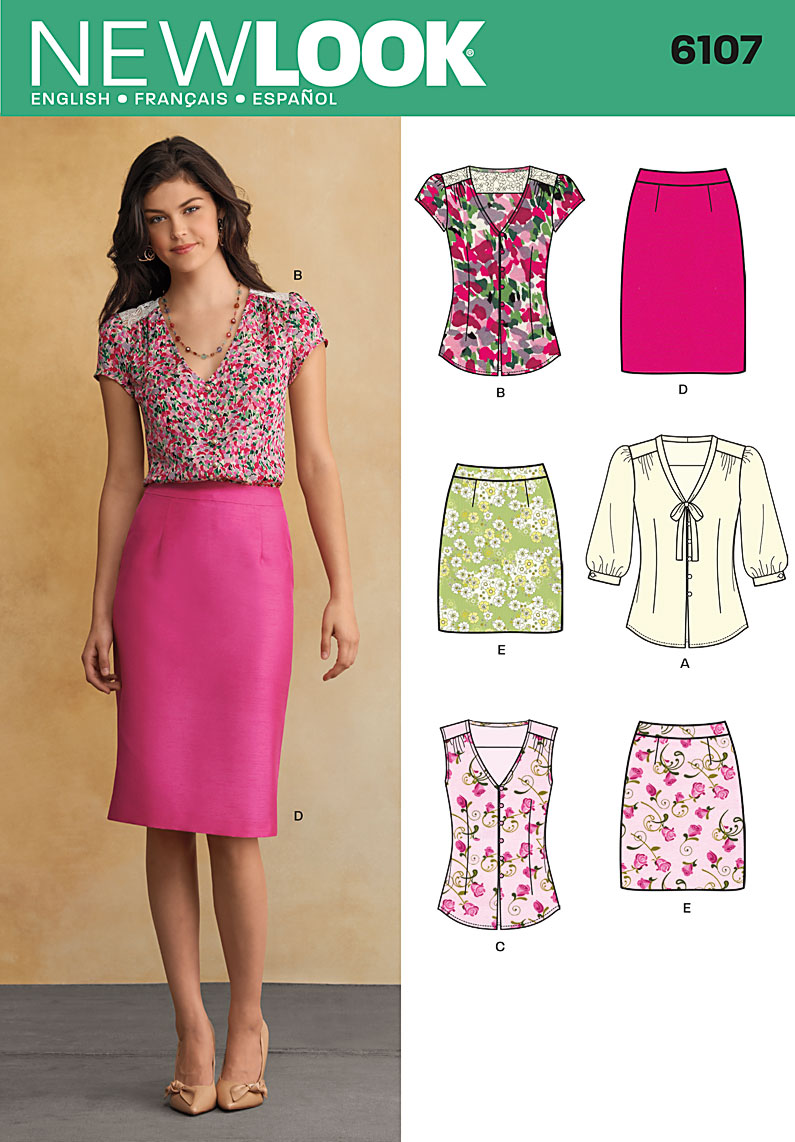
New Look 6107 (actually started in April; I normally count it in the month the fabric is cut...)


Burda 4/2018 trench coat (shout out to Carolyn for picking up more buckles for me from M&J!)

Something for my mom and IDK if she reads the blog still so I won't post it until I get it done and in her hands.

TB Ogden v2 and 3 hopefully (v2 to test out the tweaks I want to make and v3 in my Kelly green silk)

Burda 1/2018 in black and white cotton pique


Burda 3/2018 shirtdress in black shirting. I have not stopped thinking about this dress since the preview in February! And there are some cute versions on the Russian site.


McCall's 7745 in a black floral rayon challis and as a skirt in a black/purple/white plaid shirting.

That's kind of a big list and I'm okay if I don't get to ALL of them. They are listed in order of my plans to sew them, for a couple of reasons.

1) It's okay if I don't get to the dress/skirt until June because they are warm weather garments and we're just beginning nice weather.

2) serger thread color. LOL!  On the silk Ogden, I'll do French seams.

ME MADE MAY!

Yay! I've been taking daily outfit photos anyway (okay, I sucked the last half of April - it's the travel's fault!) so I'm in there...

I, KS, plan to wear at least one handmade item everyday during the month of May and to wear completely handmade outfits at least 2 days per week. I also plan to not have any repeat outfits (repeating individual garments is okay).

I have a lot of RTW pants and jackets that I love so while daily handmades aren't much of a challenge, going full "me-made" a couple times a week will be slightly more challenging. I'll post daily IG pics and round up here weekly perhaps. We'll see.

Sunday, April 29, 2018

Burda 5/2018 #113

I decided I was going to take a pic at the lake...I mean, it's MN, land of 10,000+ lakes so there are lakes everywhere you look! I don't know what I was expecting but I wasn't expecting everything to be BROWN! LOL!!!!!!

Well, once again, I am glad I looked past a semi-wtf Burda photo to find a cool little pattern!


The May patterns aren't up on the US site yet. Here's a pic I posted on IG:


Their version looks so sloppy :/ But the eyelets and tie - and the other version with the tassels!! - got me. I knew it wouldn't take a lot of fabric and was aiming for wearable muslin. Well, the finished garment works!

GO CHECK OUT SHARON'S!!!


I sewed a straight 42 and should have used a size 40 neckline like I usually do. I believe there was a secondary grain line that I missed (Burda does this often when the pattern can be cut either way) so my stripes are different but I'm okay with that.

I skipped the bottom band - I'm not a huge fan of traditional pullover sweatshirts and knew this would get more wear without it. I added 1" to the hem and hemmed it at 5/8". I could not get with the length. It was too long for the boxy shape. I should have gotten a photo. I removed 1" and hemmed it again at 5/8".


In this pic, I have the sleeve folded under. Theirs looked SO sloppy that I decided not to finish it as stated and just leave the sleeves loose. I like the longer sleeve but I also like it folded under. I'll wait until I wear it to decide if I want to change it. I'm leaning towards folding it under!


The Ponte is a little too heavy for le old half-tuck...


I'm using a black glitter ribbon for my tie. I like the idea of changing it depending on what I'm wearing with it...we'll see if I do it :)


Because I was using smaller eyelets, I went for 4 sets instead of 3...but needed an odd number and went back and added a fifth set. I used a 5/8" seam allowance on this seam only and 3/8" everywhere else. I serged the pieces beforehand and pressed the seam open. The seam allowance then served as a sort of backing for the eyelets. These newfangled eyelets claim to not require interfacing!  :)

I decidedly offset my stripes...


The neck binding finishes at about 1" and I didn't like it in the photo and didn't really want it that wide so I cut it to a more normal width, about 1/2" to 5/8" (I didn't measure, just used the stripes as a guide for the width). However, the pattern requires that taller binding or to bring the shoulder line in. I think it sits a little weird as-is.


The outtake:


This weekend I also finally sewed up a wearable(YAY!) muslin of the True Bias Ogden Cami using the same rayon challis as my M7757 outfit. I JUST barely eeked it out of the remnant. Woohoo! 

I posted a full pic on IG (@dressmakingdebacles). I will review it when I make the next version with my tweaks. 

Thursday, April 26, 2018

McCall's 7757 and Ottobre 2/2015

This was one of the few patterns from the latest release that fell into that "have to have" category. I thought it would be perfect for vacation and then saw a couple of inspiration photos and really "needed" to sew it! And then I found this pretty rayon challis, at Fabric.com.


the above link is an affiliate link. If you purchase from Fabric.com I will receive a small commission.

I received the fabric, washed it, and it is FABULOUS. It's a really nice weight and it's opaque. I have to say, while I think the top is adorable, the pants will be a summer staple. So lightbweight and breezy.

On the top, the pattern pieces are quite rectangular and is gathered up once the elastic is inserted. I finished it and oh boy! I was trying to convince myself that it was okay but I couldn't. I had to open up the upper and lower and remove 9" of elastic from the top and 4" from the bottom. Caveat is that I probably stretched it out somewhat while inserting (it's a lot of fabric!) but not 9" worth. 


I guess I picked up the L/XL size range because I knew I was interested in the bottoms.  It is safe to size down in this pattern IMO. I am normally M up top and L on bottom. I ended up removing 3" total from the side seams of these pants.I had to remove 4" from the waistband elastic as well.

~9" removed from upper top
4" removed from lower top
~4.5" removed from waistband

I also removed 1/2" from the top back pattern piece, on the fold. On the pant I lowered the front crotch curve 1" and raised the back 1".  The pattern includes a 1 1/4" hem allowance; I hemmed them at 2.5". I am sure I'm more likely to wear them with flats or lower wedges.

I also decided I wanted a drawstring and inserted buttonholes in the front. I made the drawstring by taking a 1 1/8" strip of fabric (cut on the straight grain) and used my bias tape maker to essentially make double fold tape. I then stitched it closed.

insides all serged up, drawstring is hard to see against the print! :)
 
And they looked SO cute paired with a tank too!!! LOTS of mileage this summer, I'm sure of it!

Here's how I wore it on vacation:

I had plans to get some cute pics on our way to breakfast but a crisis call from work came and by the time we walked the ~1 mile to the restaurant (Playa Papaya - DELICIOUS!), I was over it. LOL! 

I'm totally counting this top in Faye's TOPS THAT POP! sew-along. But I knew there were a couple more knit tops I wanted to knock out before the sew along ends on Monday.

Ottobre 2/2015 is one I traced off of at sew camp. I ordered this Art Gallery cotton-lycra knit when I ordered the challis.


I don't like this top. :( I like the pattern but the top + this fabric = fail. And this fabric was expensive!
Well, I will wear it...more as loungewear...but it's too whimsical for my tastes. Whimsy is not bad! *I* just don't do novelty prints and such in my "real clothes".

ignore the antler-like light fixture :-p

I look like a nurse in the pediatric wing.
Shout out to nurses who work in the pediatric wing...we love you! But I don't want to dress like I'm heading to work side-by side with you. :(

And apparently I need an FBA? Or something? Because why is the neckline completely different on my body vs the drawing and on Lily?

Otherwise, I like the fit, the length and the overall style and LOVE the yoke / shoulder seaming.


But it needs some work to 'work' for me. I remember wanting so badly for the Maria Denmark kimono tee to work for me. I made several and I wore them, but I never liked them ON me very much. Perhaps this silhouette isn't for me? Or maybe I should try once more with an FBA? Decisions, decisions.

I've also discovered I'm not a huge fan of cotton jersey. One of those things that, you see it referenced so much but...meh. It always feel so thick and...cottony. LOL!!!!! I've found that for lightweight knits I prefer wool jersey or rayon/poly blends. I like that little bit of polyester in there to keep it from being too unruly.

In true upper Midwestern fashion...it went from 16" of snow on the ground on April 14th to a solid 60+ degrees for the foreseeable future. My coat plans are done...my trench will be first up in May. I hope to get to the Ogden tank before April is out. I have enough of the challis from the McCall's outfit for a wearable muslin I think!

Monday, April 16, 2018

Burda 7136 v.5

I didn't realize I'd made this 5 times now!

v1 is no longer in my wardrobe. It was made from a tencel blend shirting, very nice fabric, but my flat-fell seams failed at one point.

v2 is decidedly "fall" colored but I still wear it. It's a wonderful flannel shirting in a plaid print.

v3 is the almost a fail chambray version that I now wear all.the.time.!

v4 was done in a green gingham seersucker. I did not care for the seersucker. I still have it but I never want to wear it, so it's in the donate pile.

I adore this one. ADORE!


When I made the first one I noted snug sleeves and made an adjustment. When I made the chambray one I almost wadded it because of the sleeves. Chopping them off to above elbow length and adding decorative tabs helped a ton. The sleeves on the gingham version were bad.

LIGHTBULB. The first version was made in 2014. This time I looked at my "sleeve adjustment".

what in the whole entire hell?!?

I don't know what I did or why I did what I did but it was WRONG. It was a super janky bicep adjustment and THAT'S why my sleeves were wonky! WHEW! I put the sleeve back together as best I could, traced off a new one and did a proper full bicep adjustment. Ahhhhh.

I also added 1" to this version. Adding length, I should have added a little more hip room (did we not JUST have this conversation!?!? Why do I forget that the junk needs more room?)

I wore it with the last button unbuttoned 

It's buttoned full here and you can see it's a bit snug on the hip. 
The left photo, and the pic below, shows off my horrible posture. Wahhhhh!


The fabric is a border print (haha! People kept commenting on "the two fabrics") from Fabric Mart. Spotted during sew camp before it was available to be sold. I ended up with 5 yards of it. What? (there's 8.5 yards left, NAYY shirting)

The border runs along the grain but after a discussion at sew camp I learned to do what you like but be consistent. So, I marked front and back accordingly and cut them on the cross-grain. The yoke and collar were cut on the cross grain as well. The sleeves, pockets and collar stand were cut on-grain. All of the pieces cut on the pink striped border were cut on the crossgrain.

I love these cuffs and the plackets. So much

The main buttons were too big for the placket IMO so I found a plain white button to use. I think it works out okay. The border wasn't wide enough for the entire cuff so I made sure it was on the interior of the cuff.


I set my pockets and looked at them questioningly and carried on. And then when I got the side seams sewn up, I realized how low they were. It is not fun to a) unpick pockets or b) sew them back on with closed side seams. Blergh. But I wanted them this time so I pushed forward!!

Everything is nicely lined up!
Pocket is cut on grain.
I did diagonal bar tacks on the pockets because why not?!


The only other departure from the pattern is button placement. I am a 34H. For serious. I never even bother to pay attention to where the pattern wants a button. I place button #1 at the fullest part and space them 2.5" apart on a fitted shirt, 3-3.5" on a less fitted shirt.  I decided to use smaller buttons on the placket and in hindsight wish I would have used the contrasting pink buttonholes there too!

Interior with burrito'd yoke, contrast interior stand and contrast buttonhole.

I mentioned on IG how quickly I got my buttonholes sewn.
1) we have established that I am a fast sewer (I do not rush, I just am that way!)
2) I have a dedicated sewing room which makes life so much easier. I marked the buttonholes Tuesday night.
3) I had about 30 minutes to kill before I had to leave home. In that time, I tested some buttonholes and (in 20 minutes) sewed all 13(!) for this shirt (7 front, 2 on each cuff, 1 on each placket).
4) my machine makes very nice buttonholes and are just a dream on cotton fabric like this shirting.

Lastly, people asked about my collar and asked for tutorials. I love my sewing peeps but I am not a teacher. I don't have "it". No one who knows me ever asks me to teach them anything...it leads to frustration for everyone! :-p

I will say that I can give some steps/tips as to what I* do (there are myriad ways to skin a cat...or sew a collar).

1) I rarely EVER staystitch but you better believe I ALWAYS staystitch necklines on collared shirts. This time I used my awesome new-to-me knit stay tape.
2) I never cut the collar pieces until I'm ready to sew them. I want to prevent the possibility of distortion as much as possible.
3) Once interfaced I trim the undercollar and interior collar stand by 1/8" where I want them to roll. I used to trim the entire thing but found I don't really need to. Around the curve on the collar stand and around the 3 "exposed" sides on the collar. This helps it roll.
4) I mark my pivot points on the collar and decrease stitch length as I approach to make it easier to stop exactly at that point. I also draw in the entire stitching line around the curve of the collarstand.
5) I PRESS(!) those collar seams open. Made SO much easier by my clapper from Carriage Corner.
6) I trim everything but not too much! I insert my thumb into the space and use my pointer to point the corners in and then wiggle until it's nice and pointy. I don't stick anything in there to push it or pull it. :)
7) topstitch the collar - The distance from the edge all depends on the look I'm going for
8) attach the collarstand to the collar. I do not press up 5/8" on the facing as instructed typically.
9) Once the collar assembly is sewn to the shirt, I trim that seam, press it up, and press the facing in place *just* over the stitching line. I secure it with Wonder Tape in a few places.
10) topstitch. DONE!

Clear as mud? :)

I searched for links but found none that encapsulated everything. But honestly, I almost never take a tutorial as-is. When I'm looking for techniques I usually find a few that look good (e.g. the finished product looks admirable, the instructions are clear, etc) and try them out. Eventually, I come up with some combination and tweak it over time. And that becomes "my" method.

When I went to Fray Check my buttonholes (which I always do before cutting them open), it was coming out very slowly. What did I do? I will tell you...I squeezed it. Of course I did!! So I ended up doing an impromptu load of laundry :-p It all came out. Yay! LOL!

"introspection"!

I'm so silly! :)

Up next, I may make a quick vacay outfit (McCall's 7757 - I bought the larger size, L/XL and the pants are HUGE. I think I'm going to use another pattern for the bottoms if I get to them) before starting the navy coat from Burda 8/2017.

And I got my quilt back!!! It's in the washer but I wanted to photograph it while there was sunlight.


I love this pattern <3

backing and binding (hand stitched this time)


Sunday, April 8, 2018

Butterick 6378 (and Burda 7/2017)

Really quick...this is the second version of Burda 7/2017 pants that I made at Sew Camp.  When I finished them they were extra snug. But we'd had pizza for dinner and I have a small appetite until we're talking pizza. Mmmmmmm! :)

No sizing changes from the original pair (made in Ankara print). Cosmetically, I left off the piping I included in the first pair. I really like this pattern! 

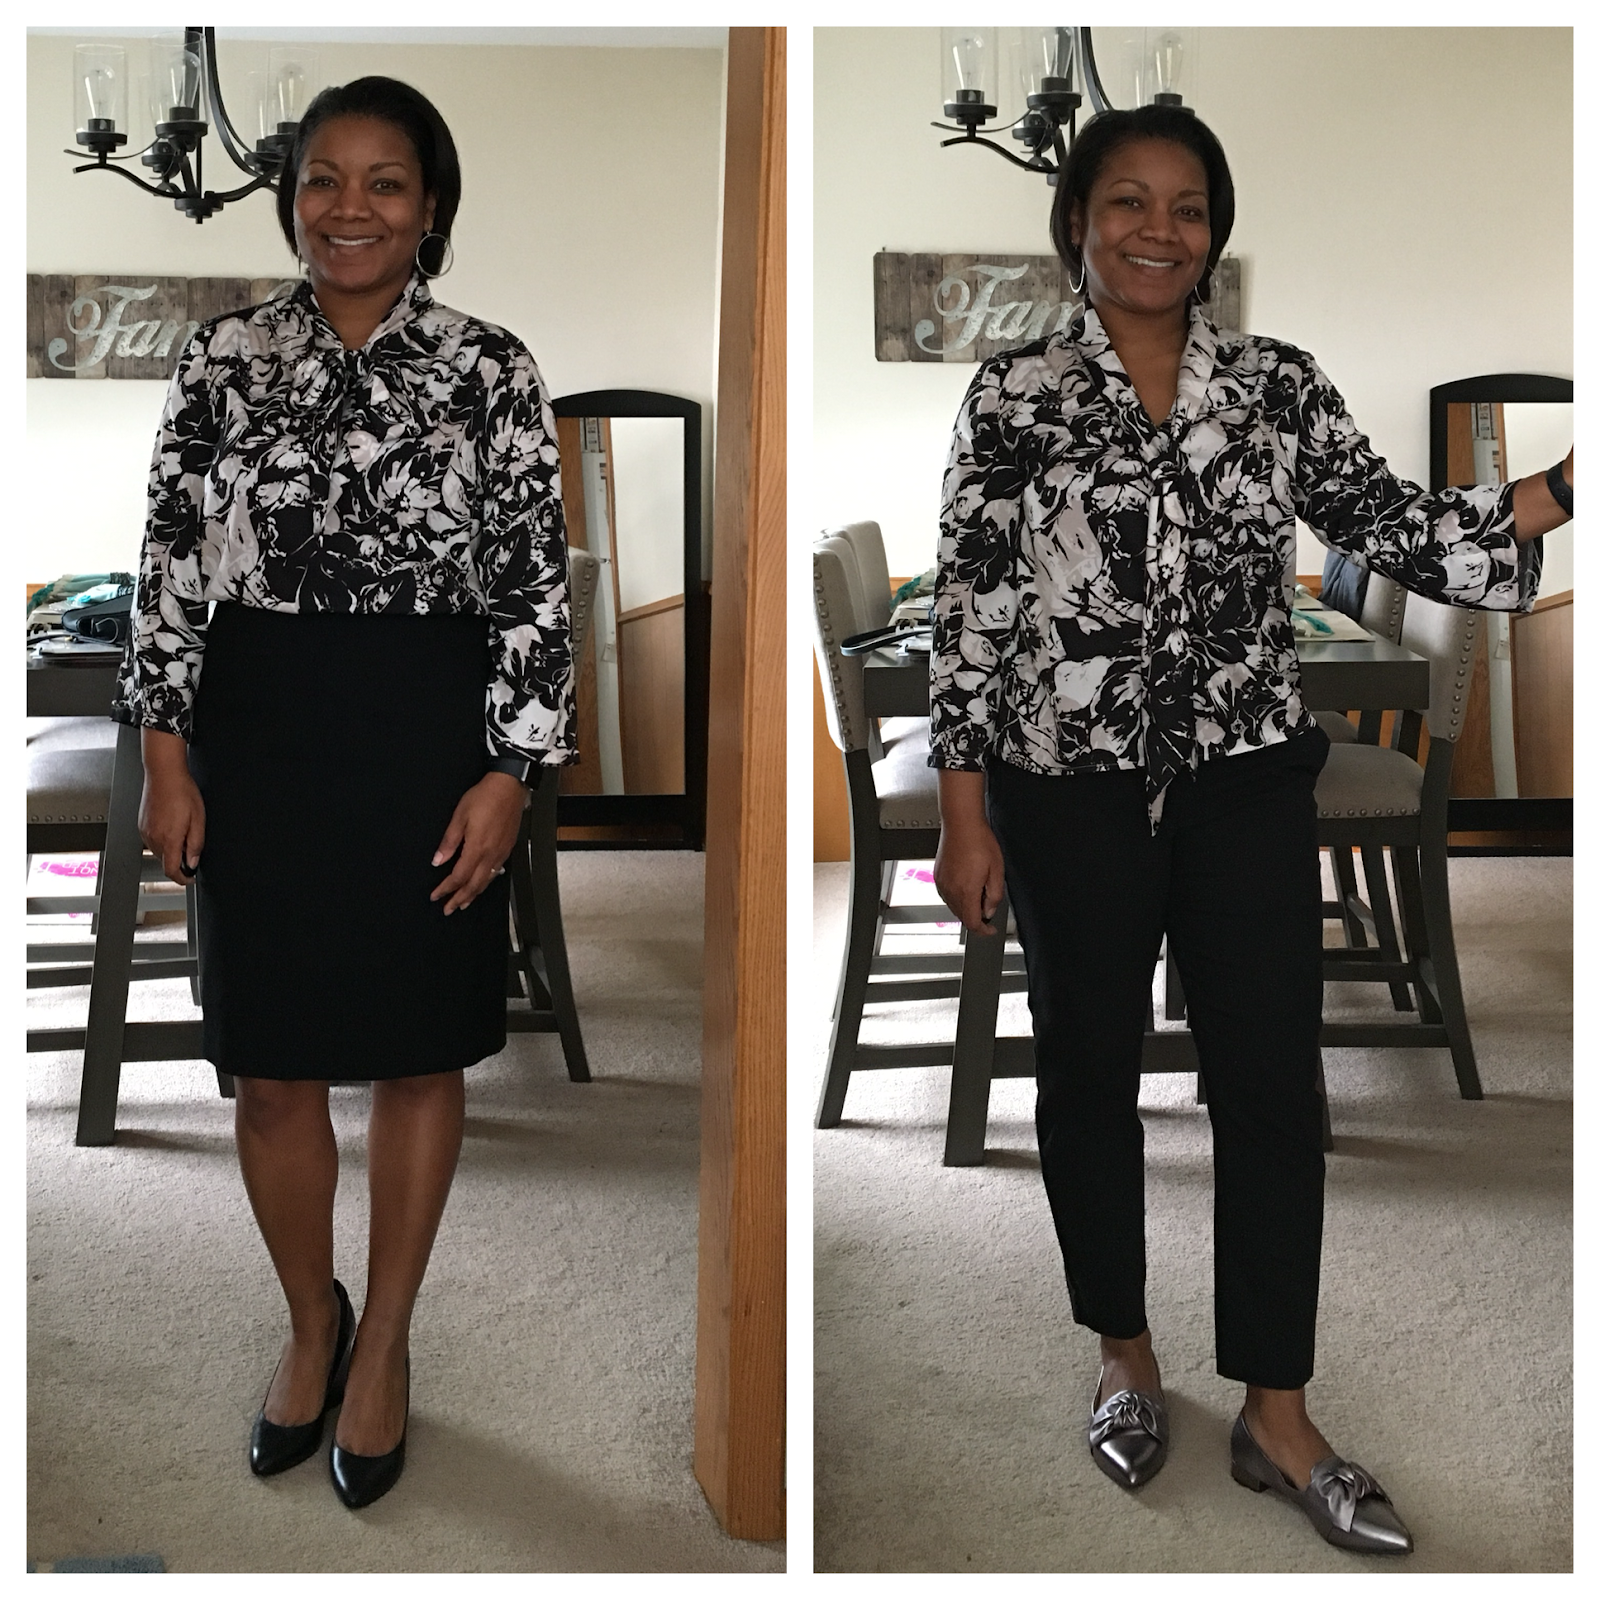
I have been having a hankering for pussybow blouses (sorry Carolyn! :-p) for a good long while. I have a ton of patterns in stash between paper and Burda and this one was in mind for awhile because of the simple lines.
When I scored this --uber cheap!! but nice feeling-- polyester peach skin from FabricMart during Sew Camp, I knew it would become a pussybow blouse. And I knew it would be used for this pattern because I'd want to limit the amount of fiddly bits with a shifty poly fabric.

I used my normal size 14 with the following adjustments:
1" FBA and left the dart (I intended on rotating it into the gathers at the shoulder and forgot)
3/4" full bicep adjustment
Shortened 1 1/4" at the hem and sewed a narrow hem. The pattern hem is 3/4".

The pattern has elastic in the sleeve hems. I have them sewn for elastic but hadn't added it yet when I realized "it's almost 2:00 and it's about to start snowing, I'd better get pics while I can!". So the sleeves WILL be as per the pattern. :)

Do you love my new bow flats?! I do!!! :)

 Pics with the skirt show the ties in a bow; with pants shows them tied in a loose knot and left to hang free. Skirt is my TNT B5760, pants are RTW (I fit *perfectly* into the LOFTs Julie Fit size 12)
 I just love the fit!!
Now, one mistake I make often, unfortunately, is using the size 14 and taking the time to make adjustments...but forgetting that my hips are an 18. 

The FBA gives me the bust and waist room that I need but I need more room through the hip. It gets hung up, as you can see here. I have already altered the pattern because I WILL be making this one again!


When I first put it on I have to arrange the facing. But once it's on, it stays put. 


The ties are integrated into the collar. I slip stitched the collar to the top by hand.


The gathers are nice and soft. Not too full and I wouldn't mind rotating my new dart into them. 
Once I realized I'd cut the pattern piece before rotating it, I figured the print would hide the dart just fine, which it does.

I love the print, I love how the color can read as taupe or blush and it looks good with some other non-black bottoms.

(this fabric is currently on sale for $3/yd! NAYY)
 
One thing that I don't like as much is how the collar sits on the neck. I've been folding it down but then once the tie is tied it wants to unfold at the back of the neck. Perhaps I can try folding it inward we'll see. I do want to make view A with long sleeves (pink on the pattern) and view C (yellow) without the elastic in the hem.

I got a lot of work done on my Burda 7136 shirt despite a VERY busy weekend! I need to do some topstitching, hem it and the sleeves. Which aren't even cut out :) I tend to cut pattern pieces as I need them with shirts (unless I'm worried about coming up short on fabric).


Until later!