Pages

Thursday, March 31, 2022

Finished Travel Bags and March Wrap-Up

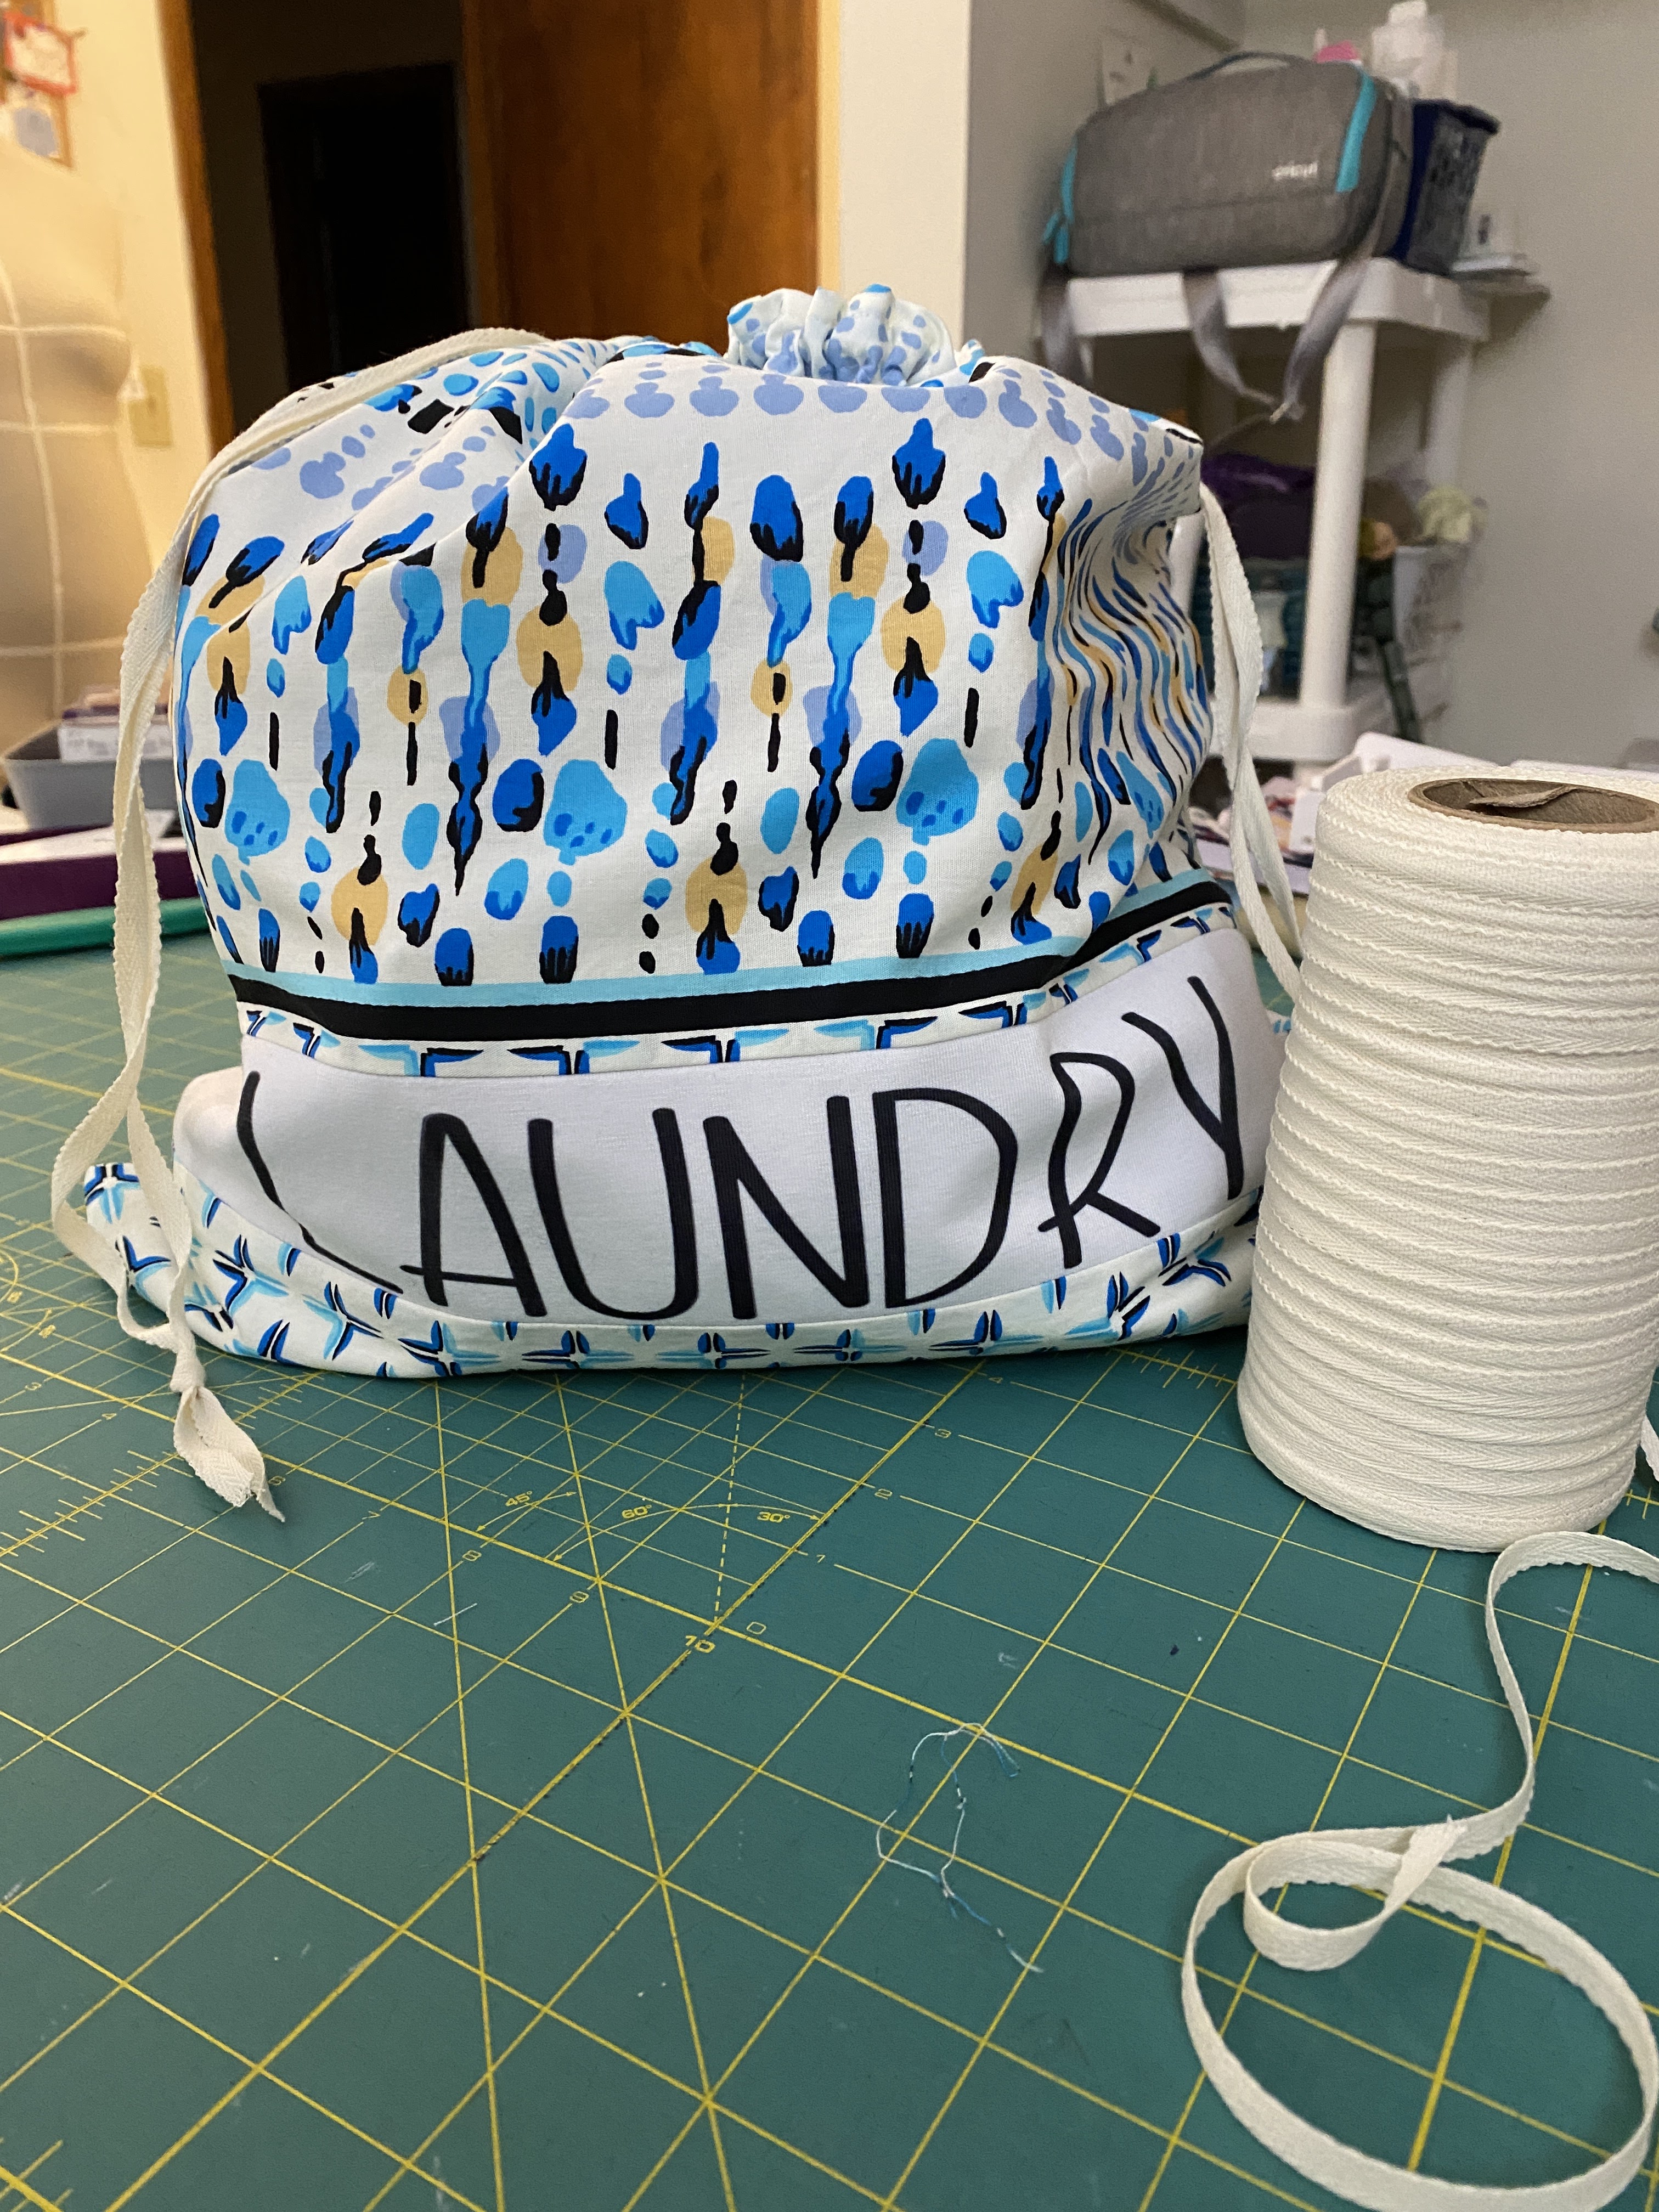
I have wanted to complete this project for SO LONG! I bought 2 yards of this border print cotton shirting last January, with hopes that Covid would soon be behind us and the world would be opening up. Haha! I have made simple drawstring bags before, but I really talked myself out of them over and over again, complicating it more than needed. And then, when we went to Phoenix earlier this year, and ended up taking an ATV tour, our clothes were so dusty and sweaty that I wished I'd had a separate laundry bag for them. And I was determined to complete the bags before my next trip. I didn't make it...we went to Denver last weekend for a wedding. But, I flew out Saturday evening and we were back home Monday evening so I didn't really need it, this time. But I'll be ready for my next trip!! 

Oh, and using a border print just made the whole process so much easier and simpler! I measured the width of the border less the selvedge and with seam allowance and cut the top part of the laundry bag at 20" wide x 10.5" long. Then I cut the plain white fabric at 3", and the bottom at 4.5" for finished dimensions of 17" x 20". But I cut the fabric at 20". 

Oops. 

And I didn't allow for the casing area. 

Oops. 

So, it's smaller than I intended, and I'll likely make another one slightly bigger :) 


I cut the shoe bags for a finished dimension of 13" x 15" and made some of the same measurement mistakes. Seriously. BUT, they fit my shoes so, WIN.

I like the narrow black border that almost looks like piping!

If you're noticing a difference in the text, I blame Cricut! I had the bright idea to buy an Infusible Ink tee blank. I had some black infusible ink in stash and I knew it would outlast iron-on heat transfer vinyl. But, Cricut made this product to perform best at 380 degrees F. The original Cricut Easy Press only heats up to 360 degrees F. So it's not quite hot enough to fully sublimate into the fabric. Booooooo! 

When I got my Beatrice, I ordered a 144 yard spool of 1/4 cotton twill tape from Wawak for the low-low price of $7.91. I used it to mark my form up and still have a gazillion yards of it, of course, so expect to see it often! 

On the laundry bag, I made the casing too narrow and the double strings don't work as well. They work perfectly on the shoe bags though! (see my IG grid for a quick video)


The lining is white athletic mesh that's been in stash for I'm not sure how many years. I love that it's just slippery enough to not stick to the cotton, it has a little bit of weight to it but not too much. 

I sewed the top fabric to top lining, pressed it out, left about 1 1/4" open on either side of that seam and then sewed down the lining, around, up, left the other side open, then down, around, and up the main fabric. The only suggested change is to turn it once the sides are sewn and just sew/serge the bottom together to anchor the lining. I was going to shape the corners but just didn't have the room to do it and the results on the laundry bag are meh.

They're so cool! :-D I expect to get lots of use from them!

This month, I sewed 2 things outside of the bags and a PS5 cover that I started for my husband. I sewed 5 yards this month: 
  • McCall's 7834 dress - 3 yards
    • rayon challis from Fabric Mart
    • 12 buttons
  • McCall's 6996 cardigan - 2 yards (WIP)
    • wool double knit from Fabric Mart
The McCall's dress was my Dozen Drafts project and I put a lot of time and work into fitting so yes, I love it! The cardigan is working up well and just needs hemming ("just" = the entire front, the lower hem and the sleeve hems!)

This doggone extra long McCall's shoulder...more on that later
Excuse my dirty mirror and toilet plunger. Doh.

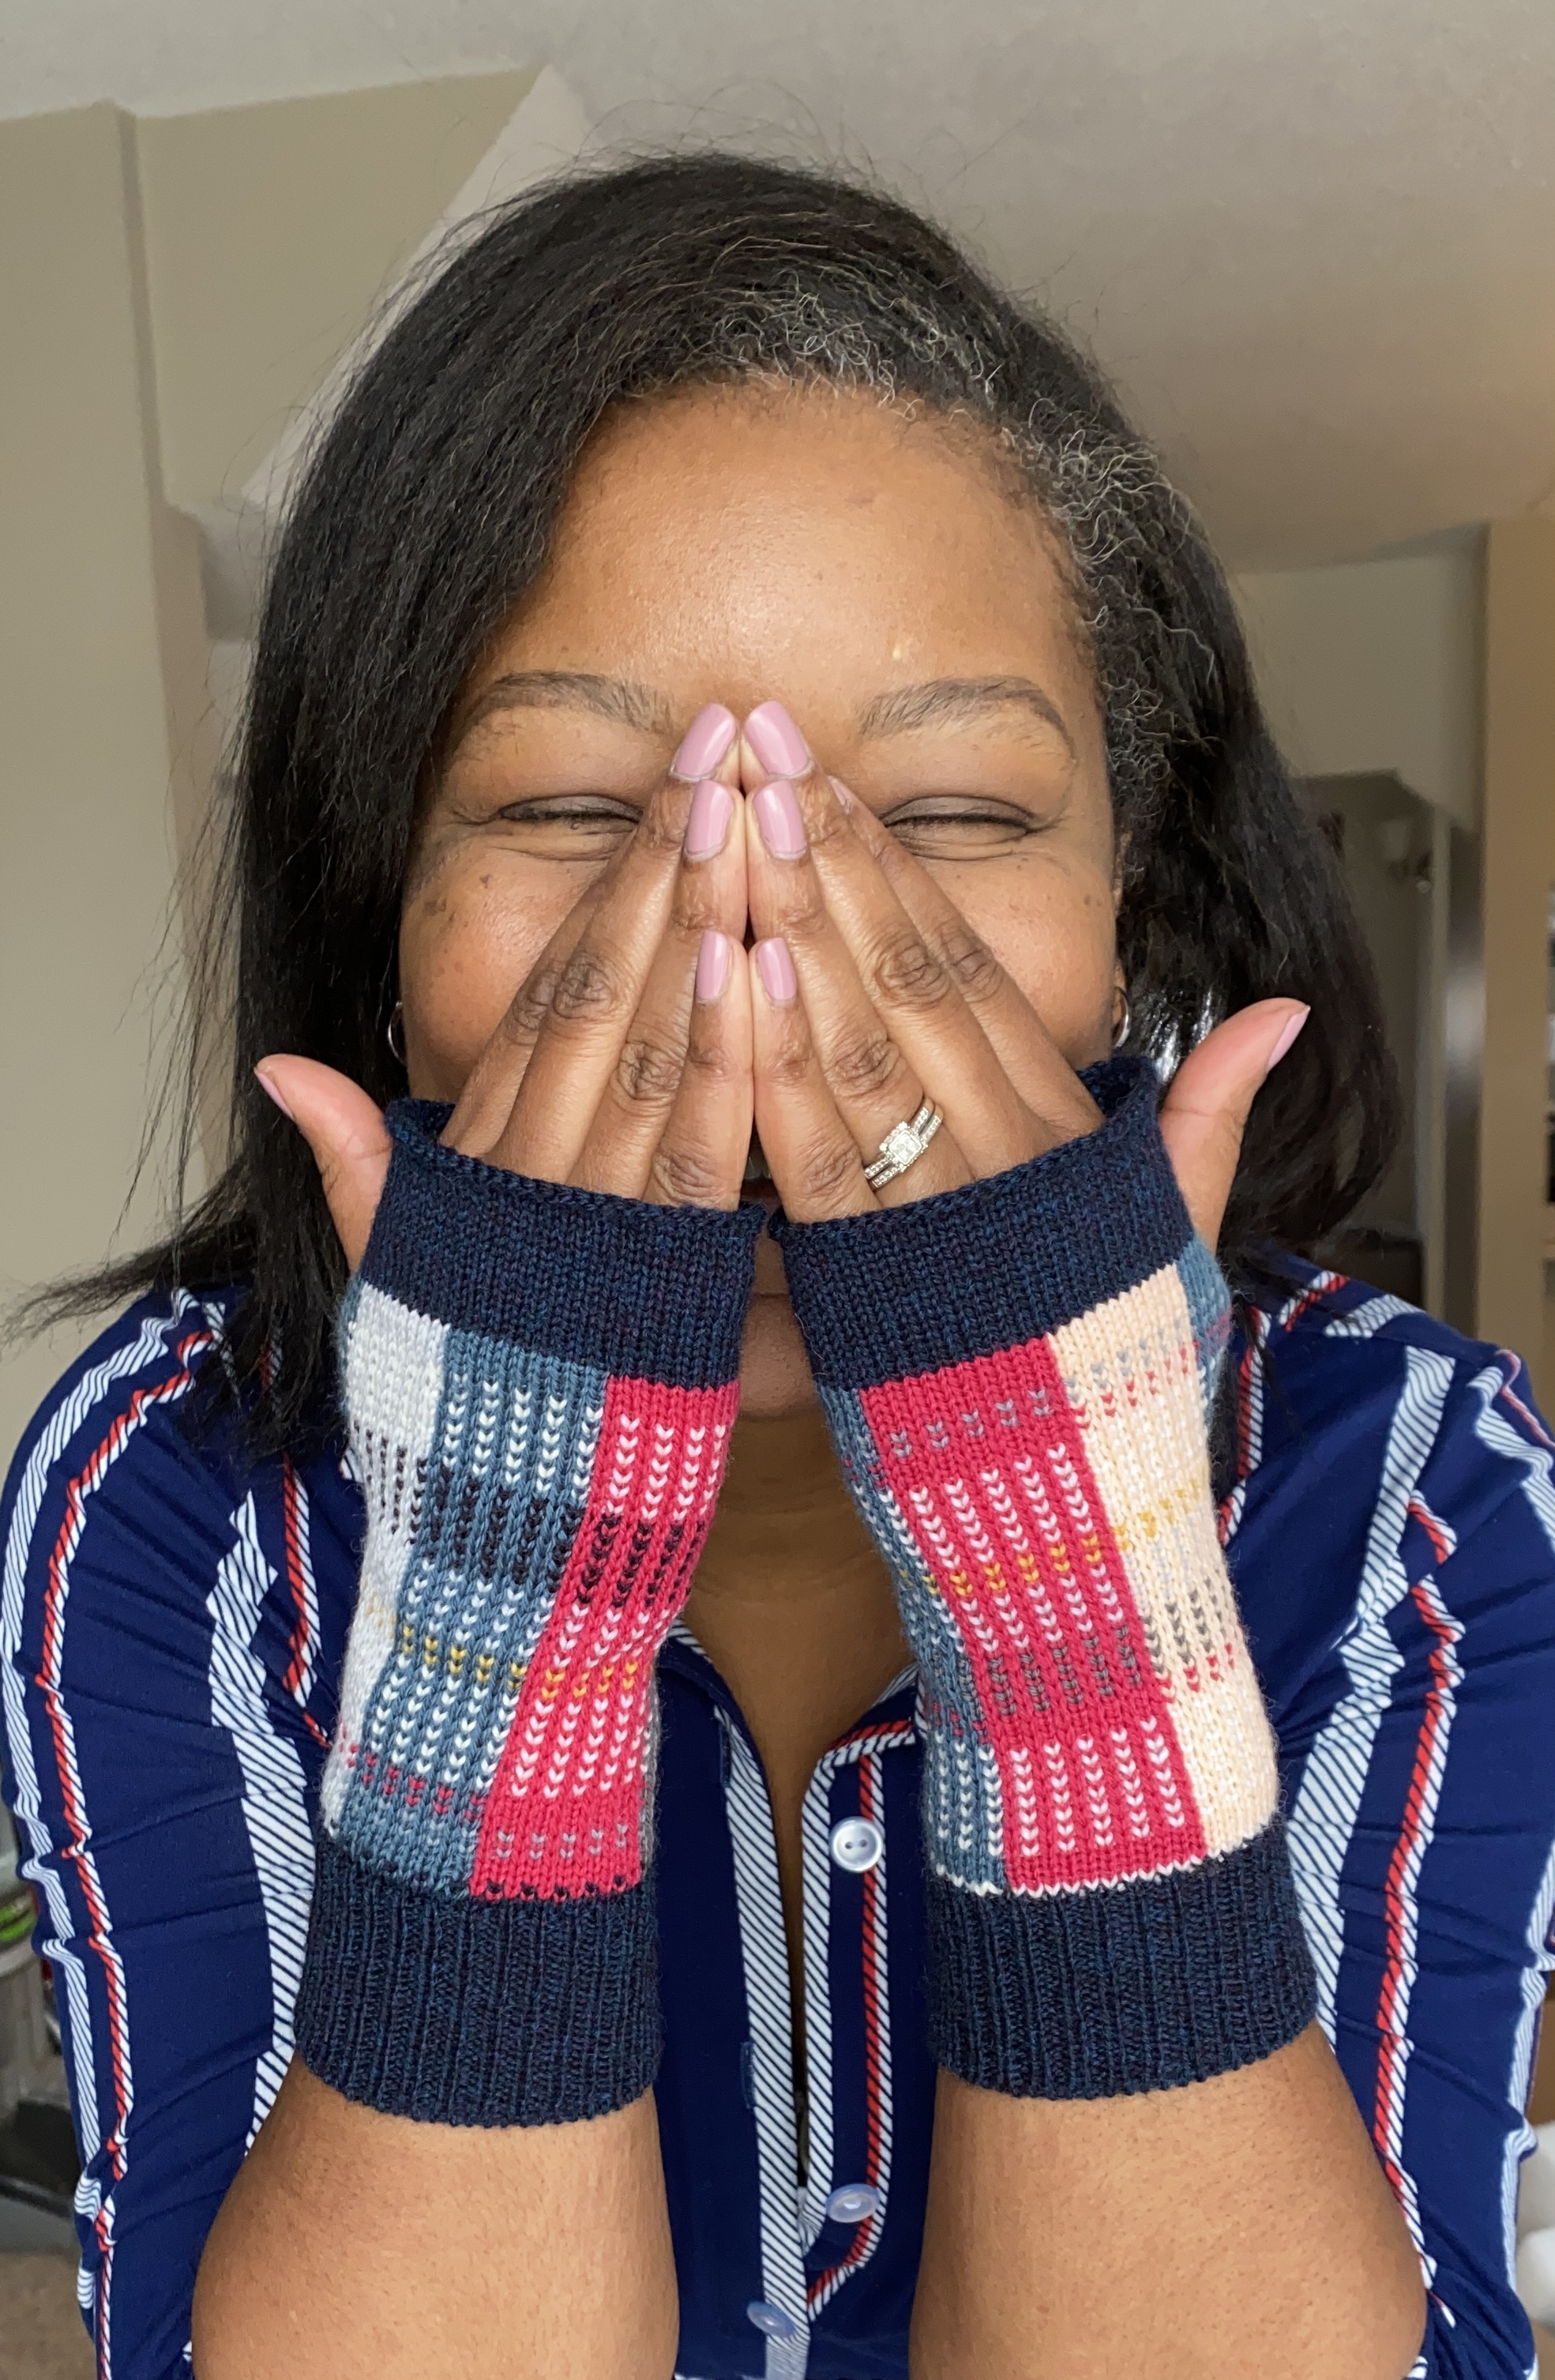
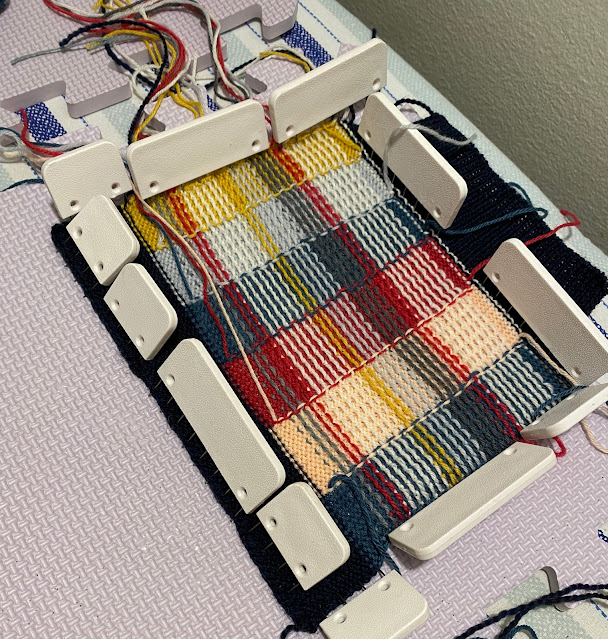
I also had a goal of making two Machine Knit projects. I "only" got the 1 but, WHEW! The plaid-like pattern was hand manipulated the entire way and was a doozy! All worth it though because they are beautiful! Ravelry project


I started two books - one on Machine Knitting. While it is a resource, I do tend to read these types of books cover-to-cover. I am also a good way through The Vanishing Half by Brit Bennett.

As of now, my plans for April include:
  • Finishing the WIP I intended to complete in March
  • Complete "A Dozen Drafts" dress
  • Complete 2 machine knit projects
More to come potentially, after I pull my spring clothes out. I didn't get to that either this month! After finishing the McCall's dress, I had so much momentum, and then over the course of 3 work days I had 17 hours worth of meetings. I was EXHAUSTED every day! April is a little quieter. I do have plans to get with a MK friend, but hoping to get lots of sewing in!  


Sunday, March 20, 2022

Some updates...

Last Wednesday I placed a Fabric Mart order and it shipped the following day. When the shipping showed estimated "March 22", I was like, "ughhhh! that was "so far from now!" It was Friday night when I realized that was just a couple days away. Oy! This month has flown by!

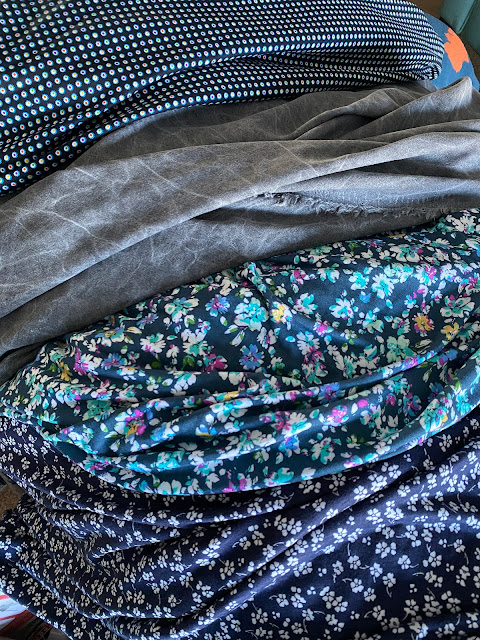
Speaking of FM, I ordered 4 cuts of fabric:

-The top is a multi-colored dot print labeled as 100% rayon challis but it is very tightly woven and crisp, more like poplin. I haven't completed a burn test yet to determine if it is actually rayon.

-Fabric 2 is a cotton/rayon washed look shirt weight. I LOVE IT! It has great drape, is just opaque enough, and the washed/distressed look is really cool. I ordered 4 more yards (it's 54" wide) to make a jumpsuit - probably Simplicity 8060. I like jumpsuits, I own quite a few, I have no issues going to the bathroom. LOL!

-Fabric 3 is a really pretty floral rayon/modal/lycra jersey. And it's 66" wide - score! 

-Fabric 4 is a ditsy floral print that's also rayon/modal/lycra and it's 64" wide. 

I have 11 days left this month, as anticipated, I won't catch up on my Dozen Drafts challenge this month, but I think I'll hit the rest of my plans, which included making a black cardigan and finishing a WIP. I plan to finish this oversized shirt from Burda 10/2019 that I started December 2020. My gosh! I think I was bothered that the (odd) pockets didn't quite turn out, and the fabric is really stiff. Now, I am on board with an overshirt style...and will attempt to soften the fabric in the washer once the shirt is done.

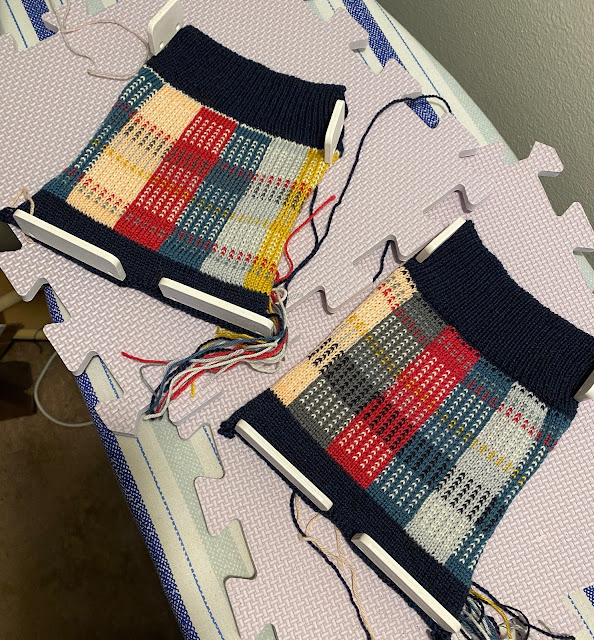
I also had a goal of completing two machine knitting projects. For one of them, I went WAY complex! 

I saw a pair of wrist warmers in a plaid pattern and thought they were incredible. I commented and asked a question and lo and behold, the maker is here in Minneapolis. She introduced me to a local machine knitting (MK) community and I've already joined, attended a meeting, and am thrilled to have found the group. If you follow me on IG, you've probably seen my MK adventure with this plaid. It's a pattern made using hand-manipulated intarsia and slip-stitch on the main carriage. The first took many hours to actually finish and the second one was done within 3 hours. 

I find the pattern SO striking!!! 

My mom text me to ask me to make her a sweater using the technique. hahahahahahahahahaha! I love you but, NO!

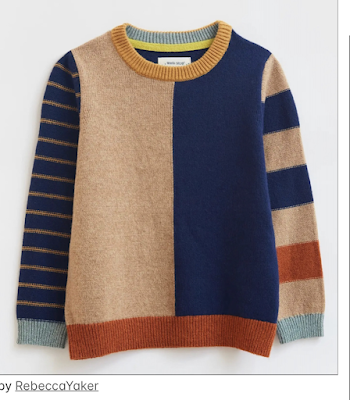
Speaking of sweaters, Rebecca has this sweater as inspiration and I will totally be knocking this off in my own way, once I am confident enough. I LOVE THIS SO MUCH!


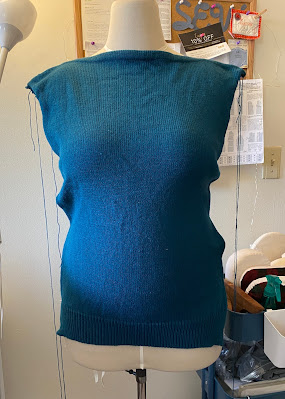
One of my earlier sweater attempts, a slash-neck style, isn't going to work. I was trying to decide if I should complete it, but seeing it on Lily, there's just not enough room at the waist and hip, and it's too long. So I feel okay with letting it go. I'm sure the yarn is acrylic, so I probably won't unravel it or try to save the yarn.  

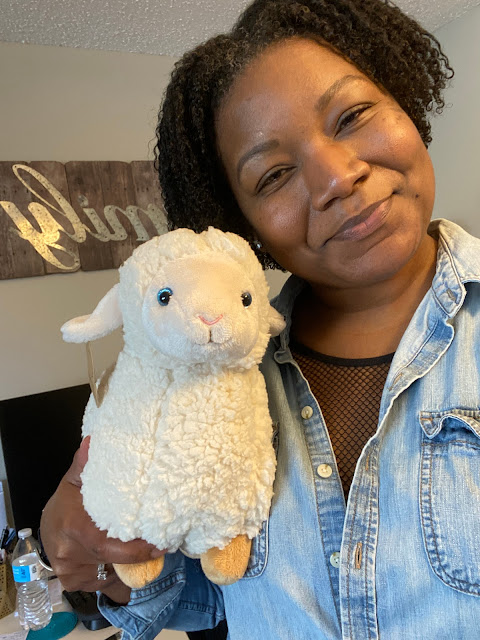
I bought this adorable little stuffy this weekend, and named her Lola! Haha! It's so squishy and soft!

I picked up this cute magnet too:


Monday, March 14, 2022

McCall's 7834 (2 of 2)

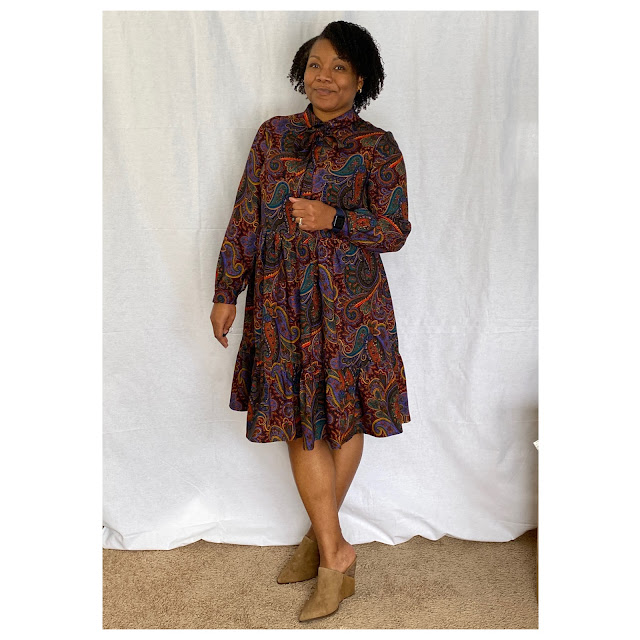
Warning - I love this dress SO much! This is a photo heavy post, but there's a lot of info too.

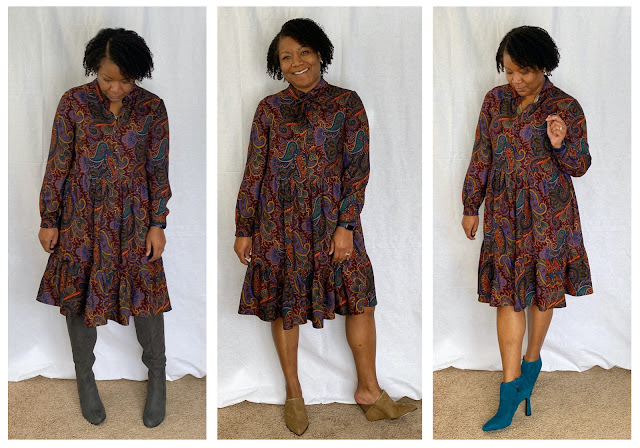
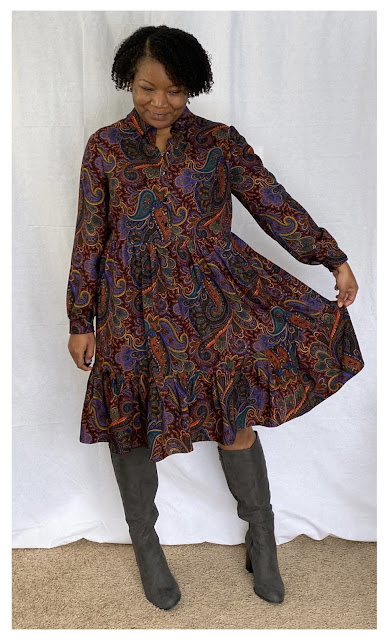
Had to play with the shoe options! :)

See this post for complete details on the fitting and muslin process: Fitting Details. To recap from that post, I cut a size 14 with the pattern adjustments indicated below.

Front:
Add 1/2" for neckline
Add 1/4" to front length
Remove 1/2" for narrow shoulder
Lower dart 1" 
Add 1" to waist circumference
Tuck at waistline 1" at side seam to match back, tapering to 1/2" at CF

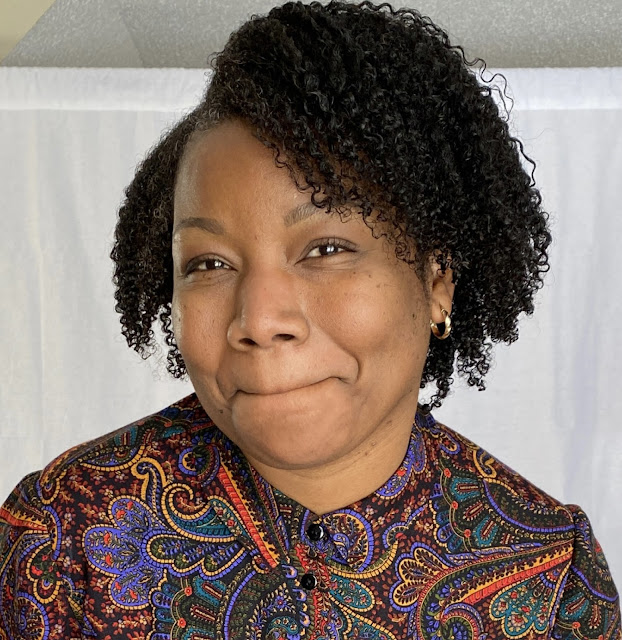
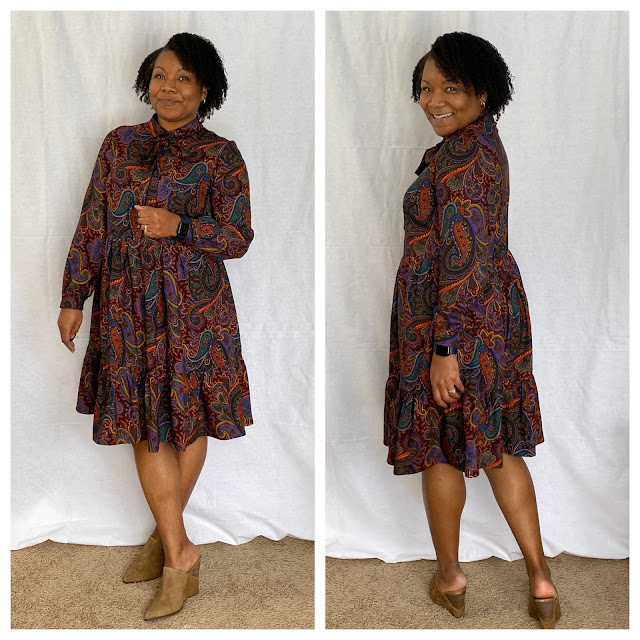
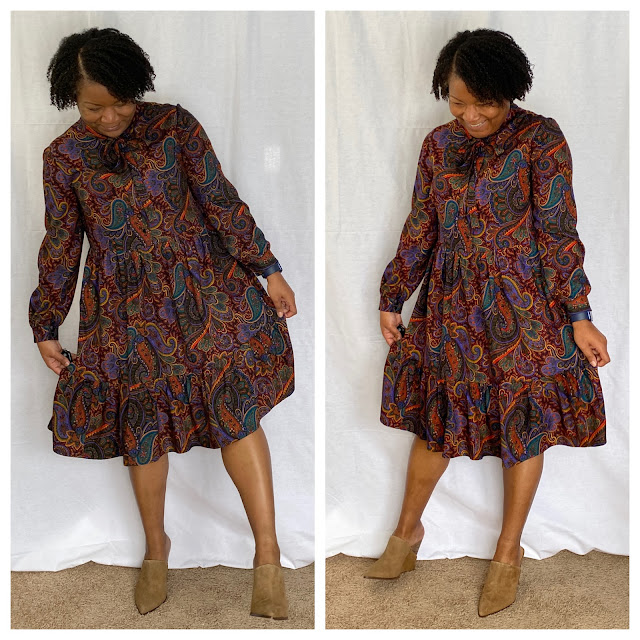
I've never owned a button-front that actually buttoned around my (more than!) 15" neck!

there are no pulls, no gaping, no wrinkles, it's not snug or tight...it just feels GOOD on!
I'm wearing the necktie in the photo on the left.

Back:
Add 1/2" for high round back
Add 1/4" to the back neckline
Remove 1/2" for narrow shoulder
Add 1" to the waist circumference
Remove 1" from bodice length

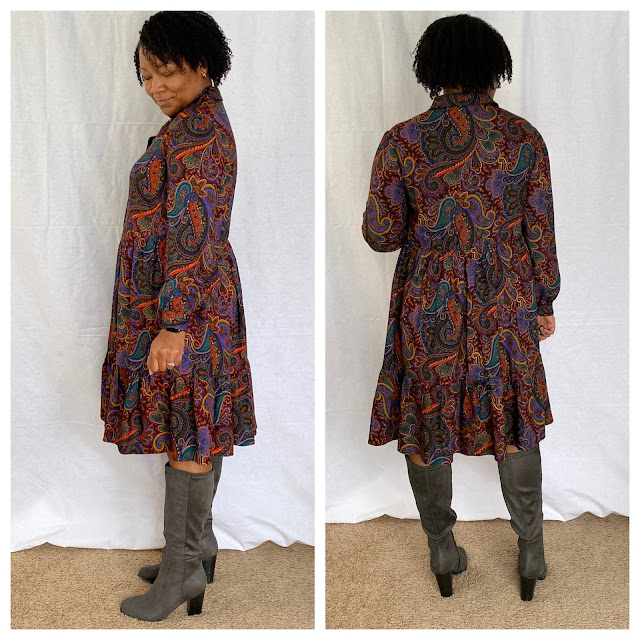
My imbalanced posture was captured - my waist seam is even, my hem is level, LOOK AT THE BACK!!!

Other:
Adjusted collarstand and collar pieces to match new neckline
Added 2" to bicep and shaped the cap while removing some ease
Added 2" to back skirt by cutting 1" away from the fold
Shortened lower ruffle on view B skirt by 4"
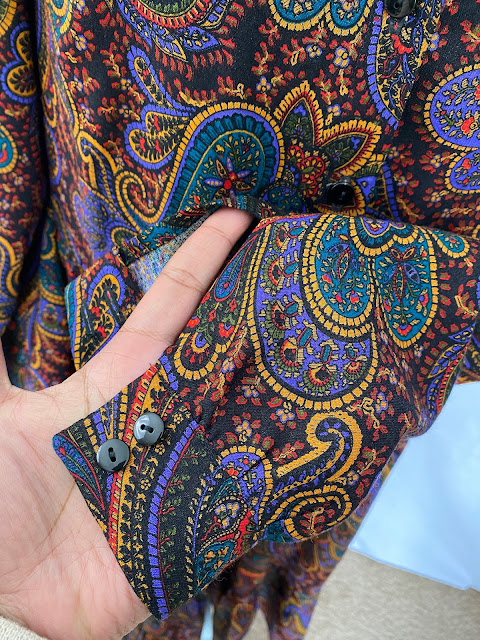
Used smaller buttons 
Sewed the buttonholes before attaching the skirt (I saw no good reason to try to work buttonholes with the weight of the skirt in the way.)

I think the shoulder is still a tiny bit long

I sewed the cuff on and when I went to press it, I realized it would be too narrow. Then looked at the cuff piece; "Cut 4". WHYYYYY!? I went to rant on IG and as I was lying in bed that night, it dawned on me. One of the other views has a ruffle in the sleeve. Meh. LOL! 

I created a new pattern piece for the option of a foldover cuff. Also, I found it much easier to attach the cuff facing after the fact. On the second sleeve I constructed it according to pattern, sewing the two together and then attaching to the sleeve. It was a lot more fiddly.

Also, I HATE that they just have you leave an opening in the sleeve seam vs adding a continuous lap or placket. I'll change that too should I make it again. It's weird having the buttons basically under your arm.

3/8" / 10mm buttons (vs. 1/2")

The elastic for the back measured at 17" for the size 14. 
Since I would have cut a larger size AND I added to the waist circumference, I cut the elastic 19"

I took a lot of care with sewing this one. I basted a ton, working really hard to ensure everything was as good as it could be.

sewing the collar

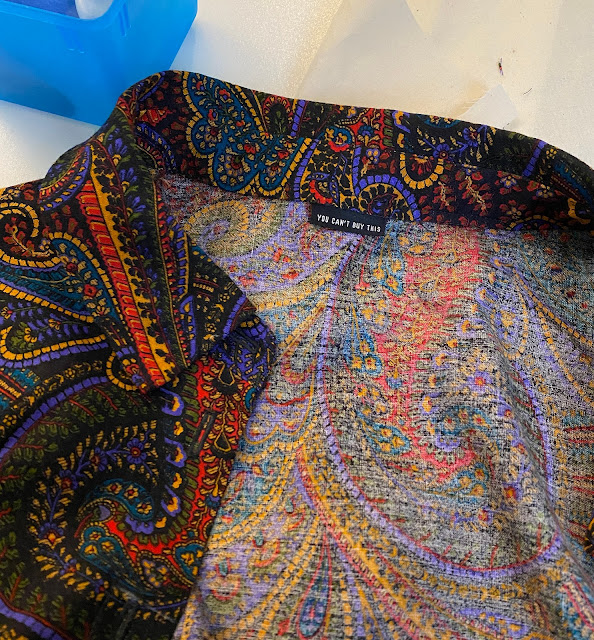
This label is pretty perfect! :-D

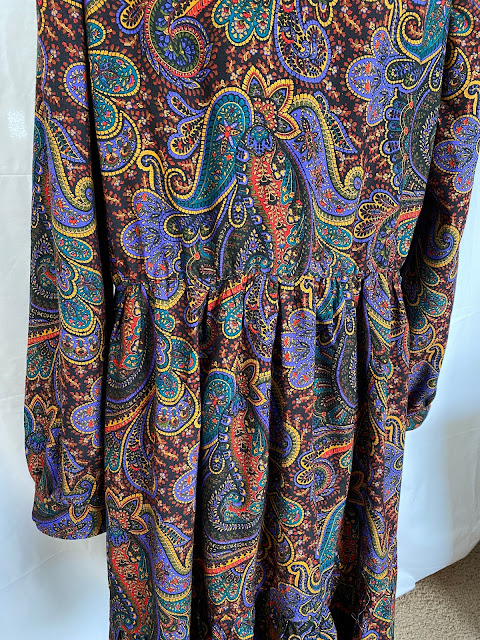
I was held up for awhile on the skirt length.  Unless I think fabric quantity will be an issue, I tend to cut pieces out as I need them. When I went to cut out the lower skirt ruffle, I was surprised by the length. I checked the back of the envelope and the finished length of view B's skirt was 45", which is midi length on me. I am not totally opposed to that length, but it isn't my favorite. 

I hemmed and hawed for a bit and was going to cut the ruffle at 8" which was half the upper skirt length. Then, I started looking at past makes for lengths that I thought worked on me. Eureka! My Burda 4/2019 dress had an upper skirt and lower ruffle. I pulled that pattern out and the upper skirt was about the same length as this one and the ruffle was 10". That's how I settled on this length. 


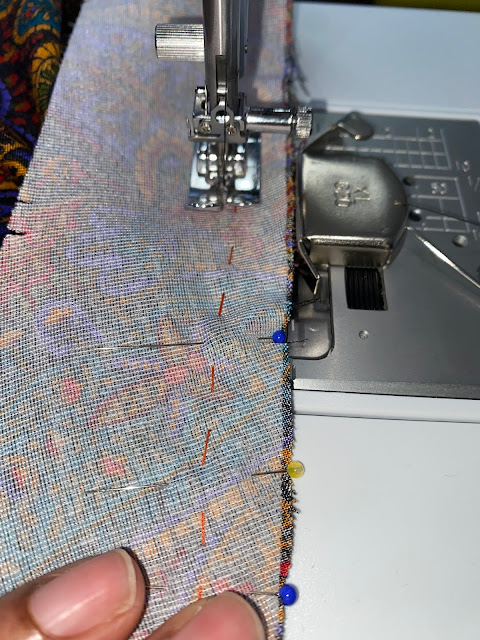
For the upper skirt, I gathered it traditionally - with two rows of basting stitches. The fabric for the lower ruffle measured about 110" if I recall, and there was NO WAY. LOL! I went to my serger method and gathered it about 50%. With this method, you want to test out a few samples and be certain of your ratio as it's not as easy to adjust the gathers (which is why I elected not to use it for the skirt), but it was a great option for the ruffle. 

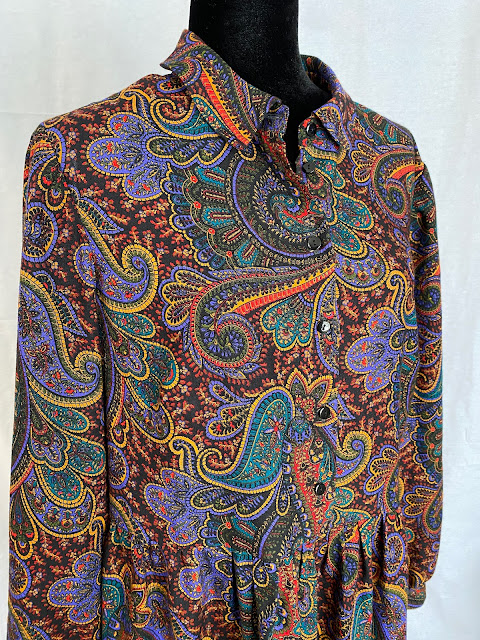
The fabric is a rayon challis with amazing weight and drape. 
I picked it up during my in-person trip to the store at Sew Camp 2018.

Love. Love. Love. Although I realize now why I don't own many woven McCall's garments. Their block is obviously not a great match to my body as-is. I'll be curious to see how the next pattern I choose from the brand works up.

Outtakes because, ME!


Sunday, March 13, 2022

A Dozen Drafts: McCall's 7834 (1 of 2)

My Simplicity is almost done (needs a hem) and it looks really good! For March, my challenge focused on McCall's patterns. I realize the gathered skirt takes me a tad bit away from my original mission, but not by much. 

I cut out a pattern size 14, which is the largest size I had in my envelope (no clue why I didn't buy the larger size) and sewed a half muslin. When I put that first muslin on Lily, I was so confused about where to even start. I went through my Pattern Review and blog history and realized I've sewn very few fitted, woven McCall's patterns. 

Now, if I'd had the larger envelope, I likely would have cut a 14 front, graded to a 16 at the waist, and 16 back. So while a smaller pattern can account for some of the issues, there was just a lot that was SO far off of my body!

Muslin #1

On the front bodice, we have a dart that's incredibly wrong for me, and the (again) obvious need for a tuck at the armhole. The second photo shows that the shoulder is a bit too long. I later realized that the neckline seamline wasn't quite reaching where it needed to.


The back bodice was a mess! 

Never mind the waist, the back waistline has elastic in it, so that gets pulled in quite a bit. But I felt at a loss with how the entire upper back was fitting. There were so many cuts and slashes and marks and...whew! 


Muslin #2:

Things got even crazier! LOL!

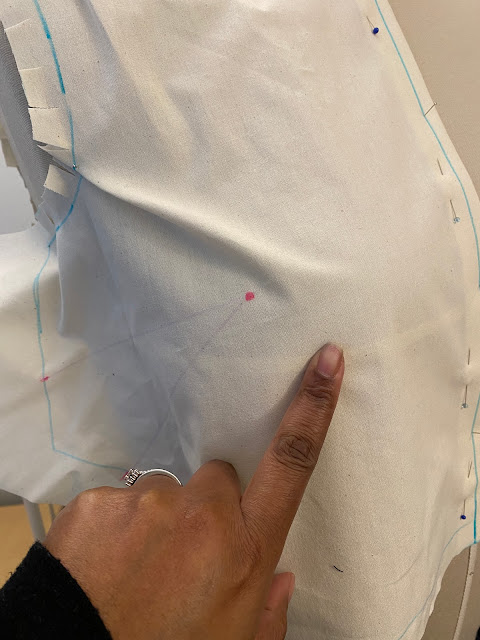
I realy didn't know how to add the neckline space that was needed. Turns out, according to my books, I should just raise the stitching line by the amount needed, so this slash across the chest was ignored. And if you look closely at the waist, it wasn't actually lining up where it needed to be. 

I had also aded an underbust waist dart here (later removed), and was still working on where the dart needed to be. The shoulder was narrowed here as well. 

Photo 2 of the front shows a bunch of mess. I cut the side seam with a bunch of extra fabric and drew in the stitching line and where I thought the side seam needed to be. I also slashed at the belly to allow more room (remember the dart?). 

Lastly, you may notice that the waistline isn't level. 


The back is looking much better at this point. I shortened it 1" at the waist here. I'd also taken a 1/4" tuck out the back armhole. 

I then sewed the front and back pieces together and tried it on (filling in the slashed areas as needed). When I got my Beatrice and set it up, I wasn't sure how I determine where the actual placement for neckline, armhole, shoulder, and side seams needed to be. I made some educated guesses (placing the necklace I wear daily on the form to gauge that, measuring my shoulder in a nice fitting top, etc) but it wasn't quite right. The muslin fit a lot different on me in those places than it did on the form. 

I added back the fabric I removed from the back armhole, I added 1" to the waist circumference of front and back, I removed the dart from the front waist and took a tuck to allow for the shortening of the back piece and to level the front bodice (posture+bust). 

I transferred the changes from muslin 2 to the tissue and cut out a sleeve. I had just taken a course at the virtual Sewing Expo about bodice and sleeve relationship and didn't really like the fit of the sleeve. I was so confused about the poor fit that I had to check the armhole against what was touted in books as a "good armhole".
Looks okay? It just had SO much sleeve cap ease

I attempted to shape the cap better while removing some of the ease, but realized I didn't know how to account for the large amount of additional width I needed to add to the bicep. The pattern has a 13.5" finished bicep and mine is 14.25" which, in this woven, semi-fitted bodice, I wanted a minimum of 1" of ease. So I added 2" to the bicep (finished width of 15.5"). 


The pencil lines and highlighting shows my attempts at making the sleeves fit better (I sewed 2 sleeve muslins before going back to something closer to the original cap). 


Last shot! Whew! Now, we know I would normally never in a million years consider multiple muslins, but the whole point of this exercise is to know what needs to be done for the pattern companies I tend to be interested in. But things were looking good here!!

When I shortened the back I folded out 1" which meant removing 2" of length. ooops. So never mind the side seam difference :-D


After trying this on, I was confident of the armhole/side seam point and allowing a measuring tape to fall showed a closer idea of where the side seam should be (line marked with the small pins). And while it looks like there's more room needed on the front, really, it was needed in back. The front side seam is shaped and the back is rectangular (because of the elastic). When I gathered the back waist to the length it would be with the elastic, this became clear, and I added the 1" to the back waist mentioned above (graded to nothing at the underarm). This also resolved the seemingly excess fabric in the front waist. 

I also realized I needed a little bit more of an adjustment for my rounded upper back. This adjustment went from 1/4" to 1/2".


Summary of pattern adjustments

Front:
Add 1/2" for neckline
Add 1/4" to front length
Remove 1/2" for narrow shoulder
Lower dart 1" 
Add 1" to waist circumference
Tuck at waistline 1" at side seam to match back, tapering to 1/2" at CF

Back:
Add 1/2" for high round back
Add 1/4" to the back neckline
Remove 1/2" for narrow shoulder
Add 1" to the waist circumference
Remove 1" from bodice length

Other:
Adjusted collarstand and collar pieces to match new neckline
Added 2" to bicep and shaped the cap while removing some ease
Added 2" to back skirt by cutting 1" away from the fold
Shortened lower ruffle on view B skirt by 4"
Used smaller buttons 

The bodice fits SO nicely. I am very happy with it and will post a review and pics in a follow-up post tomorrow or Tuesday. 

ETA: Finished garment post HERE

Monday, March 7, 2022

A Dozen Drafts WIP - McCall's 7834

When I cut the first muslin (half) for this bodice, I was truly mystified. I ended up going back through my Pattern Review history and searching a bit on the blog (I stopped reviewing there at one point) and realized I had only made a handful of woven McCall's tops/dresses over the years, quite a few of them had dropped, cut-on, or raglan sleeves, and I don't think I have any of them in my wardrobe currently. 

I was ready to throw in the towel but I kept going and am so happy with the current progress. 

As you can see, the sleeve isn't actually set yet, but the neckline, shoulder, bust, and waist is sitting so nicely. I joked on IG that if I could just stop trying on pieces of garments, I could get more sewing done! And someone pointed out that I move too fast as it is :) I was totally having one of my, "ah, I was hoping to get more done" but I then realized I'd made a ton of progress. Next up is assembling the collar, sewing the buttonholes, sewing the side seams, inserting the sleeves, then I'll work on the skirt (which is 2 tiers and gathered). I've decided to take Wednesday off and will spend a lot of time that day sewing and knitting. 

This weekend I also baked like 10 dozen cookies (peanut butter and oatmeal raisin), visited with my niece who was in town from NC, saw The Batman, washed my hair and visited a sewing friend who gave me a bunch of books that she was downsizing.


These gems plus a stack of Singer Reference Library books (you can see them peeking out on the left, below). Some of them were duplicates to what I have in stash, but I scored a few new ones too.


My S1325 is stalled because it needs a tiny bit more hand sewing and my hand is NOT cooperating. I have (another!) appointment next week with a hand specialist. I've seen 3 or 4 orthopedic docs, done physical therapy, done occupational therapy, I just want my hand to work and not be perpetually swollen :(


That's it for now. I had very ambitious March goals. WHEW. I'm chugging along. 

This fabric just makes me HAPPY!